1. Mounting the solar charge controller
1.1 Do not mount the solar charge controller outdoors or in wet rooms
1.2 Do not subject the solar charge controller to direct sunshine or other source of heat.
1.3 Protect the solar charge controller from dirt and moisture.
1.4 Maintain a minimum clearance of 10cm below
and around the device to ensure unhindered air
circulation
1.5 Mount the solar controller as close as possible to the batteries (with a safety clearance of at least
35cm).
2. Fix the solar charge controller
2.1 Mark the position of controller fix holes on the walls;
2.2 Drill 4pcs Ø6mm holes and insert dowels.
2.3 Fix the controller to the wall with the cable openings facing downwards, using 4 oval head
screws M4x35(DIN 7996).
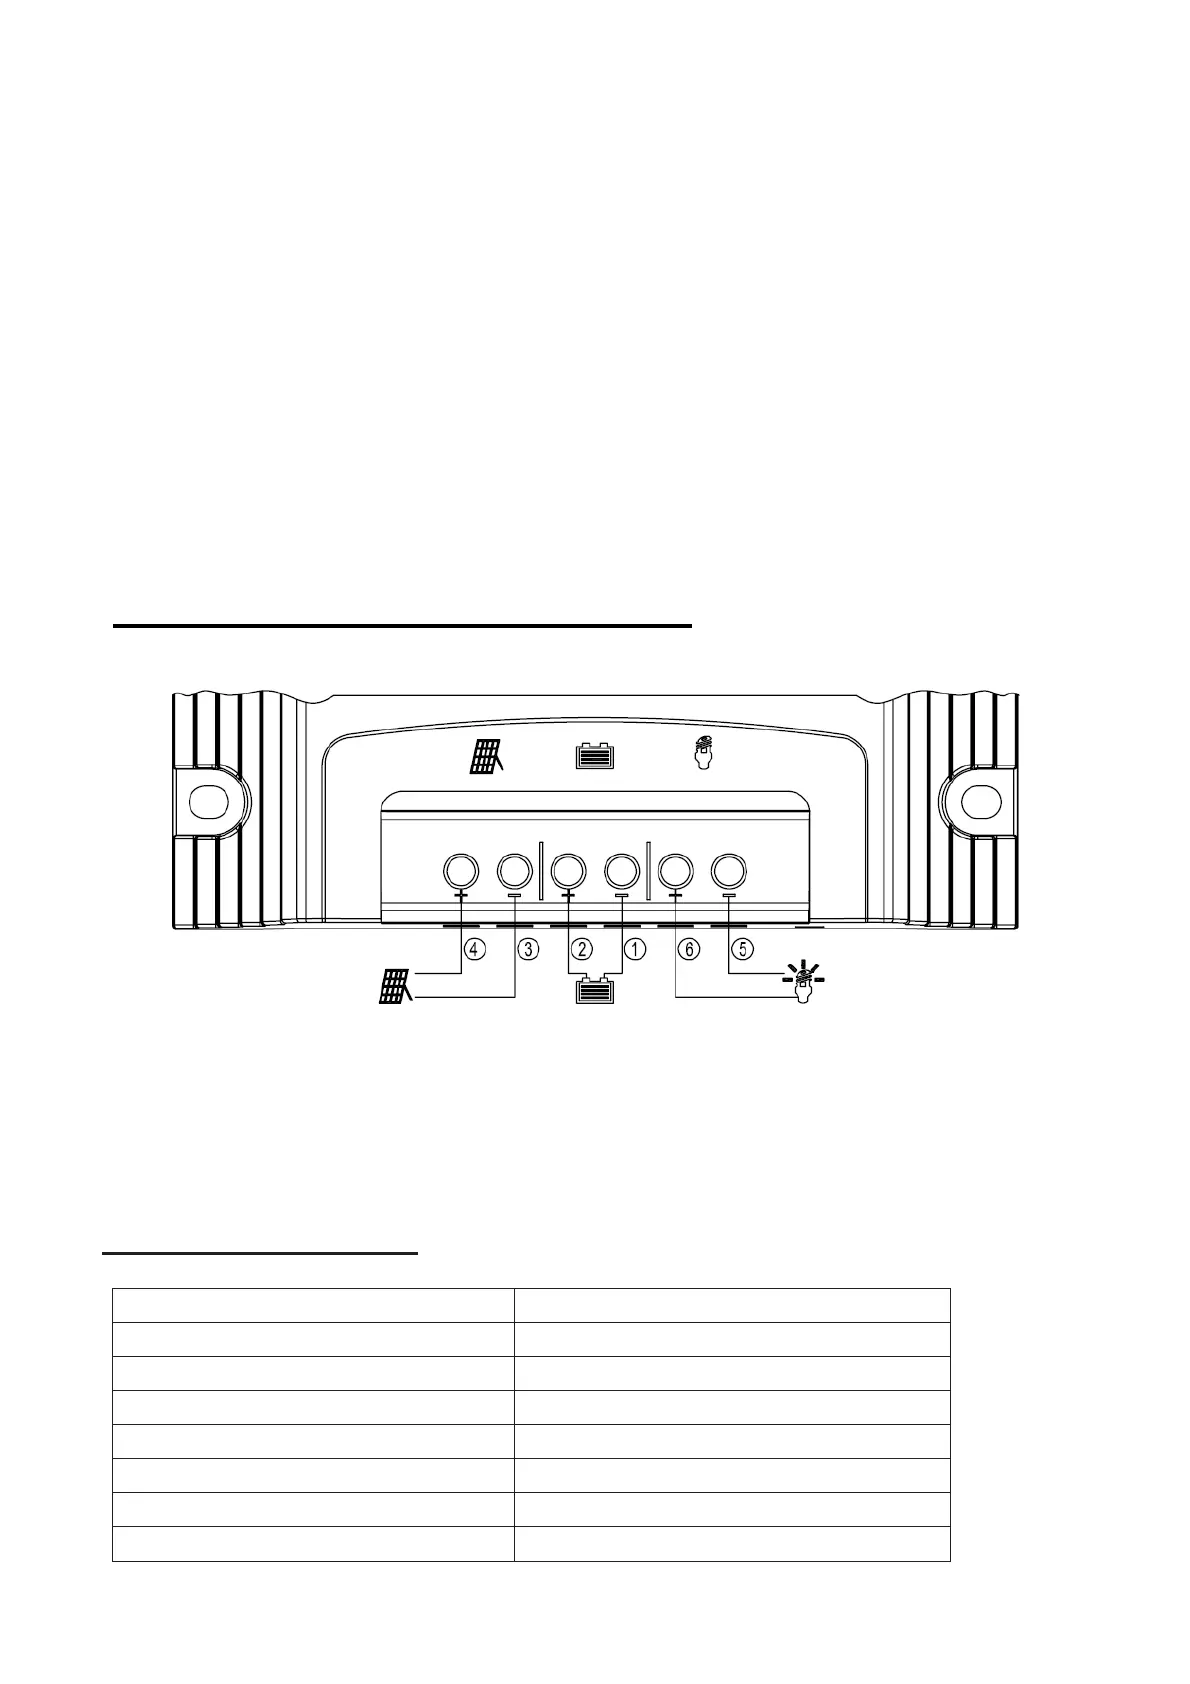
Install the solar system and operating mode
Connect the wires in the sequence from 1 to 6 according the above diagram.
Disconnect the wires in the REVERSE sequence from 6 to 1 according the above diagram.
Use only with 12V batteries only.
Never exceed the nominal ratings(see below technical date for reference).
Suggested cable length, 10m solar panel connection cable/2m battery connection
cable/5m load connection cable
TECHNICAL INFORMATION
Max. Input Current
10Adc
Max. Input Voltage (Voc) 29Vdc
Max. Load Current 10Adc
Over charge Voltage 14.4Vdc±2%
Over discharge Voltage 11Vdc±2%
Output Voltage 12Vdc
Typical idel Consuption < 10mAdc
Operating temperature -20°C/+50°C
4