UNPACKING INSTRUCTION
CAUTION! Immediately upon receiving the product, carefully unpack the carton, check the contents to ensure that all parts are
present, and have been received in good condition. Notify the shipper immediately and retain packing material for inspection if
any parts appear damage from shipping or the package itself shows signs of mishandling. Save the package and all packing
materials. In the event that the product must be returned to the factory, it is important that the product be returned in the original
factory box and packing.
If the device has been exposed to drastic temperature fluctuation (e.g. after transportation), do not switch it on immediately. The
arising condensation water might damage your device. Leave the device switched off until it has reached room temperature.
POWERSUPPLY
On the label on the backside of the product is indicated on this type of power supply must be connected. Check that the mains
voltage corresponds to this, all other voltages than specified, the light effect can be irreparably damaged. The product must also
be directly connected to the mains and may be used. No dimmer or adjustable power supply.
Always connect the device to a protected circuit (circuit breaker or fuse). Make sure the device has an appropriate
electrical ground to avoid the risk of electrocution or fire.
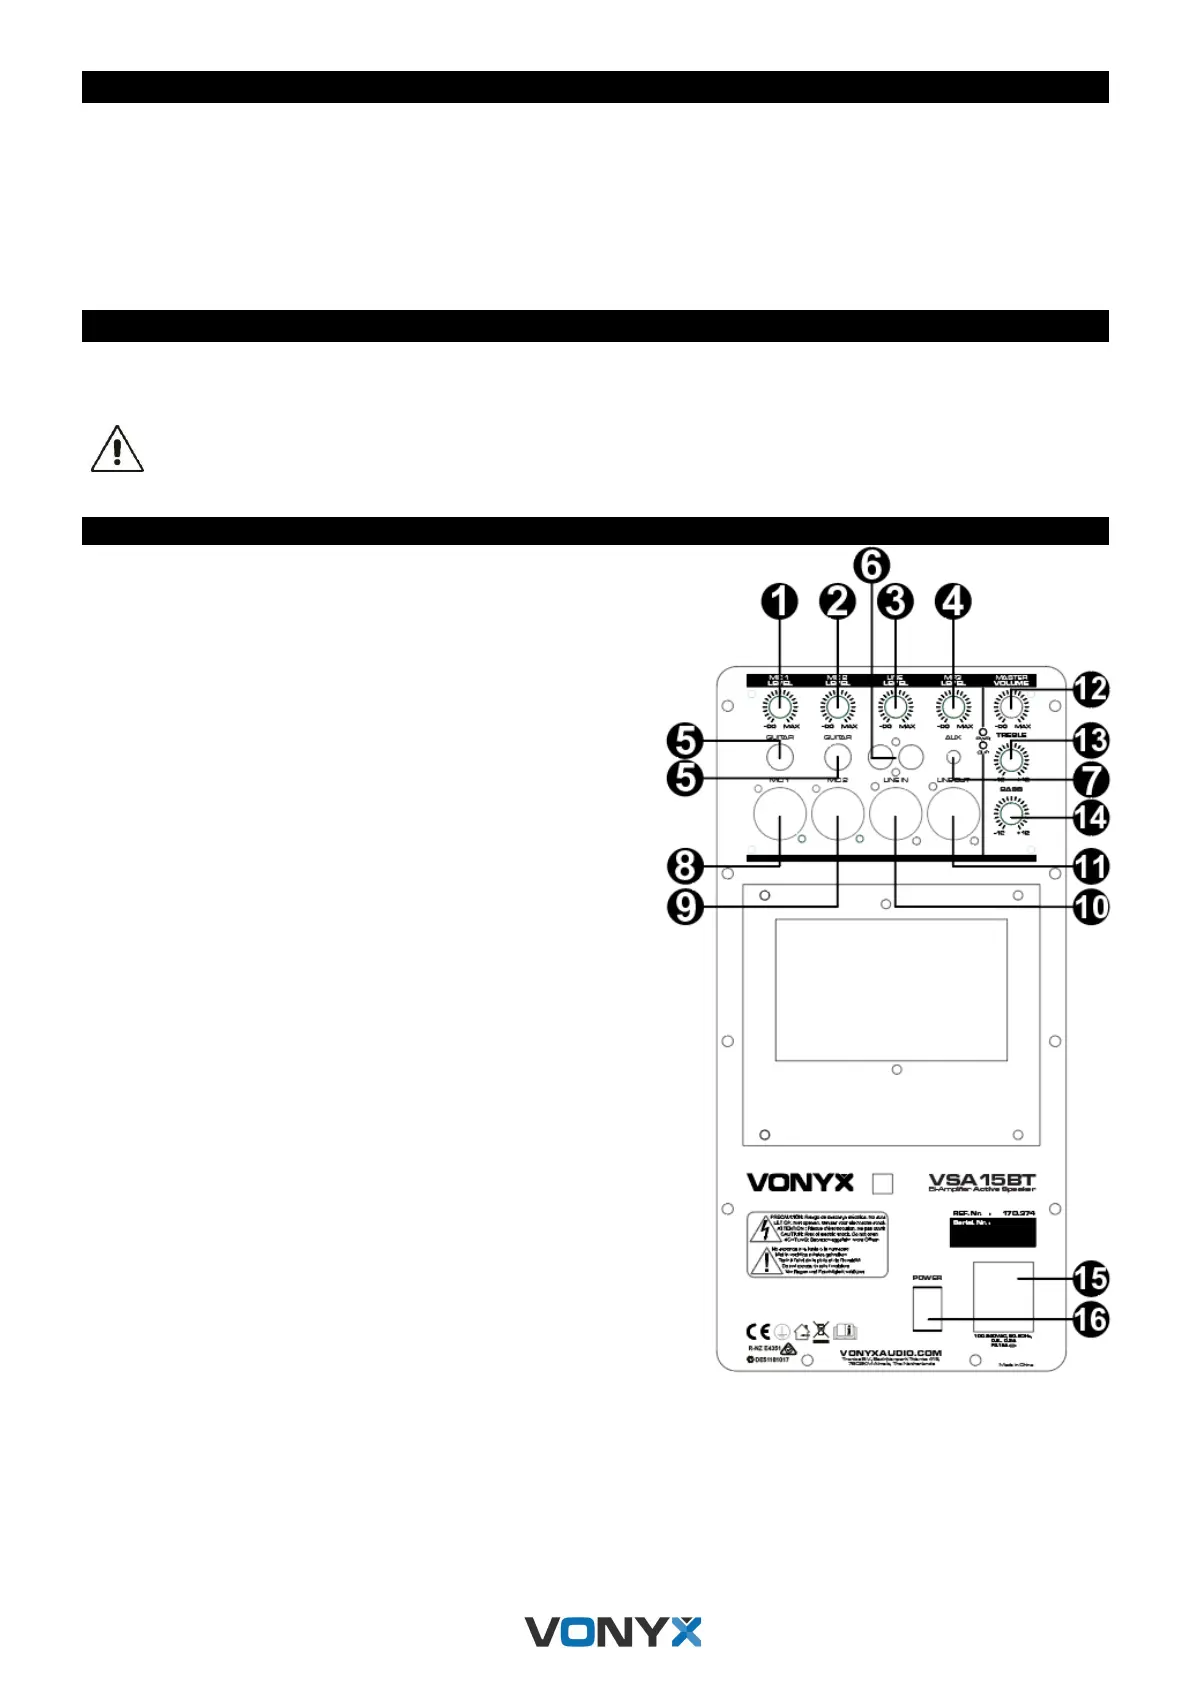
REAR PANEL
1. MIC 1 VOLUME LEVEL
Controls the microphone input volume
2. MIC 2 VOLUME LEVEL
Controls the microphone input volume
3. LINE VOLUME LEVEL
Controls the line input volume
4. MP3 VOLUME LEVEL
Controls the MP3 input volume
5. GUITAR
Two 6.3mm jack inputs for connecting guitars
6. RCA LINE IN
RCA connectors for line signal input
7. AUX IN
Auxiliary 3.5mm input connector
8. MIC 1 IN
This connector can either take a 6.3mm Jack balanced or an XLR
balanced cabled microphone
9. MIC 2 IN
This connector can either take a 6.3mm Jack balanced or an XLR
balanced cabled microphone
10. XLR LINE IN
XLR connector for line signal input
11. XLR LINE OUT
XLR connector for line signal output
12. MASTER VOLUME
This knob controls the master volume
13. TREBLE CONTROL
Adjust the high frequencies of the corresponding
channel
14. BASS CONTROL
Adjust the low frequencies of the corresponding channel
15. AC IN AND FUSE HOLDER
Socket for plugging in the supplied power cord (top). For
instructions on how to change the fuse (bottom), see
“REPLACING THE FUSE”
16. POWER SWITCH
Turn the device ON or OFF
 Loading...