DESCRIPTION
A plug and play option for heat pump systems with independent circulation
pumps. Can be fitted during the installation of the heat pump.
OPERATION
The VortexSwitch is designed to switch a 240Vac pump maximum rated to
9.98 Amps 2395 watts from the switch inputs.This unit is designed to be
plugged into a general power outlet and the heating priority connections on
the heat pump.
HEATING PRIORITY
The heat pump is designed to heat or cool the water of the pool only when
the water circulates through it. By connecting the VortexSwitch to the heat
pump, and then the circulation pump to the VortexSwitch,the heat pump will
control when the circulation pump is run.This system allows the heat pump
to maintain the set-point temperature in either heating or cooling mode.
Every 60 minutes,the circulation pump is started for 2 minutes to sample the
water temperature.If after 2 minutes,the temperature of the water is below/
above the required set-point temperature (depending if in heating or cooling
mode),the circulation pump will be turned off for a further 60 minutes before
sampling the water temperature again.
If the heat pump senses that the water has cooled/heated below/above the
temperature set-point,the circulation pump and the heat pump will continue
to operate until the desired set-point temperature is reached.
By following the instructions in the heat pump instruction manual, setting a
start and stop time will ensure that the heat pump is not sampling the water
temperature and running throughout the night if running noise is a factor.
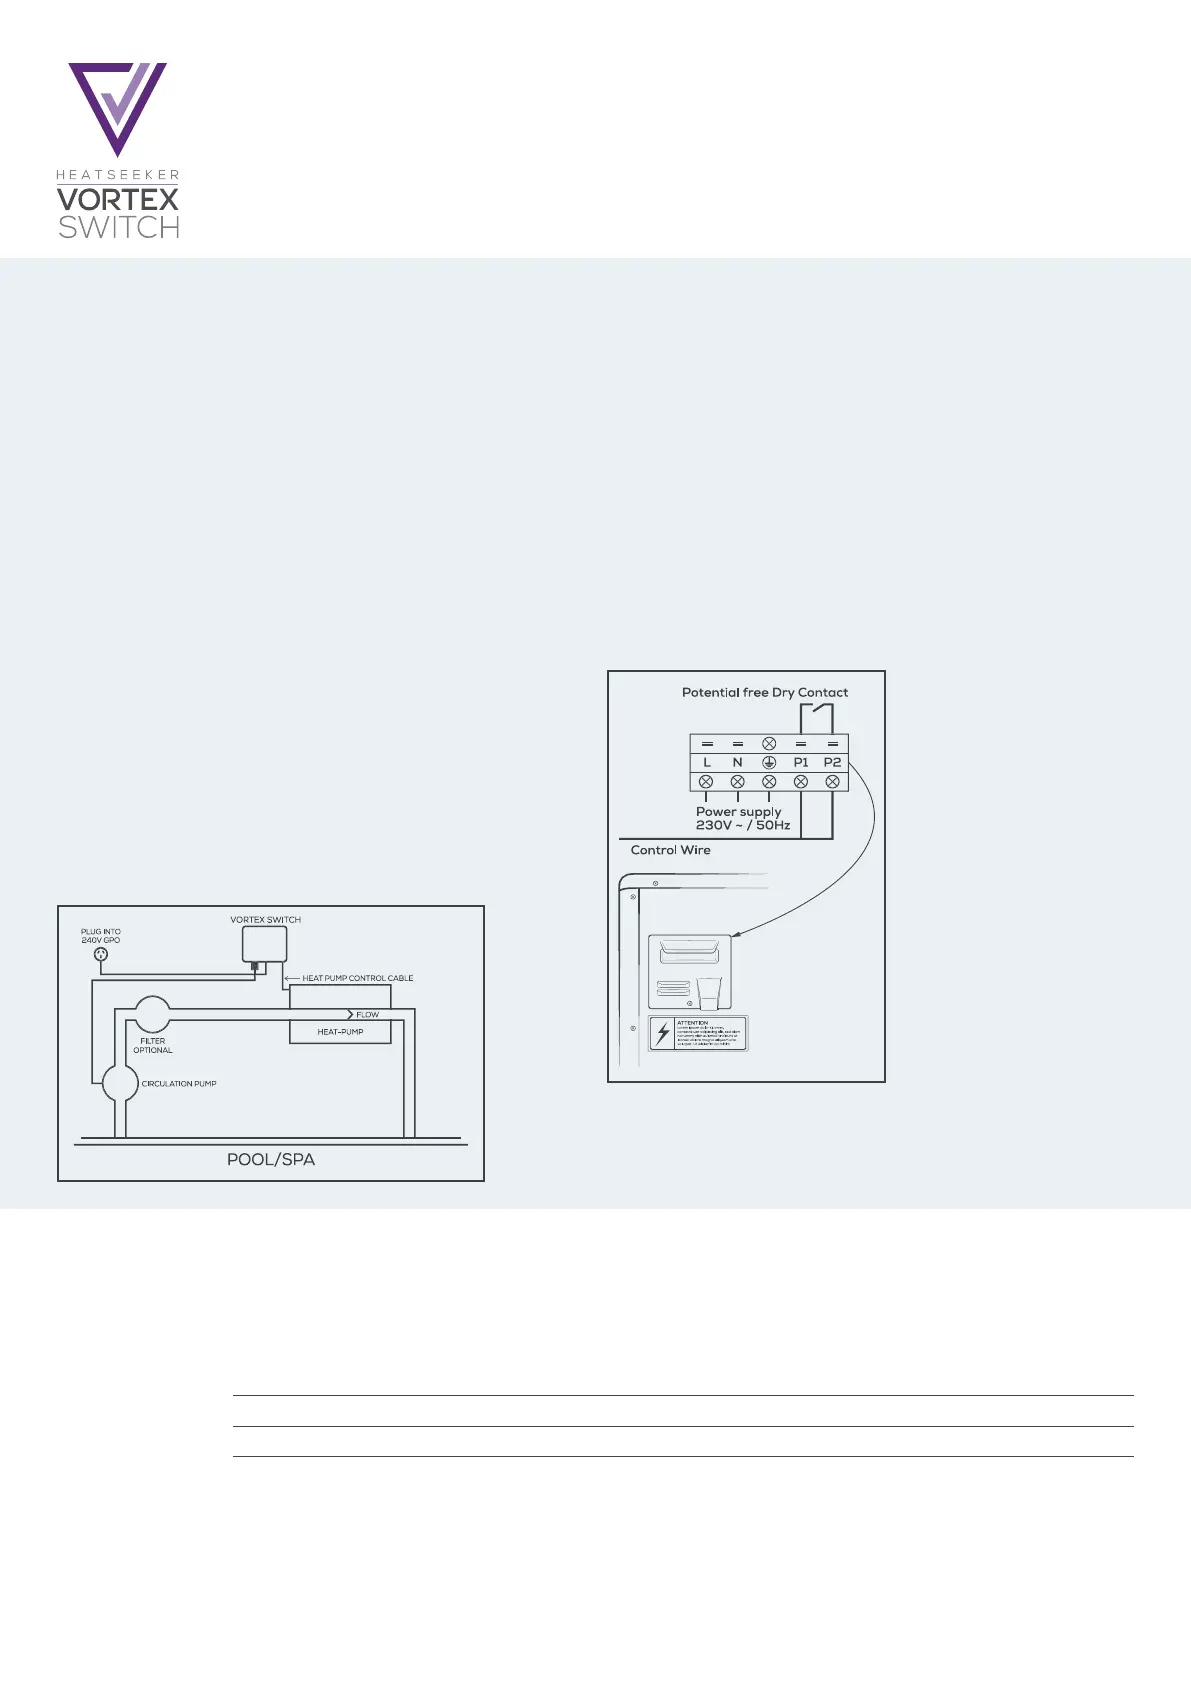
INSTALLATION INSTRUCTIONS
Mounting
Find a suitable location to mount the VortexSwitch box.Ideally as with all pool
equipment it should be installed out of direct weather and no closer than 3m
from the water’s edge and a minimum of 600mm above ground.Lift up the
two mounting tabs and use two appropriate screws to mount the VortexSwitch
box to the wall,keeping in mind that the power cable is 1.8m long and should be
plugged directly into a general power outlet,not into an extension lead.
Pump
The circulation pump plugs into the 240V outlet beneath the VortexSwitch.
Heating Priority
Connect the heating priority cable from the VortexSwitch to the heat pump,
refer to the heat pump manufacturer’s instructions and the below diagram
for the appropriate connection and note that damage caused by incorrect
connections will void warranties.
WARRANTY
This range of product is covered by a limited 2 year warranty against component failure or faulty workmanship from the date of installation.
Faulty units should be returned in the first instance to the dealer from which the unit was purchased.
Damage to the unit due to misuse,power surges,lightning strikes or installation that is not in accordance with the manufacturer’s instruction may void the warranty.
Warranty does not include on-site labour or travel costs to or from installation site.
Customer Record. (To be retained by the customer)
Dealer/Installer Name
Serial Number
Date Installed
OPERATION & INSTALLATION
INSTRUCTIONS
32
 Loading...