VRG CONTROLS LLC. 15 of 39 MAY 2021
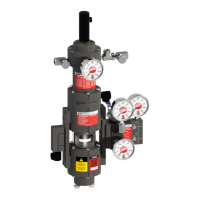
RCVC 3000 - Red Circle Valve Controller
Installation, Operation, Maintenance Manual
7. Once all settings and calibrations have been restored
save the setup le (File -> Save Application)
a. To save the le as a standard le, for future RCVC
applications. Disconnect from the device and nd the project/
le under the oine section. Right click on the le and select
save as standard, this will allow you to select this le when
writing to a new device.
Command Signal Calibration
1. Open programming connection to RCVC and
connect to the device.
2. On the Home Tab, select Manual Calibration
under the calibration section.
3. In the calibration window select Analog Input from
the Type drop-down menu. Select command
Signal from the Signal drop-down menu.
4. Select start calibration, then send a 4ma signal to
the device and select the Set button for the
Minimum. Then send a 20ma signal to the device
and select the Set button for Maximum.
5. Once both values have been set Select the Stop
Calibration button to end calibration. Close out of
the window and select the Setup tab and the
Analog Input tab to verify that the values have
been updated under the COMMAND section.
Feedback Signal Calibration
1. Open programming connection to RCVC and
connect to the device.
2. On the home tab, under the CALIBRATION
section select Auto Calibration.
3. In the Calibration window select Start Auto
Calibration. The valve will automatically move and
save the values for full open and full close.
4. Once the calibration is complete there will be a
Finished message next to the Start Auto
Calibration button.
5. NOTE ** The Auto Calibration can ONLY be used
for the analog input feedback.
a. You can write the values down or you can put
them directly into a new setup le located in standards ->
VRG Defaults -> BV-LL (Ball Valve Lock Last)
6. Copy over any other changes from the old setup le: Dead
bands, pulse zone, solenoid count, lock up and fail modes.
Ensure that you new setup le matches the old one.
7. Next right click on the le name below the online section
and select load standard le. Select the correct le from the
drop-down menu (BV-LL) and click OK.
8. After the le nished writing to the device. Select device
-> connect to reconnect to the RCVC. The RCVC has now
been updated with the latest version of the setup le.
9. Verify that all calibrations are accurate and run a new
calibration if any need to be changed.
10. Once all settings and calibrations have been re-
stored save the setup le (File -> Save Application)
a. To save the le as a standard le, for future RCVC
applications. Disconnect from the device and nd the project/
le under the oine section. Right click on the le and select
save as standard, this will allow you to select this le when
writing to a new device.
Alternative Method for new Setup le
1. Open RCVC app software
2. Connect to the RCVC Via the USB connection
3. Once connected to the device Assign a project and le
name.
4. Right click on le name under the online section and
select load standard le and select the correct le from the
drop-down menu.
5. Once the le has ben loaded, select device -> connect to
device.
6. Once connected run through calibration procedures to
recalibrate the RCVC
a. Auto calibration to calibrate the Ballu (Westlock/
Soldo) to the RCVC
b. Manual calibration -> Analog Input-> Command
signal for 4-20ma command
c. Manual Calibration -> Analog output -> Feedback
for feedback to RTU (Gas Control)
 Loading...