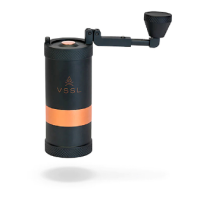
Use a scrub brush to clean the inside of the hopper.
The push button release mechanism (11) can’t be
removed, but use a cotton swab or Q-tip to remove
build-up. The carabiner release (12) and carabiner
hinge (13) shouldn’t need cleaning, but may need
lubrication. A household, food-grade
lubricant will work. You can also lightly lubricate
the carabiner extension arm.
1. To begin, ensure both bearings are nested back
in place within the grinder body. Slide the grinding
bolt from the top to the bottom, so the threaded
end is at the copper band end of the unit.
2. Slide the spring over the grinding bolt. Slide
the burr over the grinding bolt, and then slide the
adjustment plate over the bolt against the burr.
Ensure the adjustment plate aligns so it fits into a
depression on the burr.
3. Press down on the adjustment plate to expose
enough of the grinding bolt threads so you can
begin screwing on the adjustment dial.
Note: Re-positioning the adjustment dial nut
flush with the top of the grinding bolt is the
default setting for medium-coarse grinds,
recommended for pour over brew method.
RE-ASSEMBLY:
CLEANING
INSTRUCTIONS
13