14
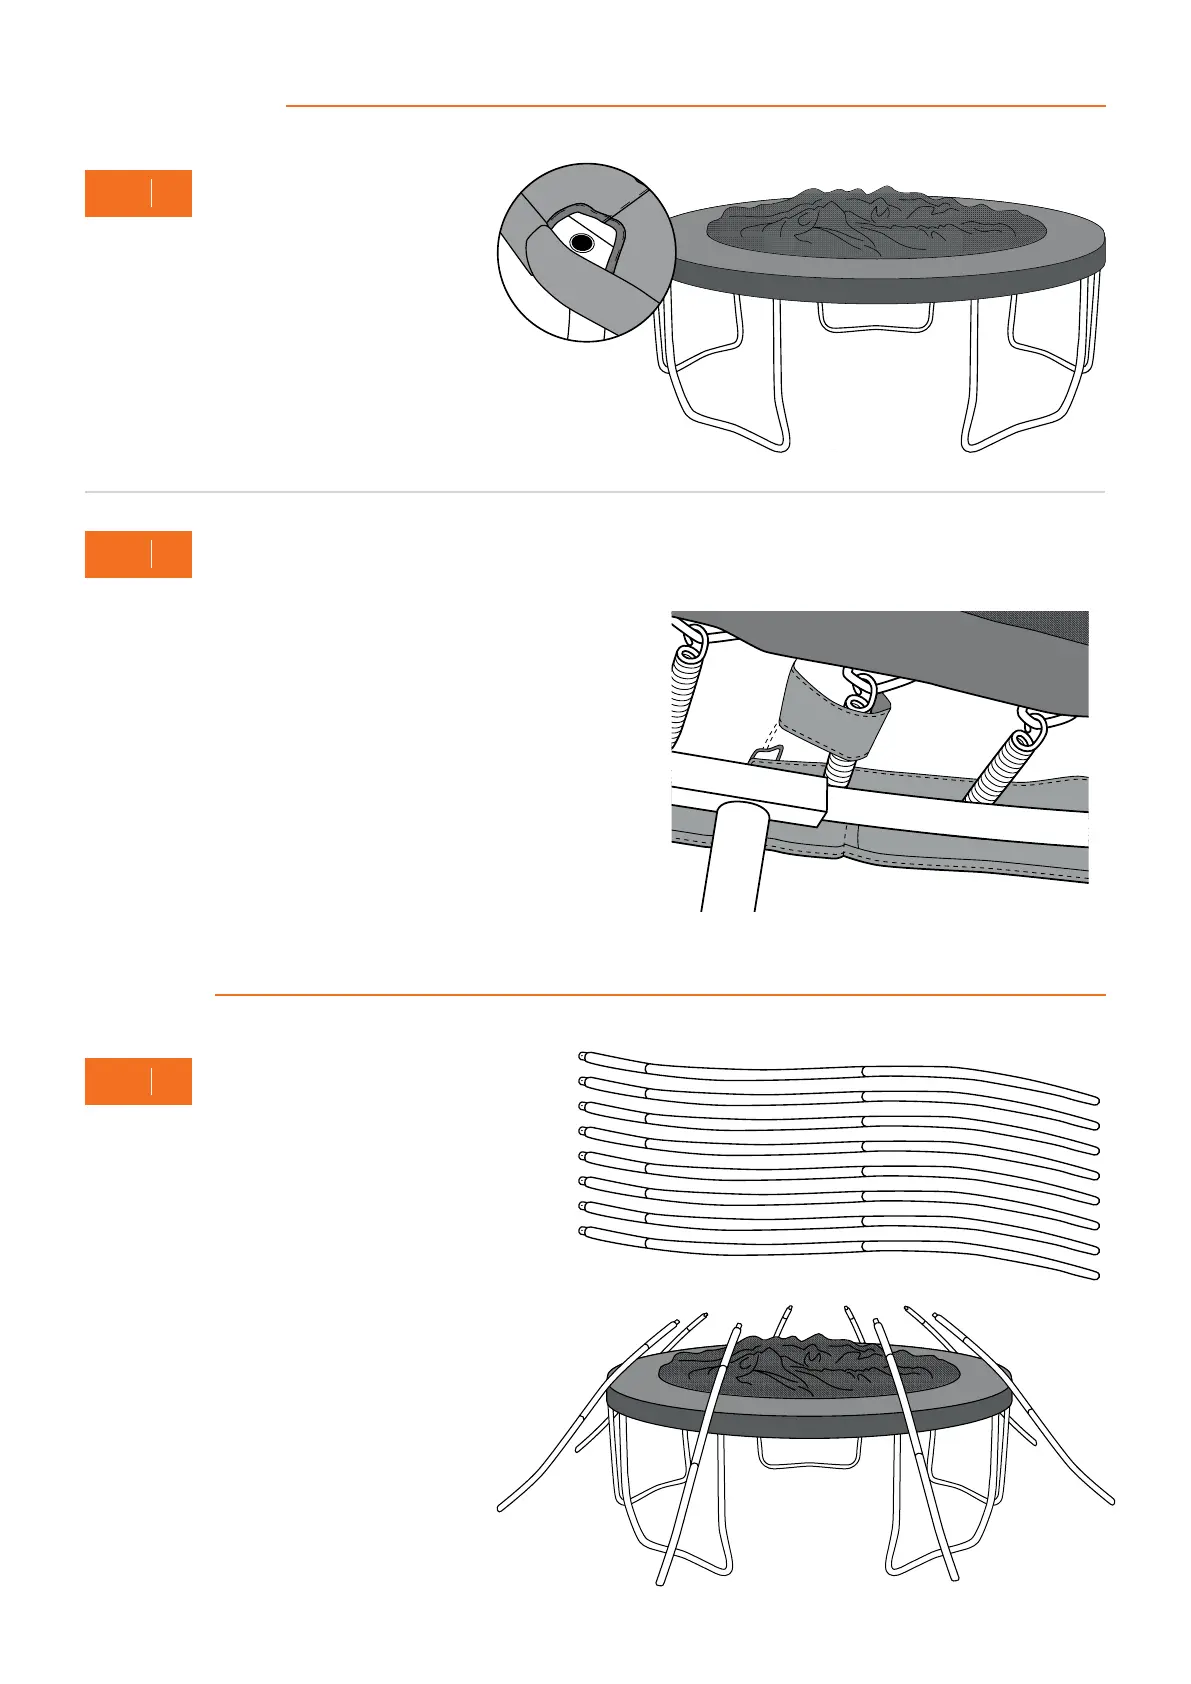
A. Lift up the Safety Padding, and completely remove the
Spring to the left of any T-Joiner.
B. Feed the Spring through the loop on the Safety Padding,
before attaching it to the Jump Mat and Curved Pole.
C. Repeat for each Spring and loop in the Safety Padding to
the left of every T-Joiner.
Remember: Ensure that the Safety Padding is correctly attached
and secured. Properly installed Safety Padding is crucial to
protect against injuries
.
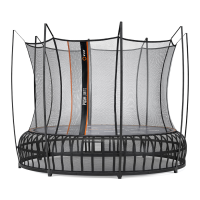
A. Connect your Upper Net Poles (found in Box D)
and Lower Net Poles (found in Box C) together,
B. The Lower Net Poles can be identified by the
heart shaped bottom and the Upper Net Poles
have a push button and narrowed bottom to
attach into the Lower Net Poles.
C. Rest the completed Net Poles against the frame
at each T-Joiner.
Safety Padding
Net Poles
Place the Safety Padding (found in Box A)
over the trampoline frame and line this up so
that the Vuly logo is in line with the entrance
in the netting and the holes in your T-Joiners
are visible through the openings in the Safety
Padding.
11
STEP
10
STEP
12
STEP
A
B