11
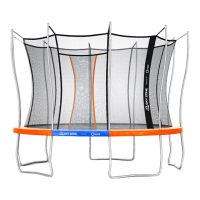
Frame
A. Lay out each Curved Pole in a circle. Ensure that the
punch-lines are facing upwards.
B. Position each T-Joiner in the gaps around the Curved
Poles. Ensure that the push-button holes are facing
downwards.
C. Place Straight Poles with each T-Joiner. Ensure that
the push-button holes are facing downwards.
D. Place a W-Pole beneath every second Curved Pole,
between each inwards Straight Pole. Ensure that the
push buttons are facing downwards.
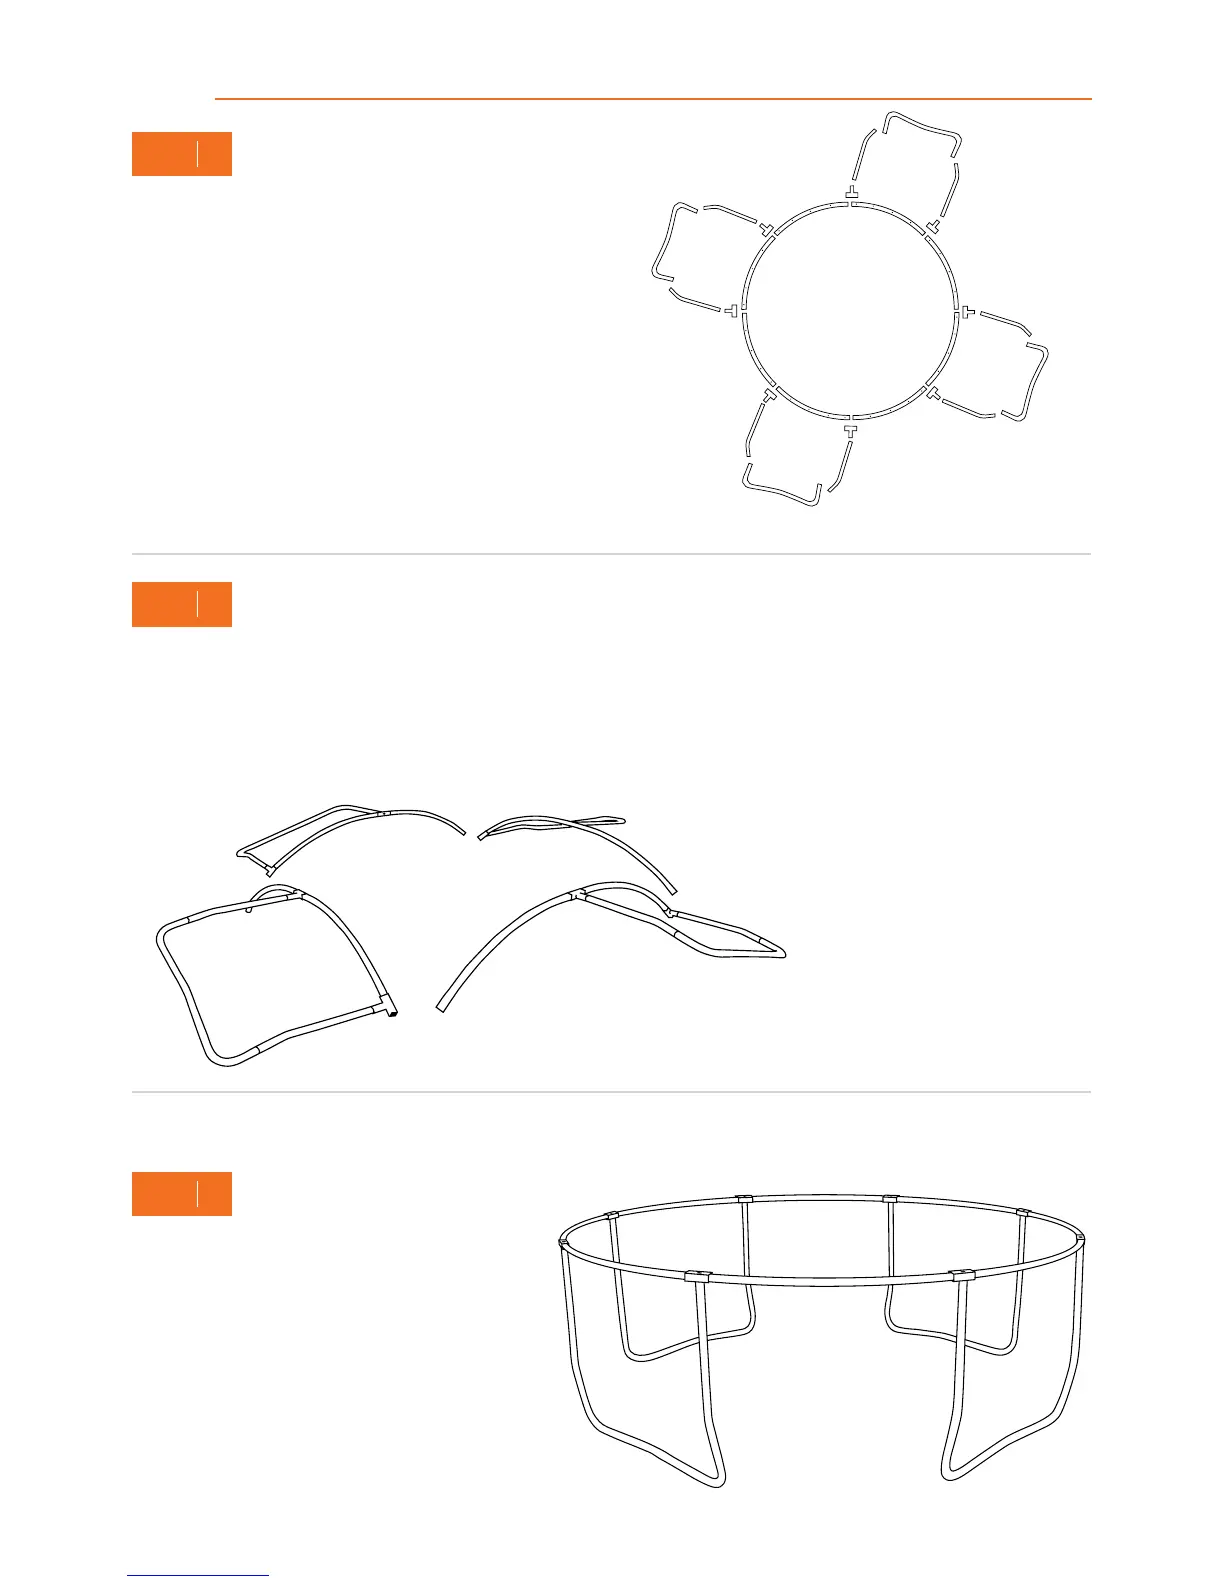
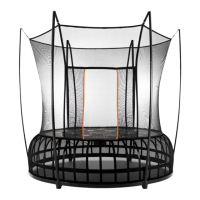
2
STEP
1
STEP
3
STEP
Go around your trampoline, connecting Curved
Poles to T-Joiners, until you complete the frame.
A. Slide two T-Joiners into either side of a Curved Pole, Straight
Poles into both T-Joiners and a W-Pole between the Straight
Poles to form a complete leg.
Make sure that the push-buttons properly lock when connecting.
B. Connect the Curved Pole that is to the left of this completed leg
to the left T-Joiner.
Make sure that the punch-lines of Curved Poles are facing upwards.