NOTE: This is a very technical receiver with many options to change settings.
Be careful, in the hands of children whom could fiddle could leave the receiver
not operable. DONT UPDATE to another image Via USB. You will loose all the
NZ setup of channels, SKY card reading and plugins. It will take you many
hours even if experienced to get back to the same configuration. Some
images are destructive and not compatible with this receiver and don’t
have the On Demand plugin, the Info and EPG screen features. To
SAFELY update the VIX image and plugins. Menu / Setup / Software update.
You will retain all the setup settings and channels.
1. In the MENU NEVER do a FACTORY RESET as you could loose all NZ
functions and settings on the receiver. Also all NZ channels will be deleted
and there will be no NZ beamed Satellites listed, only European Channels.
Note you will NOT be able to receive any of these Satellites in NZ.
2. One of the selections in Scan mode can be destructive. Non technical
users Dont BLIND SCAN use Manual Scan unless you are a professional
installer, have had experience in Satellite receiver setups, have a very large
dish and are scanning for another Satellite positioned at a different angle in the
heavens, of which we have not programmed in for NZ.
PLEASE READ
HD Satellite Receiver + On Demand + ITV & PVR
3. This receiver is setup for the oval LNB on a Sky dish & receives
satellites Optus D1, C1/ D3.
Frequency 10750.
The other popular LNB is Frequency 11300.
To change to this frequency. MENU / Setup / Service searching / Tuner Configuration / Tuner B /
LOF/L to 11300 and LOF/H to 11300
This LNB Nothing to change
4. NOTE we have configured the receiver so that LNB input 1 (Tuner A) loops through to Tuner B.
Oval LNB
NOTE if “No Signal” appears
on screen & you have changed
(if necessary) to the correct LNB
settings above, the receiver is
probably not at fault. The Satellite
Dish may be out of alignment.
“Scrambled” means receiver needs
a SKY card. Front flap, bottom slot,
SKY logo up with Arrow in first. Takes
about 20 secs to first recognise card.
- 4 -
- 1 -
HAVE A PROBLEM - read this first before consulting with retailer
GETTING CONNECTED with the DISH
SUPPORT and CONTACT: Contact your NZ sales representative
This receiver is very new to the NZ
market. We have easy
guide as the screen
There are
many images for this type of receiver.
Open Pli, etc We have chosen the Vix
image as it provides the best screens
and support to suit NZ.
produced this
image on the receiver
is different and setup for NZ.
NZ EASY Start GUIDE
Internet TV is set to dramatically change the way TV stations can be seen.
- KODI (used to be called XBMC) is installed and mentioned on page 2.
- Hbbtv is another and currently it can see NZ on demand material TVNZ Tv3 &
Maori but not fully functional at this time.
- IPTV can be used on this receiver but links to content keep on changing often.
You can ftp the receiver from your computer. However we do not support users
that go past this point. There is enough info on the web for the technically
minded.
INTERNET TV - ITV ON DEMAND
FEEDBACK - HELP - BACKUPS
Iif there is something you believe should be included then email us and we will
try to provide the information on the updated EASY START GUIDE to you via
email. A more detailed Vix image manual for Vu+ can be downloaded from
www.freeviewnz.com/solo2-manual.
SUGGESTION: Note the receiver settings can be backed up on the internal
HDD eg Menu / Backup . Recovery access then would be Menu / Setup /
Vix / Backup Manager.
Receiver UPDATES: These can be downloaded from the
website.http://freeviewnz.com/html/help_desk.html
SKY CARD USERS
Press TV Button - Select SKY Optus D1
- Card Insertion > > > > > >
STARTOFF - MUST CONNECT SATELLITE cable to INPUT 2
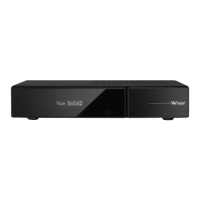
Vu+ Solo2 Satellite Receiver
Updated Nov 2016
1. Connect Satellite Dish cable to LNB input 2 to ensure you are able to Record a
channel and watch another channel at the same time.
(Applies to receivers with a USB drive or an internal HDD)
NOTE if you think that you want to configure this in reverse to the above
... DONT ..IT WONT WORK for a single sat dish cable setting.
2. If you finally want to connect TWO dish feeds to the receiver, you can change
once receiver is working for the first time. The Tuner A settings to the same or
similar settings to Tuner B. Menu / Setup / Service searching / OK /
Tuner Configuration / OK / Tuner B (manually copy settings) exit select Tuner A
and change Config Mode = Loop through to B to Config Mode = Advanced etc etc