Right Shoe
CLEAT INSTALLATION continued
3. FIT THE CLEAT SURROUND AROUND THE
BASE PLATE
Cleat Surrounds are labeled “L” or “R”.
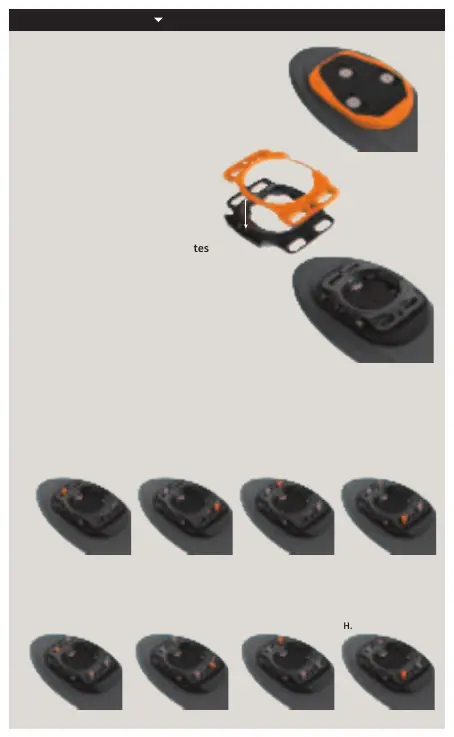
4. FIT THE PROTECTOR PLATE TO THE
SPRING & HOUSING
Spring & Housings are labeled
“LEFT” or “RIGHT”. Protector Plates
are not labeled.
The Spring & Housing ships
pre-assembled to the Protector Plate.
If they have separated, gently snap
them together using the two small
tabs as a guide.
A. B. C. D.
5. SCREW THE ASSEMBLY TO THE BASE PLATE USING THE PROTECTOR PLATE SCREWS
Install the Protector Plate Screws using a “Double X Pattern” (shown below).
Loosely engage all four Protector Plate Screws (Steps: A thru D).
Set the desired le-right position then tighten the Protector Plate Screws
(Steps: E thru H).
Recommended tightening torque: 2.5 Nm.
E. F.
G. H.
Right Shoe
Right Shoe
 Loading...