Householder Information
IMPORTANT!
Your boiler must be commissioned in order to:
- Validate your warranty
- Ensure the boiler has been installed correctly and avoid premature failure
- Set the boiler to its optimum efficiency. Operating conditions for the boiler will vary from site to site, your
commissioning engineer has specialised equipment to check the oil pressure and analyse the exhaust gases for
temperature, smoke and carbon dioxide content.
Your installer will organise the commissioning of your boiler. Should you experience any difficulty locating an
engineer, our service department may be able to provide you with details of an engineer in your area.
“Benchmark” Installation, Commissioning and Service Record Log Book
Please ensure that your installer has completed all sections of the log book (found at the back of this manual).
The log book will be required in the event of any warranty work. Ensure that the service record is completed.
Warranty
Your HRM boiler is under warranty for 2 years from the date of installation.
Warranty Conditions
- The boiler must be installed and commissioned in accordance with our handbook
- The boiler must not be repaired, modified or tampered with by any person not authorised by HRM
Extended Warranty
The “Benchmark” and warranty registration document at the end of this manual should be completed as
appropriate by your installer / engineer. This is your record that the boiler has been correctly installed in accordance
with our recommendations. Return the warranty registration document to HRM in order to qualify for a further 3 year
warranty of the heat exchanger – a total of 5 years.
Extended Warranty Conditions
- The boiler must be serviced annually and maintained in accordance with this handbook. The
“Benchmark” service log is located at the back of this manual
- This warranty is in addition to your statutory and other legal rights
After Sales Service
- If your boiler fails during the warranty period contact your installer, who will be able to identify the
cause of the problem. If appropriate, your installer will contact us.
- Under no circumstances should “in warranty” work be undertaken without authorisation from the HRM
service department
- If you are unable to contact your installer please contact our service department. Quoting your boiler’s
serial number when phoning – this can be found on the cover of this manual.
Standard X-ternal & System X-ternal
Handbook
Contents Page
DESCRIPTION PAGE
Householder Information
Warranty Registration Document End Of Manual
Warranty 3
Extended Warranty 3
After Sales Service 3
Boiler Controls: Wallstar 4
System Wallstar 5
Wallstar Combi 6-7
Burner Lockout 8
Technical Specifications
Boiler Dimensions: Wallstar 9
Boiler Dimensions: System Wallstar 10
Boiler Dimensions: Wallstar Combi 11
Technical Specifications 12
Burner Settings 13
Boiler Installation
Regulations 14
Boiler Sizing 14
Refurbishing An Old System 14
System Protection 14
Boiler Location 15
Wall Construction 15
Flue Terminating Positions 16
Fuel Supply System 17
Oil Supply 17
Installation Procedure
Wallstar 18-23
System Wallstar 24-31
Wallstar Combi 32-40
Condensate Drain 41
Wiring Diagrams
Wallstar 42
System Wallstar 42
Wallstar Combi 43
Boiler Maintenance
Baffle Removal 44
Fault Diagnosis
Wallstar Combi 45
Wallstar Combi Components 46
Contacts
Tel No: 01953 455400
Fax No: 01953 454483
Email: info@hrmboilers.co.uk or technical@hrmboilers.co.uk
1
Standard Wallstar, System Wallstar &
Wallstar Combi Manual
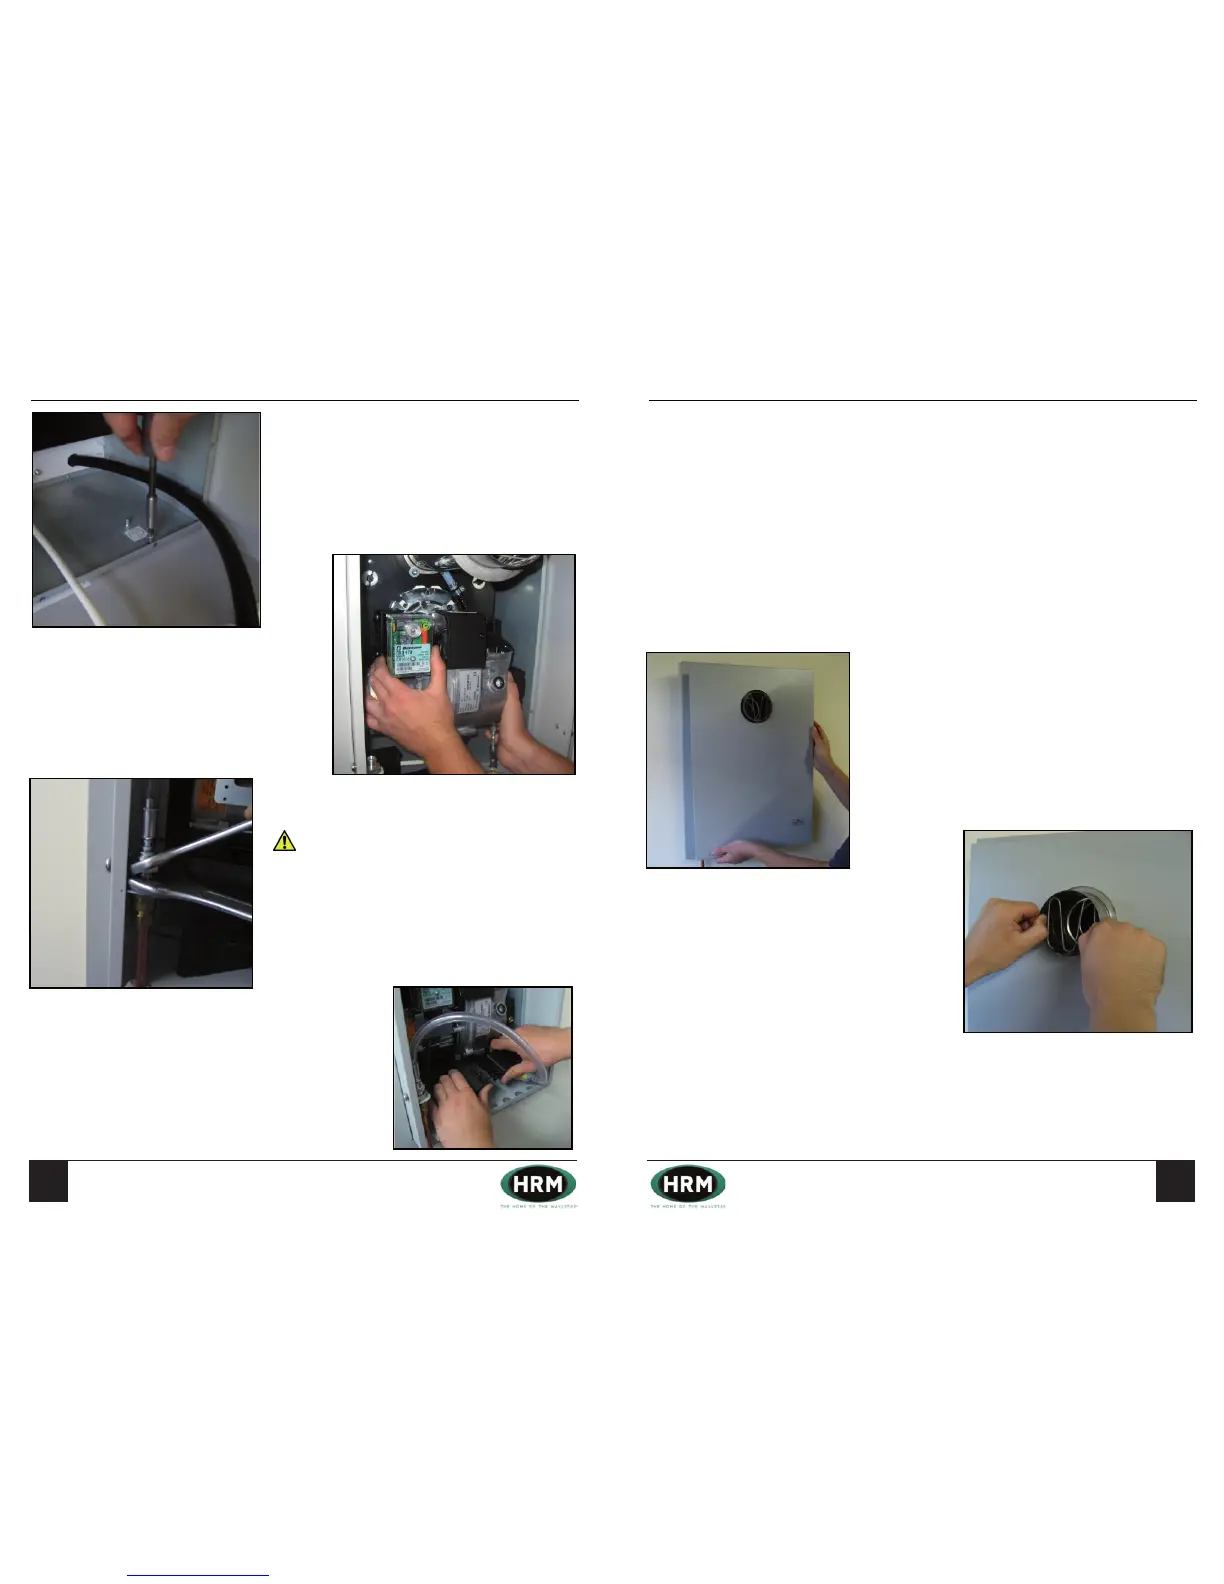
Installation Procedure Continued - System Wallstar
23. Wall Duct Outer (Cont.)
Join the wall duct outer and wall duct inner together using the 4
supplied self drilling screws.
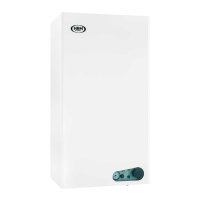
24. Burner
Fit the burner to the mounting flange on the silencer box.
25. Connect The Fuel Line
Connect the fuel line from the burner to the oil supply.
IMPORTANT: The Wallstar comes supplied with a remote
acting fire valve and has a non-return valve attached to the
burner pump. No additional non return valve must be used.
Should the boiler be used in conjunction with a purpose designed
underground tank, the foot valve found inside such tanks must be
removed or at least rendered ineffective. In addition to the sealed
fuel filter found in the boilers flexible fuel line, a replaceable
element fuel filter must be fitted near the tank.
Note: Please refer to page 17 of this manual for oil tank
installation recommendations.
26. Burner Lead
Connect the 5 pin plug and socket.
30
Standard Wallstar, System Wallstar &
Wallstar Combi Manual
Installation Procedure Continued - System Wallstar
27. Priming The Burner
Ensure both power and fuel supplies to the boiler are switched
on. Press the reset button, the burner will start it’s firing
sequence. To release air from the oil line slacken the vent plug
during this sequence. If ignition fails the burner will go to lock
out, wait 60 seconds and repeat the procedure.
28. Test The Fuel Supply
With the burner running, check the fuel supply for air leaks. It is
normal for a static air bubble to remain at the highest point of the oil
line, but a continuous stream of bubbles through the oil line
indicates that air is being drawn in. This must be cured before
proceeding.
29. Access Door
Fit the access door onto the wall duct, secure it in place by
tightening the 2 screws located on both sides.
30. Flue Positioning
Pull the end of the flue out until the flange on it sits flush
against the back of the access door.
31. Commissioning the Boiler
Installation is complete. The boiler must now be commissioned
by a competent engineer. The “Benchmark” log found at the
back of this manual should be completed and the warranty
documentation returned to HRM Boilers Ltd.
31
Standard Wallstar, System Wallstar &
Wallstar Combi Manual
The Wallstar comes supplied with a non-
return valve attached to the burner pump. No additional non
return valve must be used. Should the boiler be used in
conjunction with a purpose designed underground tank, the
foot valve found inside such tanks must be removed or at least
rendered ineffective. In addition to the sealed fuel lter found in
the boilers exible fuel line, a replaceable element fuel lter must
be tted near the tank.
Ensure both power and fuel supplies to the boiler are switched
on. Press the reset button, the burner will start it’s ring
sequence. To release air from the oil line remove the vent plug
during this sequence.
 Loading...