EasyManua.ls Logo

WarmlyYours nSpire UWG4-4999 - User Manual

WarmlyYours nSpire UWG4-4999
2 pages
Print Icon
To Next Page IconTo Next Page
Loading...
Setup Instruction
WiFi Settings and Remote Control
for nSpire Touch WiFi
Adjust And Monitor Your Home Wherever, Whenever
The nSpire Touch WiFi thermostat enables remote WLAN connectivity, which gives users a convenient way to control heating
of their homes. Furthermore, WLAN connectivity gives easy access to information on energy consumption and system
performance. The OJ Microline UWG4 app gives homeowners direct access to product information and settings.
Wifi Settings And Remote Control For Nspire Touch Wifi (Uwg4)
These settings allow you to set up your thermostat for connection to your wireless network, through which the thermostat is
able to connect to a server. Server connectivity enables your thermostat to be controlled remotely from a smartphone, tablet or
computer with Internet connection. A weather forecast is also available through the server connection. These thermostats will
not connect to the following networks: 5.8 GHz, an unprotected network, or an older one using a WEP encryption scheme.
Still can’t connect to your wireless network?
Give us a call at (800) 875-5285 and wed be happy to help.
Any information that you can gather about your router, like the make, model, and bandwidth,
will help us help you.
Installation Support • (800) 875-5285 • www.WarmlyYours.com
1. Tap the “menu” button on the home screen.
2. Then tap the “WiFi / weather” button to access the various
WiFi settings.
3. Choose your WiFi network from the list of available networks
detected by the WiFi Touch Thermostat. Jump to step 7.
4. If the name of your network does not appear, tap “other...
5. If you choose “other..., you must enter your SSID.
6. Confirm your SSID by tapping the “✓” button.
7. If you choose “X”, the wizard will return to step 3.
8. Enter the network key (password) for your wireless network.
The network key may contain upper and lower case letters,
special characters, and numbers. You can access numbers
and special characters by tapping the “12@ñÇ” button.
9. Confirm your network key by tapping the “✓” button.
10. If you choose “X”, the wizard will return to step 3.
The thermostat will now attempt to connect to your wireless
network. This may take a while. If connection fails, the
thermostat will tell you so. In case of failed connection, check
your WiFi router and repeat steps 1 to 6.
11. If you choose “X”, the wizard will return to step 3. A confirma
tion screen will now appear, informing you that connection
to the wireless network has been established.
12. Tap the “✓” button to proceed.
13. Enter a name for your thermostat (e.g. “Living room”).
14. Tap the “✓” button.
15. If you choose “X”, the wizard will return to step 3.
You must now
16. Tap the “✓” button to accept this and continue.
17. Enter the email address to which an activation email can
be sent. The email address may contain upper and lower
case letters, special characters, and numbers. You can
access numbers and special characters by tapping the
“12@ñÇ” button.
18. An activation email and website link will be sent to the email
address you enter. Tap the “✓” button.
19. If you choose “X”, the wizard will return to step 3.
The thermostat now verifies connection to the server and you
should wait until the screen changes. Alternatively, you can tap
the “X” button.
20. If you choose “X”, the wizard will return to step 3. If connection to
the server fails, you have two choices:
21. If you choose “X”, the wizard will return to step 13.
22. If you choose “try Again, the thermostat will once again attempt
to connect to the server using the data already entered.
As soon as the thermostat connects to the server, a verification
screen will appear. An activation email will be sent to the previously
entered email address. This email contains a link to a web page
where you can create a user account. You must have a user
account if you want to access the thermostat remotely either from
mythermostat.info or through an app. You do not have to set up the
account immediately; you can wait until you have completed the
WiFi/Weather wizard.
At this point, your thermostat can be accessed, controlled, and
monitored through mythermostat.info (as a webpage) or through
OJ Microline UWG4 (as an application for smart-devices). You can
find the OJ Microline UWG4 app by searching for “UWG4” in either
App Store or Google Play, or by using the links below.
App Store
https://itunes.apple.com/us/app/oj-micro-
line-uwg4/id1046778776?mt=8
Google Play
https://play.google.com/store/apps/details?id=com.ojelectron-
ics.microline&hl=en
Question and Answer IconNeed help?

Do you have a question about the WarmlyYours nSpire UWG4-4999 and is the answer not in the manual?

Summary

WiFi Settings and Remote Control

Connecting to Your Wireless Network

Guide to connecting the thermostat to a wireless network, including SSID and password entry.

Server Connection and Remote Access

Steps for server connection, thermostat naming, email activation, and remote access via web or app.

Troubleshooting WiFi Connectivity

Advice on what to do if the thermostat fails to connect to the wireless network or server.

Voice Assistant Integration

Voice Control Requirements

Prerequisites for enabling voice control with Google Assistant and Amazon Alexa.

Google Assistant Setup

Step-by-step guide to linking the thermostat with the Google Home app for voice commands.

Amazon Alexa Setup

Instructions for connecting the thermostat to Amazon Alexa via its app and skill.

Voice Command Examples

Illustrative voice commands for controlling the thermostat with Google Assistant and Alexa.

Overview

The nSpire Touch WiFi thermostat is a smart home device designed to provide convenient control over home heating systems, offering remote access and monitoring capabilities through WLAN connectivity. This device allows users to manage their heating from anywhere, leveraging an internet connection to communicate with a server. It also provides valuable insights into energy consumption and system performance, helping homeowners optimize their heating efficiency. The OJ Microline UWG4 app serves as the primary interface for direct access to product information and settings, enhancing user control and interaction.

Function Description:

The nSpire Touch WiFi thermostat facilitates remote control of heating systems via WLAN. Once connected to a wireless network and the internet, users can manage their thermostat from a smartphone, tablet, or computer. This remote access is enabled through server connectivity, which also provides additional features like weather forecasts. The thermostat is designed to integrate with smart home ecosystems, specifically supporting voice control through Google Assistant and Amazon Alexa. This integration allows users to adjust settings and monitor their heating using simple voice commands, adding a layer of convenience to home management. The device's primary function is to maintain desired indoor temperatures efficiently, while also offering data on energy usage to help users make informed decisions about their heating habits.

Important Technical Specifications:

The nSpire Touch WiFi thermostat requires a stable WLAN connection for operation. It is compatible with standard 2.4 GHz wireless networks but will not connect to 5.8 GHz networks, unprotected networks, or older networks using WEP encryption. This specification is crucial for ensuring secure and reliable connectivity. The device communicates with a server to enable remote control and data exchange. While the manual does not explicitly list power requirements or physical dimensions, its functionality implies compatibility with typical home electrical systems for thermostats. The reliance on a wireless network and server connectivity means that a stable internet connection is a prerequisite for its advanced features.

Usage Features:

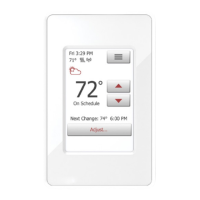
The thermostat offers a user-friendly interface for setup and daily operation.

WiFi Setup:

  1. Access WiFi Settings: From the home screen, tap the "menu" button, then "WiFi / weather."
  2. Select Network: Choose your WiFi network from the detected list. If not listed, tap "other..." and manually enter the SSID.
  3. Enter Password: Input your wireless network key (password), which can include upper/lower case letters, special characters, and numbers. Use the "12@ñÇ" button to access special characters.
  4. Confirm Connection: The thermostat will attempt to connect. If unsuccessful, check your WiFi router and retry.
  5. Name Thermostat: Once connected, name your thermostat (e.g., "Living room").
  6. Activation Email: Enter an email address to receive an activation email with a link to create a user account. This account is necessary for remote access via mythermostat.info or the app.
  7. Server Connection: The thermostat verifies connection to the server. If connection fails, users can retry or return to previous steps.

Remote Control:

Once connected to the server, the thermostat can be accessed, controlled, and monitored through mythermostat.info (webpage) or the OJ Microline UWG4 app. The app is available on both the App Store (for iOS devices) and Google Play (for Android devices). Users can search for "UWG4" to find the app.

Voice Control Integration:

The thermostat supports voice control via Google Assistant and Amazon Alexa, requiring specific setup steps:

  • Google Assistant:
    1. Open the Google Home app.
    2. Tap "Add" (+) -> "Set up device" -> "Works with Google."
    3. Search for "UWG4 Smart Thermostat" and select it.
    4. Sign into the UWG4 app, accept grants, and link the thermostat to Google Home.
    5. Choose the thermostat and its location, then click "Next."
    6. Voice commands like "Hey Google, set the temperature to 70 degrees" can then be used.
  • Amazon Alexa:
    1. Open the Amazon Alexa app.
    2. Tap "Devices" -> "+" -> "Add device."
    3. Select "Thermostat" under "All devices," then "Other."
    4. Click "Skill store," search for "UWG4," and choose the 'UWG4 Thermostat' skill.
    5. Press "Enable to use," use UWG4 app login information to link the thermostat, then click "Close."
    6. Voice commands like "Alexa, what's the temperature in the bathroom" can then be used. The thermostat allows users to monitor energy consumption and system performance, providing data that can help in managing heating costs and efficiency. The ability to receive weather forecasts through the server connection is another useful feature, enabling users to anticipate heating needs.

Maintenance Features:

The manual primarily focuses on setup and usage, with less emphasis on explicit maintenance features. However, the remote monitoring capabilities can be considered a form of proactive maintenance, as users can track system performance and identify potential issues early. For instance, if the thermostat consistently reports unusual energy consumption or fails to maintain desired temperatures, it could indicate a problem with the heating system that requires attention. The ability to check connection status and retry connections in case of failure also contributes to maintaining optimal operation. The system's reliance on software (firmware updates, app updates) implies that keeping the app and thermostat software up-to-date would be part of ongoing maintenance, though this is not explicitly detailed. In case of connectivity issues, the manual advises checking the WiFi router, suggesting basic troubleshooting steps that users can perform. For more complex issues, the manual provides contact information for installation support, indicating that professional assistance is available for troubleshooting and maintenance beyond basic user intervention.

WarmlyYours nSpire UWG4-4999 Specifications

General IconGeneral
BrandWarmlyYours
ModelnSpire UWG4-4999
CategoryThermostat
LanguageEnglish