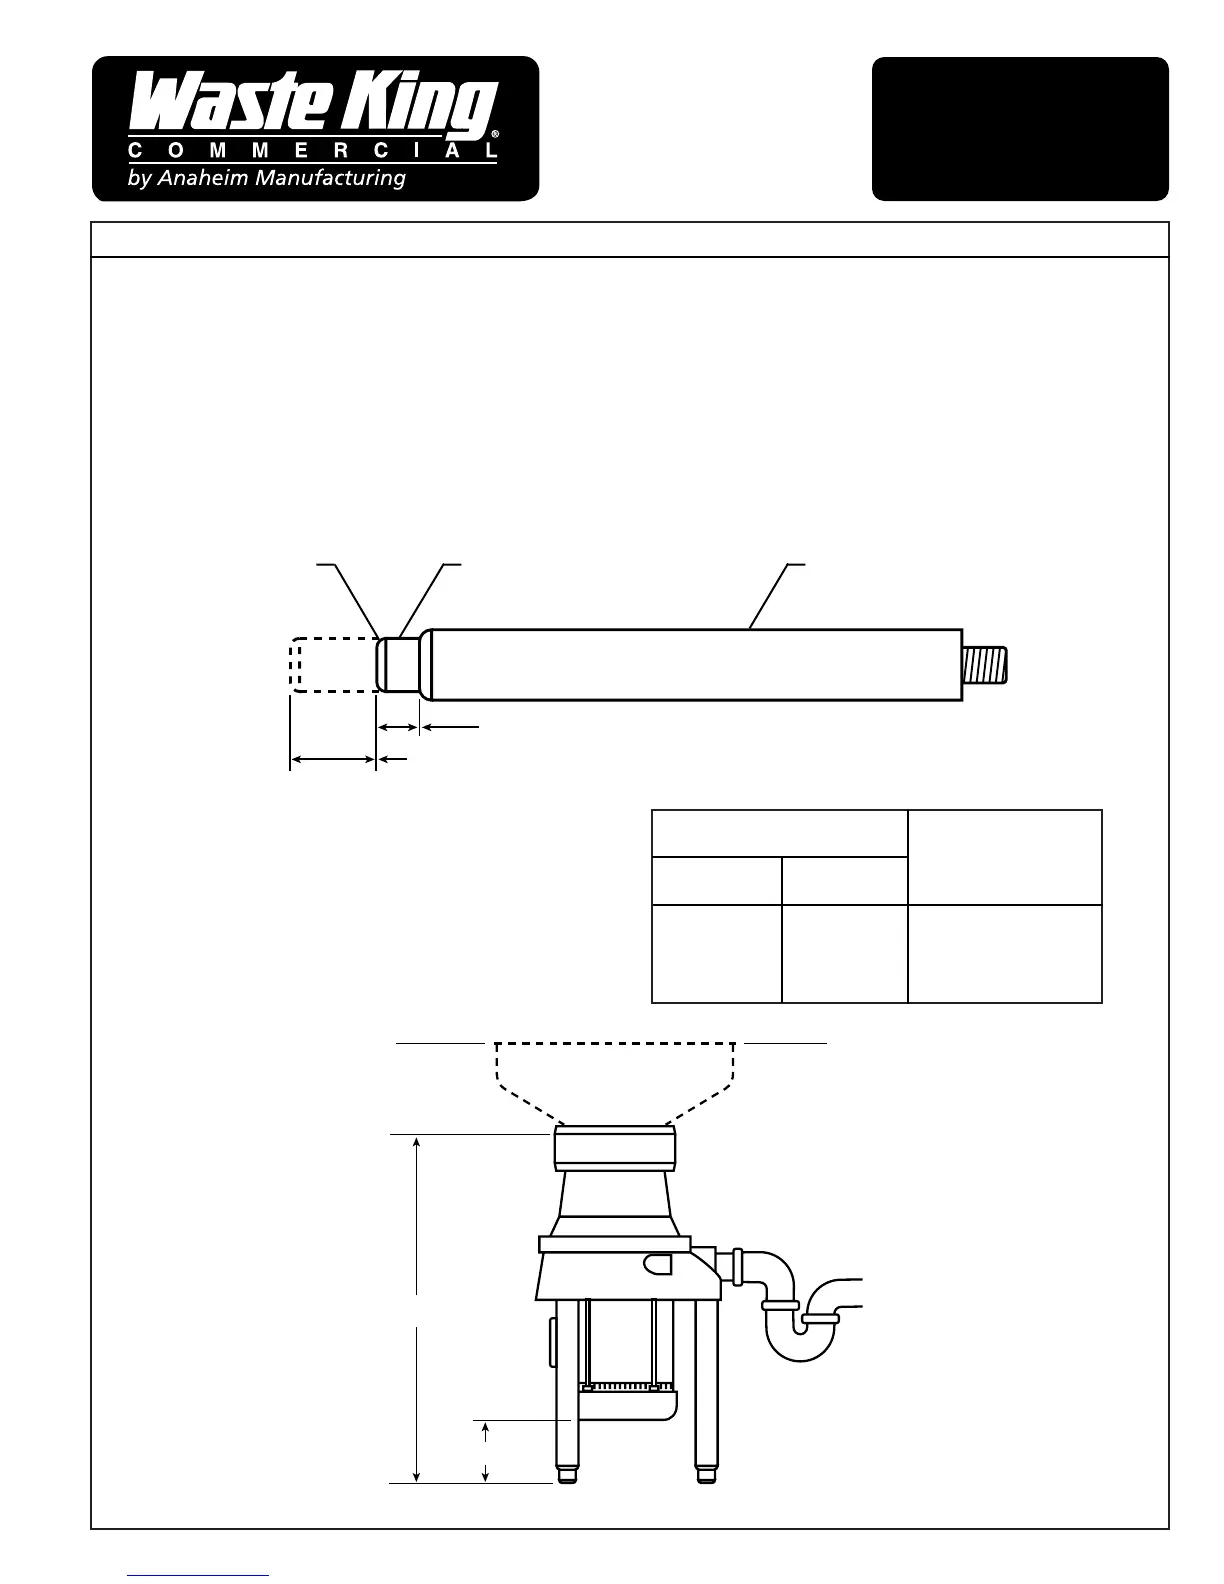
Waste King disposers are shipped with the legs fully adjusted (minimum “G” dimension in the
chart below). Please follow adjustment procedure to increase unit height. For installations where the
disposer is too tall, disposer legs may be modified with no loss of range.
Note: minimum of 2” (51mm) clearance beneath the motor must be allowed for proper motor
ventilation.
ADJUSTMENT PROCEDURE
1. Unscrew toe to achieve the desired unit height (3” (76mm) screw adjustment max).
MODELS:
2000-1, 2000-3
and 3000-3
DISPOSER LEG
ADJUSTMENT AND
MODIFICATION
INSTRUCTIONS
560P304P01 REV A
3.0" (76mm) ADJUSTMENT MAX.
TOE UPPER LEGGLIDE
1.0" (25mm)
BEFORE INSTALLING, READ ENTIRE INSTRUCTIONS CAREFULLY
4240 E. La Palma Avenue, Anaheim, CA 92807 • (800) 454-4423
MODIFICATION PROCEDURE
1. Remove the plastic glide from the toe section.
2. Measure the desired cut-off distance from open
end and mark the toe.
3. Using a pipe cutter or hacksaw make a square
cut-off at the mark.
4. Deburr the cut and reinstall the plastic glide.
“G” Inches(mm)
Maximum Cut-off
Inches(mm)
Unmodified Modified
25.7 (653) 25.2 (640)
to to 0.5 (13)
28.7 (729) 28.2 (716)
SINK FLANGE
2.0" (51mm) MIN
“G”