Parts and Usage
Fig. 3
If fitting a screw take care to ensure that there
are no buried electrical cables or pipes in the
wall.
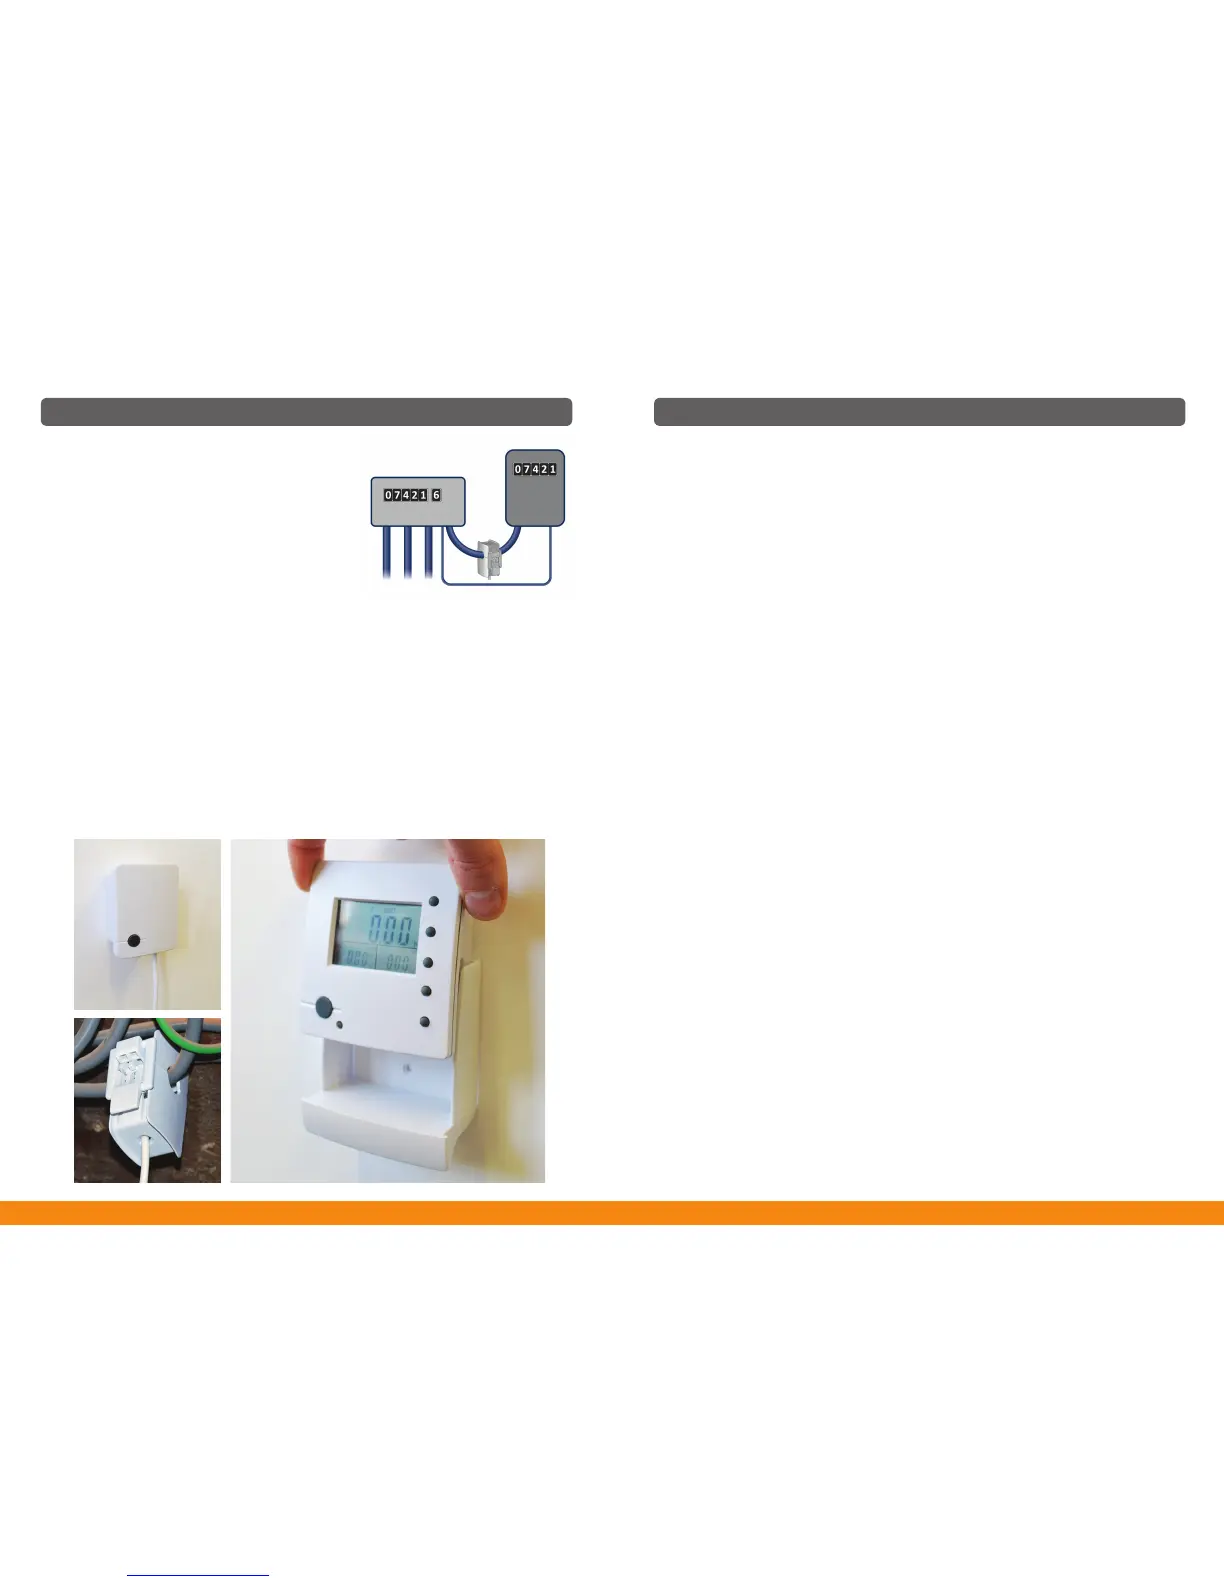
A typical electricity meter will have 4 wires that
terminate within it (as shown in Fig. 1) and the
Sensor Clip needs to be fitted around any one
of these wires.
The sensor clip is hinged in the middle and may
be opened by pulling on the release catch and
then prising the two halves apart. Now gently
clip the sensor around one of the wires that
goes into your electricity meter at a distance of
at least 5cm away from the meter.
Installing the Energy Monitor
The Energy Monitor should be placed in a central location, within 30m of the
Power Transmitter, so that it will be easily seen. It may be placed on a table
top or shelf and is angled when standing to allow it to be easily read when
placed on a table.
If desired you may attach the Energy Monitor to the wall using the wall bracket
supplied.
Fit the batteries in the rear of the unit, by removing the slide off battery cover.
When the batteries are inserted the first time will need to be set the time-date-
unit cost – please see the following section.
Parts and Usage
Pairing the two units
1. When the batteries are first inserted or changed in either the Power Trans-
mitter or Energy Monitor, the two units will need to be paired.
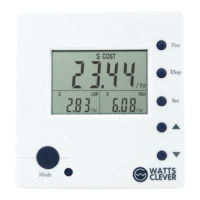
2. Press and release the [ Pair4] button on the Energy Monitor and the
[ LCD display1] will flash [ --.- ].
3. Within 30 seconds press the button on the transmitter unit.
4. When the Energy Monitor detects the Power Transmitter. [ LCD dis-
play1] will change to flashing [ 0.00 ]. The units are now paired.
● Normal operation will resume after a delay of up to a minute (once the En-
ergy Monitor has stopped flashing).
● If the Energy Monitor shows [ Err ] then pairing failed.
● Try locating the Energy Monitor nearer to the Power Transmitter and repeat
(but not too close – allow at least a 1 meter gap between the units).
Initial set up
The WIRELESS Energy Monitor needs to know the date, time, currency, and
unit cost of your electricity so that it can calculate monthly-yearly totals, high
and low levels, and costs of your electricity usage.
1. When new batteries are inserted, the Energy Monitor will require the
above to be input into the unit.
2. Using the [ Up7] and [ Down8] buttons, enter the last 2 digits of the
current year and then press the [ Set6] button.
3. Using the [ Up7] and [ Down8] buttons, enter the last number of the
month and press the [ Set6]button.
4. Using the [ Up7] and [ Down8] buttons, enter the day of the month and
press the [ Set6] button.
5. Using the [ Up7] and [ Down8] buttons, enter the hour in 24 hour
format and press the [ Set6] button.
6. Using the [ Up7] and [ Down8] buttons, enter the minutes and press
the [ Set6] button.
7. Using the [ Up7] and [ Down8] buttons, enter the currency you wish to
use and press the [ Set6]button.
8. Using the [ Up7] and [ Down8] buttons, enter the cost per unit of
electricity unit as indicated on your electricity bill. And then press the
[ Set6] button once more and then unit will show in the display [ 0.00 ].
54
 Loading...