Do you have a question about the wattstopper WS-250 and is the answer not in the manual?
Explains how users can manually control the load via the ON/OFF button for immediate response.
Describes the mode for quick testing of sensor coverage area by setting a 30-second delay.
Details how to disable automatic functions for manual-only operation by removing the Service Jumper.
Instructions on using opaque tape to eliminate coverage in unwanted areas of the sensor's view.
Provides the connection steps for single-level wiring of the occupancy sensor.
Details the wiring connections for manual bi-level lighting control.
Lists common issues and checks when the connected load fails to activate.
Outlines troubleshooting steps for scenarios where the load remains on after the set delay.
Offers solutions for false triggers by adjusting sensitivity or masking the lens.
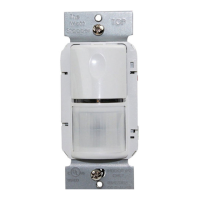
The WattStopper WS-250 and WS-250-347 Passive Infrared Wall Switch Occupancy Sensors are designed to automate lighting or fan loads based on occupancy and ambient light levels. These devices serve as direct replacements for standard light switches. The WS-250 model operates with 120 or 277VAC line voltage, while the WS-250-347 model is compatible with 347VAC line voltage. Both models share the same features and functionalities.
The core technology employed by these sensors is passive infrared (PIR), which allows them to detect human motion and identify occupancy. When motion is detected, a green LED on the sensor blinks, indicating occupancy, and then resets. It will blink again if motion is detected after a brief 2-second reset period.
Upon detecting occupancy, the sensor automatically turns ON the connected load. Once the space becomes vacant and the pre-set time delay elapses, the sensor automatically turns OFF the load. A key feature is its ability to hold the load OFF if sufficient ambient light is already present in the area. The sensor will only turn ON the load if it detects occupancy and the ambient light level falls below a user-selectable threshold. Once the load is turned ON under these conditions, it remains ON until the space is vacant, the light level rises above the setpoint, or the time delay expires.
For manual control, an ON/OFF button is provided, allowing occupants to turn the load ON or OFF as needed. When the load is manually controlled, it remains in that state (ON or OFF) as long as the sensor continues to detect motion. After no motion is detected for the duration of the time delay, the sensor reverts to automatic operation. If the load was ON, it will turn OFF. The next time occupancy is detected and the ambient light is below the set level, the sensor will automatically turn the load ON.
A useful "Walk-test" feature is integrated into the sensor. By setting the Time Delay trimpot to its fully counterclockwise position, the sensor activates a 30-second time delay and disables the Light Level function. This mode is particularly helpful for quickly verifying the sensor's coverage area.
In the event of a unit failure or if there's a need to keep the load continuously ON, a "Service function" is available. Removing the Service Jumper plug disables all automatic ON and OFF functions, allowing the load to be operated solely via the ON/OFF button.
The sensor's coverage pattern is designed to detect motion in areas up to 900 sq. ft., with a range of up to 35 feet from the sensor. It is ideally suited for spaces up to 300 sq. ft. where small amounts of motion are expected. The Fresnel lens on the sensor is a multi-segment viewing lens offering a 180° field of view. For optimal performance, the sensor requires a clear line of sight to the occupants. Obstructions like furniture blocking the sensor's lens can hinder occupancy detection.
To customize the coverage, opaque adhesive tape is provided. This tape can be used to mask specific sections of the sensor's view, effectively eliminating coverage in unwanted areas. When masking, it's important to remember that this removes bands of coverage, which should be considered during troubleshooting.
Installation involves connecting the sensor's flying leads to the existing wires in the wall box: LOAD to Red, LINE to Black, and GROUND to Green. It's crucial to ensure the ground wire is tightly secured for proper operation and to avoid bare wire showing below the connector. After installation, there's an initial warm-up period of up to a minute before the load turns ON, which occurs only during the initial power-up. The load will turn ON after this warm-up period if motion is detected.
When using the ON/OFF button, rapid successive presses can cause a delay in function. A single press yields an immediate response, but pressing the button again within 2 seconds will be ignored. It's recommended to wait at least two seconds between button presses. The sensor is designed to fit behind industry-standard decorator style wall switch cover plates.
Sensor adjustments are made via trimpots, which should not be overturned. To test operation, press the ON/OFF button to turn the load ON. The button cover can be removed to access the adjustment controls using a small, flat blade screwdriver. For sensitivity testing, after remaining still for 3 seconds, waving a hand about 12 inches from the sensor should cause the LED to blink. Typically, sensitivity is set to maximum (fully clockwise).
The light level can be set to turn OFF the controlled light when sufficient daylight or electric light is present. If this feature isn't needed, the light level can be left at maximum (fully clockwise). To enable the light level feature, the Time Delay must be set to at least 5 minutes, taking the sensor out of Walk-test mode. A recommended starting point for light level is 50% (12 o'clock position), which is approximately 100fc. After the sensor times out and lights are OFF, entering the space should keep the lights OFF. Adjustments to the light level trimpot should be made clockwise in small increments, ensuring no body shadows are cast on the sensor. After each adjustment, a 5-10 second wait is necessary to see if the lights turn ON. This process is repeated until the lights turn ON. At this setting, the load will not turn ON if ambient light levels are above the current illumination. Users can temporarily override this function by blocking incoming light with their hand, which will keep the load ON until the space is unoccupied or the light level rises above the setpoint and the time delay expires.
The time delay can be adjusted from 30 seconds (Walk-test mode) to 30 minutes in 5-minute increments.
Troubleshooting guidance is provided for common issues. If the load doesn't turn ON, checks include verifying sensitivity configuration, wire connections (especially the ground wire), and the light level trimpot (turning it fully clockwise). If the LED doesn't flash, these checks are particularly important. If the LED flashes but the load still doesn't turn ON, manual operation with the ON/OFF button and further wire checks are recommended.
If the load doesn't turn OFF, ensure the time delay is set correctly and that no motion is within the sensor's view for the duration of the delay. To quickly test, set the time delay to minimum (fully counterclockwise) and move out of the sensor's view; the load should turn OFF after 30 seconds.
For issues with sensing motion outside the desired area, the supplied opaque adhesive tape can be used to limit detection areas. Alternatively, adjusting sensitivity counterclockwise can reduce excessive sensitivity.
| Detection Method | Passive Infrared (PIR) |
|---|---|
| Voltage | 24 VDC |
| Mounting | Ceiling |
| Time Delay | Adjustable; 30 seconds to 30 minutes |
| Operating Temperature | 32°F to 120°F (0°C to 49°C) |
| Dimensions | 4.5" diameter x 1.5" depth (11.4 cm diameter x 3.8 cm depth) |
| Category | Ultrasonic Occupancy Sensor |