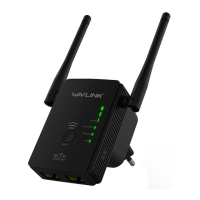
Hardware Overview
3
Configure
Default Parameters
Web Setup: http://ap.setup
Default IP: 192.168.10.1
Login Name: admin
Password: admin
LED Indicators
Wi-Fi Signal
POWER
LAN/WAN
WPS
ON: The Device is powered on
OFF: The Device is not receiving electrical power.
ON: The Ethernet port is connected.
OFF: The Ethernet port is disconnected.
Flashing: Transferring data to/from a network device
Slow Flashing: The Device is trying to connect to your PC or Phone
Fast Flashing: The Device is connecting to your AP/Router
WPS Button:
Press and hold for 2 seconds, the Device is trying to connect to your PC or Phone .
Press and hold for 6 seconds to connect to your Wi-Fi AP/Router (for Repeater Mode).
Reset Button: Press and hold for 3 seconds to Reset the Device.
Mode
AP/Router
Repeater
Wi-Fi Signal Status LED
ON
ON
ON
ON
ON
OFF OFF
OFF OFF
OFF
ON
ON
ON
ON
Flashing
Description
Wi-Fi Signal output power 100%
Better reception
signal strength 75% to 100%
Good reception
signal strength 50% to 75%
Weak reception
signal strength below 50%
Disconnected
1. Launch a web browser and type http://ap.setup
in the address field. Enter admin (all lowercase)
to login.
3. Select a Wi-Fi SSID of your router (Host Wi-Fi) and enter
the password. Either keep the same SSID as your host
Wi-Fi or create a new name for the extended network.
※Please do not install the Device in where it is heavily surrounded by things.
Please install the device as followings:
- Pictures with “ ” : Recommended
- Pictures with “ X ” : Not Recommended
Model:WL-WN578R2-A
Model:WL-WN578N2-A
2.4G SSID: WAVLINK-N
Wireless Key: no
2. Click “Wizard”.
Getting Started
OPTION ONE
Wi-Fi Repeater Mode
Using a Web Browser
Wi-Fi Signal Status LED
The Device also supports Router/AP Mode which you could also choose the mode that you prefer and configure as
the 4-step guide above.
Router Mode
Dynamic IP
PPPoE
Static IP
Enter the User Name and Password provided by your ISP, these fields are case-sensitive.
Enter the IP Address, Subnet Mask, Default Gateway and DNS provided by your ISP.
The Device gets the IP address automatically from your Router or ISP DHCP server.
AP Mode
The Device gets the IP address automatically from your Router or ISP DHCP server.
Quick Installation Guide
Router Mode and Access Point Mode
Power ON
1
switch to Repeater position
switch to ON position
1. Switch the mode selector to Repeater position.
2. Plug the Device into an electrical outlet near your
Wi-Fi router.
3. Shift the power switch to ON and wait until the
POWER LED is on and solid green.
If the login window does not pop up, please
refer to the FAQ > Q1.
4. Verify your wireless settings and click "Apply".The Wi-Fi Signal LEDs should turn on and stay solid,
indicating successful connections.
For Windows User For Mac OS X User
1. Disconnect the Ethernet (Wired) connection
from your laptop (if any).
2. Turn your laptop’s Wi-Fi ON if it is OFF.
3. Click the Wi-Fi icon on the top right corner
of the screen, and connect to the Device’s
network: WAVLINK-N.
Not connected
Connections are available
Wireless Network Connection
WAVLINK-N
Connect
Connect automatically
Connect to the Device
2
3
1.
Disconnect the Ethernet (Wired) connection
from your laptop (if any).
2. Turn your laptop’s Wi-Fi ON if it is OFF.
3. Click the Wi-Fi icon on the taskbar and connect
to the Device’s network: WAVLINK-N.
Wi-Fi:On
Turn Wi-Fi Off
WAVLINK-N
Join Other Network....
Create Network....
Open Network Preferences...
Relocate
4
1. Plug the Device into an electrical outlet about halfway between your router(Host Wi-Fi) and the Wi-Fi dead zone. The location you
choose must be within the range of your existing host Wi-Fi.
2. Wait until the WLAN LEDs are ON. If the signal is weak, relocate it closer to the router to achieve a good (or better) signal quality.
Host Wi-Fi
WLAN WLAN
Tips: Use your phone to find the ideal location for the Device.
If your phone’s Wi-Fi signal(received from our router) is higher
than 3 levels, it is the ideal spot to install the Device. If not, we
suggest you to change the location for better Wi-Fi signal.
Ideal Location
WLAN WLAN
Flashing
Too Far Away
Wi-Fi Range Extender
English
login
This Device
Repeater
Router
Speed
0 KB/S 1 Disconnet
Clients Internet
Device Information
WAN Type Repeater
192.168.10.1
192.168.10.1
0.0.0.0
0.0.0.0
82:3F:5D:09:EA:62
Wi-Fi SSID
Channel
Connect to
Status
Up Time
Firmware
Wireless-N
11
NONE
Disconnect
00h:10m
M78N_V3130.1121
Device IP
Gateway
DNS1
DNS2
WAN MAC
Wi-Fi Setup
Status
Wizard
Repeater Wizard
Status Wizard Wi-Fi Setup
Connect
Connect to:
Wi-Fi Password:
Repeater SSID:
Wavlink_530
Wavlink_530
********
Wavlink_Extend
Wireless-562
Wireless-N
Wireless-112
Wireless-MO
Select a Wi-Fi Manually enter
Host Wi-Fi Name
Extended Network Name
Host Wi-Fi Password