5
STEP 3
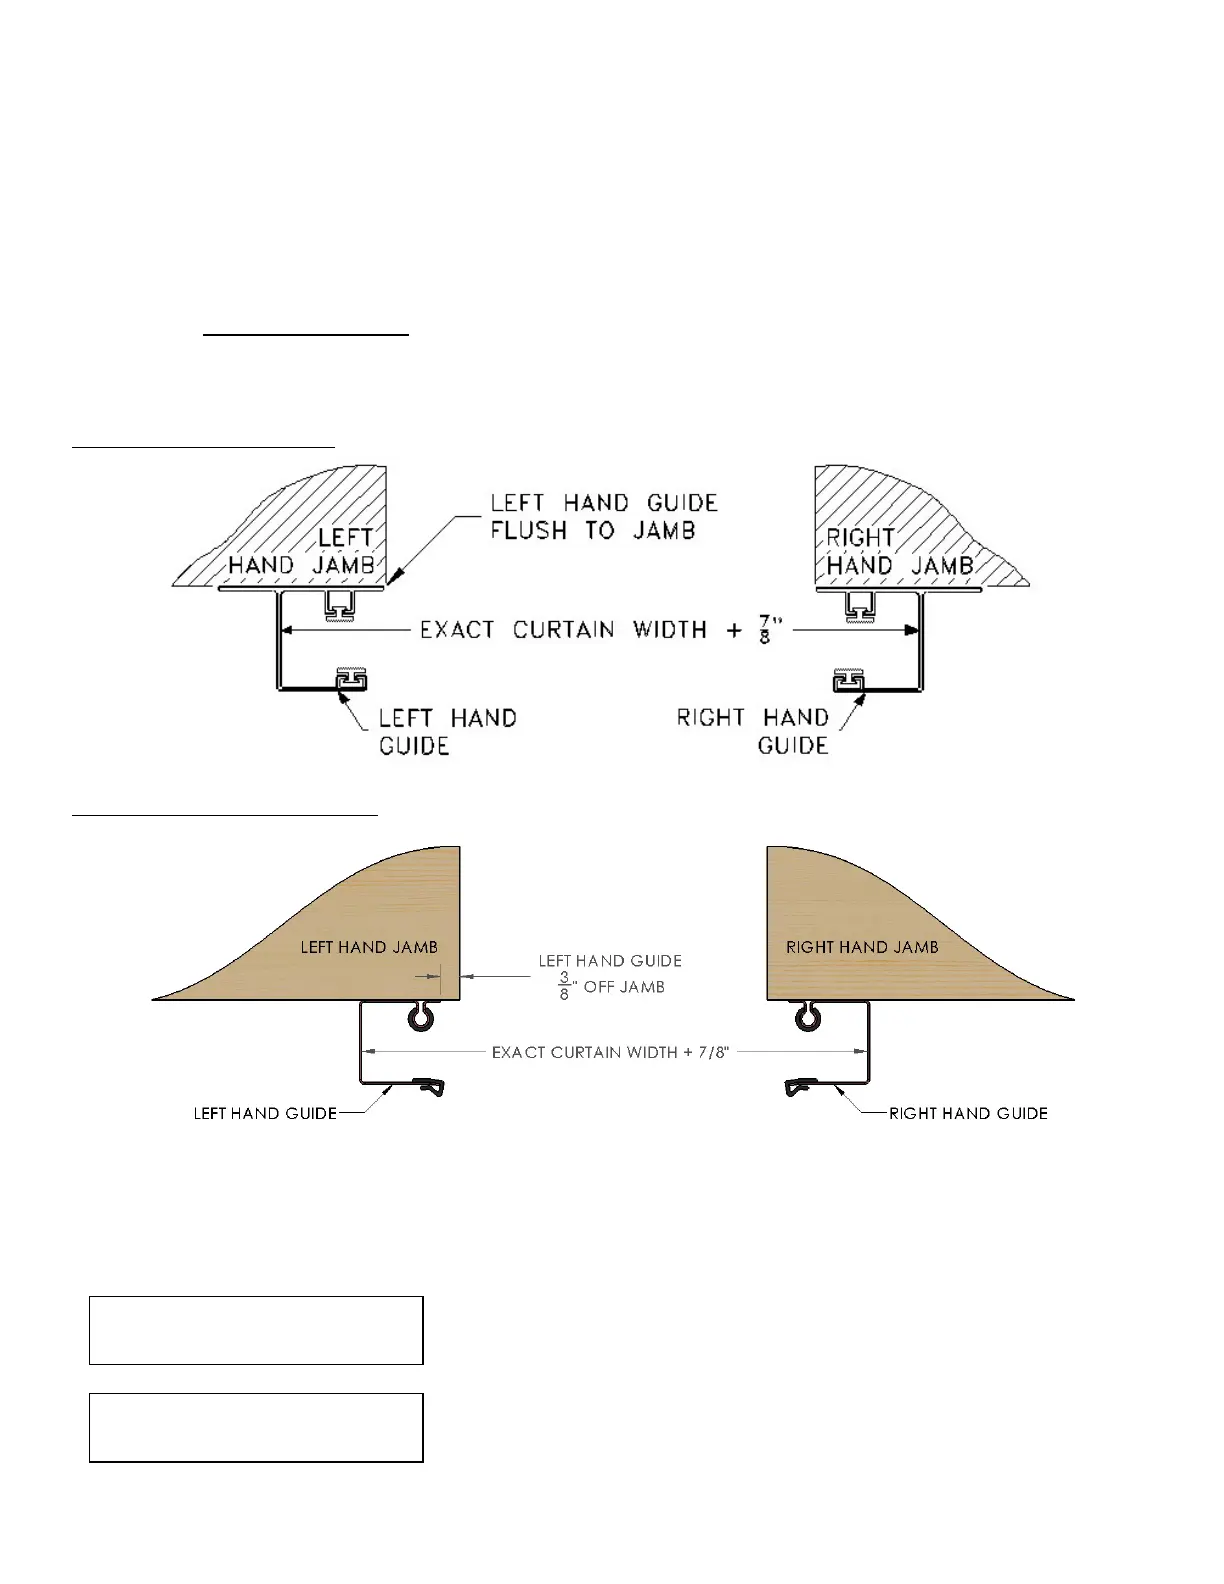
INSTALLING GUIDES
1) DS-50: Position the left hand guide flush to jamb and loosely clamp in place. Using a level, adjust the guide so
that it is plumb and tighten the clamp.
2) DS-75/100: Position the left hand guide 3/8” from the edge of the left hand jamb and loosely clamp in place.
Using a level, adjust the guide so that it is plumb and tighten the clamp.
Measure the exact curtain width of the door and add 7/8” to obtain the inside of guide to inside of guide
measurement. Use this measurement to locate the right hand guide. Loosely clamp the right hand guide to the jamb.
Plumb the guide and tighten the clamp.
DS-50 guide configuration:
DS-75/100 guide configuration:
Using a string and level, ensure that the tips of the left and right hand guides are level to each other. Shim guides as
needed. Double check the inside of guide to inside of guide measurement at top, middle, and bottom to ensure that
the guides are plumb and parallel. Fasten both guides to the jambs using the fasteners provided (See Fastener Table
in the front of this manual).
Inside of guide to inside of guide measurement must be held
to ensure proper door operation.
Use of any other fasteners than those provided must be
approved by Wayne-Dalton and cannot be of lesser diameter
or grade.