EasyManua.ls Logo

Weather Guard 237 User Manual

Weather Guard 237
4 pages
To Next Page IconTo Next Page
Page #1 background imageLoading...
Page #1 background image
ASSEMBLY AND INSTALLATION INSTRUCTIONS
Aluminum Conduit Carrier - Model 237
PARTS LIST
1- Front Body
1- Rear Body Assembly
1- Door Assembly
1- Door Stop
Weatherstripping (bulk)
2- "U" Clamps
4- Clamp Brackets
TOOLS REQUIRED
· 7/16" Open or Box End Wrench (2)
· 3/8" Open or Box End Wrench
· Razor knife or scissors
WARNING
This product is only intended for, and only safe for, storing and
transporting tubing, pipe and conduit. Any modifications made
to this product, or use of this product for any other purpose than
its intended use, could create a hazardous condition that can
cause serious personal injury or property damage.
IMPORTANT
BEFORE YOU BEGIN
Read these instructions and
warnings completely before
installation.
BOLT KIT
Bolt Kit #32-0237 is provided with
your Conduit Carrier. Check this
bolt kit to be sure the following
parts are included:
Quan. Description
4 #12-24 Nylon Lock Nuts
(black dichromate)
10 1/4-20 x 3/4" Hex Hd. Bolt
3 1/4-20 x 5/8" Hex Hd. Bolt
13 1/4-20 Nylon Lock Nuts
20 1/4" Flat Washers
Question and Answer IconNeed help?

Do you have a question about the Weather Guard 237 and is the answer not in the manual?

Weather Guard 237 Specifications

General IconGeneral
BrandWeather Guard
Model237
CategoryAutomobile Accessories
LanguageEnglish

Summary

Important Safety and Preparation

Assembly Instructions

Weatherstrip Rear Body Assembly

Cut and adhere weatherstripping over the door stop mounting holes on the rear body assembly.

Attach Door Stop and Door to Body

Place and loosely fasten the door stop and door to the rear body assembly, then tighten bolts.

Weatherstrip Door Assembly Interior

Adhere weatherstripping inside the door assembly where it touches the rear body assembly.

Weatherstrip Front Body Flanges

Cut and adhere weatherstripping to fit the attaching flanges on the front body.

Connect Front and Rear Body Sections

Fasten the front body to the rear body assembly, poking bolts through the adhered weatherstripping.

Position Unit on Roof Rack

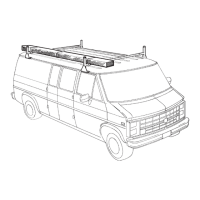
Place the assembled unit on the vehicle roof rack, allowing for rear door swing-up clearance.

Weatherstrip Carrier for Crossmembers

Adhere weatherstripping to the carrier underside where it contacted the van rack crossmembers.

Fasten Carrier to Vehicle Crossmembers

Install 'U' clamps and clamp brackets to secure the carrier to the vehicle crossmembers.

Important Notice and Disclaimer