10. Secure the electric cable to the handle assembly, using the cable clips provided. They are placed on the
right side of the handle assembly, placing the leg of the cable clip into the two pre- drilled holes on the
inner side of the handle assembly.
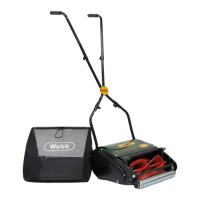
FITTING THE COLLECTOR
1. Slide the collector handle into the hard top of the collector, placing the tab in first. Then apply downwards
pressure to the handle, to ensure the two prongs secure into the hard top of the collector. Position the
collector on a hard surface to assist with the handle fitment.
2. Ensure the lower mesh of the collector is fully open and away from the collector top.
3. Lift the rear grass flap.
4. Secure the collector to the machine, ensuring the hooks are firmly housed onto the machine deck
HANDLES
1. The lower handles will arrive inserted into the deck of the machine. Rotate the handle up away from the
lawnmower, ensuring the electrical cables are not trapped of crimped.
2. Secure the lower handle by folding the quick release handle upwards and repeat on both sides.
3. If the quick release handle is too tight to lift and secure, rotate anti-clockwise to loosen.
4. If the quick release handle is too loose to secure, rotate clockwise to tighten.
5. Secure the upper handles to the lower handle using the tri-knob, bolt and quick release handle.
6. Select the required height for the user and secure, ensuring the handle assembly is straight and in line
with one another.
7. Ensure the electric cables run down the outside of the handle assembly.
8. If the quick release handle is too tight to lift and secure, rotate anti-clockwise to loosen.
9. If the quick release handle is too loose to secure, rotate clockwise to tighten.