Do you have a question about the Webb WER40HP and is the answer not in the manual?
Lists all components included in the mower package with corresponding images for identification.
Detailed illustration of the lawnmower with numbered parts and their corresponding names.
Step-by-step guide for assembling the lower and upper handle bars and attaching the safety cable.
Instructions for attaching the drive cable (WER40SP) and the grass catcher to the mower.
Essential procedures for filling the engine oil sump and fuel tank with unleaded petrol before use.
Guides the user through the correct process of starting the lawnmower engine, including priming and cord pulling.
Instructions on attaching the grass catcher, adjusting cutting height, cleaning, storing, and transporting the mower.
Crucial safety guidelines and precautions to ensure safe operation and prevent accidents while using the lawnmower.
Summary of recommended maintenance tasks for the mower, including frequency for cutting system, spark plug, and air filter.
Detailed procedures for blade maintenance, removing, sharpening, mounting, and servicing the spark plug.
Instructions for cleaning and replacing the air filter, and procedures for checking and changing the engine oil.
Guidance on adjusting the transmission cable tension for optimal mower performance and drive system longevity.
Details the technical specifications of the WER40HP and WER40SP lawnmowers, including dimensions and capacities.
A guide to identifying and resolving common issues the lawnmower may encounter, with suggested remedies.
Formal declaration by the manufacturer that the WER40HP lawnmower complies with relevant EU directives.
Formal declaration by the manufacturer that the WER40SP lawnmower complies with relevant EU directives.
Information on the service book's role in warranty claims and machine maintenance records, and warranty terms.
Pages dedicated to recording service dates and dealer stamps for warranty validation and maintenance history.
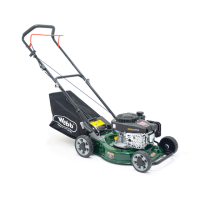
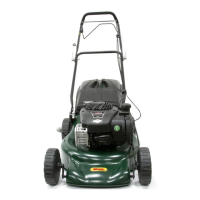
This document is an operator's manual for the Webb 40cm Push & Self Propelled Steel Deck Lawnmower, models WER40HP and WER40SP. It provides comprehensive instructions for assembly, operation, maintenance, and safety, ensuring users can effectively and safely utilize their lawnmower.
The manual begins with a table of contents, outlining sections such as Box Contents, Product Diagram, Assembly Guidelines, Before You Begin / Starting The Engine, Using Your Mower / Safety Tips, Basic Maintenance, Technical Specification, Declaration Of Conformity, and Warranty. Contact information for spares and support is also provided, along with the Webb Garden Power website for more information on their product range.
The "Box Contents" section details all the items included with the mower, such as the petrol engine mower, grass collector, spark plug spanner, instruction manual, spanners, cable ties, flash nuts, bolt & nut assembly, and spring cord guide. Each item is clearly listed and accompanied by a visual reference.
The "Product Diagram" section provides a detailed illustration of the lawnmower, labeling its key components. These include the Brake (OPC) Lever, Brake Cable, Fuel tank, Fuel Tank Cap, Primer, Spark Plug, Exhaust, Oil Gauge & Tube assembly, Height Adjustment Lever, Recoil starter, Grass Collection Bag, and Drive Lever (for WER40SP Only). This visual guide helps users identify and understand the function of each part.
"Assembly Guidelines" walk the user through the initial setup of the lawnmower. This involves attaching the lower and upper handle bars using the provided bolts and nuts. Specific instructions are given for fitting the flash nuts, spring cord guide, and bolt on both sides of the upper handle bar. The process of attaching the safety (OPC) cable is detailed, including pulling the brake lever, inserting the cable end, and replacing the lever. For the WER40SP model, instructions for attaching the drive cable are also included. The manual then guides the user on how to fit the cable ties to secure the cables and how to locate and prepare the starter cord by rotating the string clockwise around the spring. Finally, it explains how to attach the grass catcher by lifting the rear flap and hooking the catcher onto the bar.
The "Before You Begin / Starting The Engine" section emphasizes critical pre-operation procedures. A warning highlights that these steps must be completed before starting the engine. Users are instructed to fill the oil sump with 400ml of SAE30 or 10W/30 lawnmower grade engine oil, with clear visual aids showing how to remove the dipstick and pour the oil. Regular oil level checks are advised, ensuring the level remains between the min and max marks on the dipstick. The manual also covers filling the fuel tank with unleaded petrol, stressing the importance of using fresh fuel (less than 4-6 weeks old) and leaving space for expansion. Safety precautions regarding petrol handling are highlighted due to its flammability.
To start the engine, users are instructed to place the mower on a safe, flat area away from fuel. The red primer button should be pushed three times, though this is usually unnecessary for a warm engine. A warning is given against over-priming, which can flood the carburetor. The final step involves firmly holding the brake handle and pulling the recoil starter cord vigorously until the engine starts, then guiding the cord back to its rest position.
"Using Your Mower / Safety Tips" provides guidance on operating the lawnmower. It explains how to attach the grass catcher by lifting the rear flap and sliding the catcher into position. Adjusting the cutting height is detailed, advising users to turn off the mower and lift it to move the Cut Height Adjustment Lever. The lever can be moved outwards to release it, then forward to increase height or backward to reduce it, ensuring it fits snugly into its serrated holder. For mowing, users are instructed to start the mower, keep hold of the Safety (OPC) Lever, and for the WER40SP, move the Drive Lever up and forward to engage self-propulsion. The manual suggests pushing the mower with the drive disengaged for more precise handling. After use, the engine should be turned off before emptying the grass catcher.
Safety tips are extensively covered, including inspecting the mower before use, ensuring good footing, keeping hands and feet away from moving parts, clearing the mowing area of debris, maintaining a safe distance from people and animals, and never putting hands or feet under the chassis while the engine is running. It also advises against opening the fuel filler cap or filling the tank when the engine is hot, and to securely tighten the cap after filling. Specific instructions are given for mowing on slopes (across, not up and down), avoiding very steep slopes, and refraining from mowing in rain or poor light. Users are warned not to operate the machine by pulling it towards them and to avoid filling the tank or starting the mower indoors due to poisonous exhaust gases and flammable petrol fumes. Altering engine governing settings or over-revving is discouraged. Smoking while handling fuel or operating the machine is strictly prohibited, and the mower should never be stored near naked flames. The importance of using fresh, unleaded petrol and cleaning up spills is reiterated. For transport, the fuel tank must be empty. Users are reminded that the exhaust and other parts get very hot. The engine should be turned off before emptying the grass catcher or clearing grass from the rear flap. Fuel and oil should be stored in a cool, well-ventilated place away from direct sunlight and heat sources. Wearing ear protectors, safety goggles, and safety boots is recommended. When inspecting the underside, the mower should only be tilted to the right or back to prevent oil leakage. Finally, all warranty-related servicing and repair work must be carried out by an Authorized Dealer.
"Basic Maintenance" outlines a schedule for regular upkeep. This includes checking the cutting system before each mowing session, sharpening and balancing the blade every 25 hours or annually, checking and cleaning the spark plug electrodes every 25 hours or annually, checking and cleaning the air filter every 25 hours or annually, and checking, draining, and renewing the oil every 25 hours or annually. Detailed instructions are provided for each task. For the cutting system, users are advised to check for damage or wear on the blade, bolts, and drive shaft, replacing damaged parts with genuine Webb components. Excessive vibration is noted as an indicator of a cutting system problem. Removing the blade requires protective gloves, disconnecting the spark plug cap, tilting the mower, and using a spanner to loosen the blade screw. Sharpening and balancing should be done by a specialist. Mounting the blade involves ensuring all components are present, clean, and correctly aligned, with the cooling fins facing the engine, and then tightening the screws.
Spark plug maintenance involves checking it after the first five hours and then every 25 hours. Users are instructed to remove the spark plug cap and then the spark plug with the provided wrench, clean carbon deposits with a copper brush, check the electrode gap (approx. 0.7 mm), and replace or tighten the spark plug. If worn or damaged, it should be replaced with a new one of the same type.
Air filter maintenance is crucial for engine performance and life. Users are advised to check and clean the air filter every 25 hours or more often in dusty conditions. This involves removing the cover and foam cartridge, cleaning the cartridge in warm soapy water, rinsing, squeezing dry, and then applying a uniform layer of clean engine oil. The filter should be reinserted correctly, and damaged cartridges replaced.
Adjusting the transmission cable (for WER40SP) ensures proper drive system function. The manual explains how to adjust the cable tension by increasing or reducing the length of the adjustment device using a spanner, then securing it with lock nuts.
Checking and changing the oil are also detailed. Users should position the mower on a level surface, unscrew the dipstick, wipe it clean, and reinsert it without screwing it in to check the oil level. The oil level must be between the min and max marks. Oil should be added if necessary, and running the engine without sufficient oil can cause serious damage. The first oil change is recommended after five hours, then every 25 hours or annually. To change the oil, the engine should be warmed up, the spark plug cap removed, the oil level dipstick unscrewed, and a container placed beneath the oil filler pipe. The mower is then tilted to drain the oil completely, after which it is returned to its wheels and refilled with new oil.
The "Technical Specification" section provides a detailed breakdown of the mower's characteristics, including engine type, displacement, maximum power, tank capacity, engine oil capacity, maximum operating speed, cutting width, adjustable cutting heights, grass collection capacity, noise level, chassis type, and dimensions.
"Fast Trouble Shooting" offers a practical guide to diagnosing and resolving common issues. It lists various problems such as the engine not starting, engine stopping often, engine losing power, mower vibrating too much, and poor cutting/catching. For each problem, likely causes are identified, along with suggested remedies. For example, if the engine doesn't start, remedies include checking the throttle lever setting, fuel level, spark plug condition, and connections. If the engine loses power, solutions include cleaning the air filter, adjusting cutting height, and clearing fuel tank vent holes.
The manual concludes with a "Service Book" section, which includes a warranty statement, period of warranty, and items not covered by the warranty. It also provides space for dealers to stamp and date services, which is required to validate the second-year warranty. Registration information for the machine is also included, with instructions on how to complete the product label details and personal information. This section emphasizes the importance of regular maintenance for safe and efficient operation and to reduce environmental impact. It also provides advice on fuel storage, recommending the use of fresh unleaded petrol and a fuel stabilizer if storing fuel for more than 30 days. Proper storage of the machine in a dry, well-ventilated area away from flames, sparks, or heat sources is also advised.
| Cutting Width | 40 cm |
|---|---|
| Weight | 28 kg |
| Grass Collection | 50 L |
| Wheel Size | 7 inches |
| Engine Type | Petrol |