ASSEMBLY
Remove the machine and contents from the carton. Be sure the carton is empty before discarding.
If you require any assistance with regards to the contents or operation of your machine, please call our
Customer Service Team on 01793 333212 or email customerservice@webbgardenpower.co.uk
Opening hours weekdays: February to October 8:30am - 5:30pm / November to January 8:30am -
5:00pm (Closed Bank Holidays)
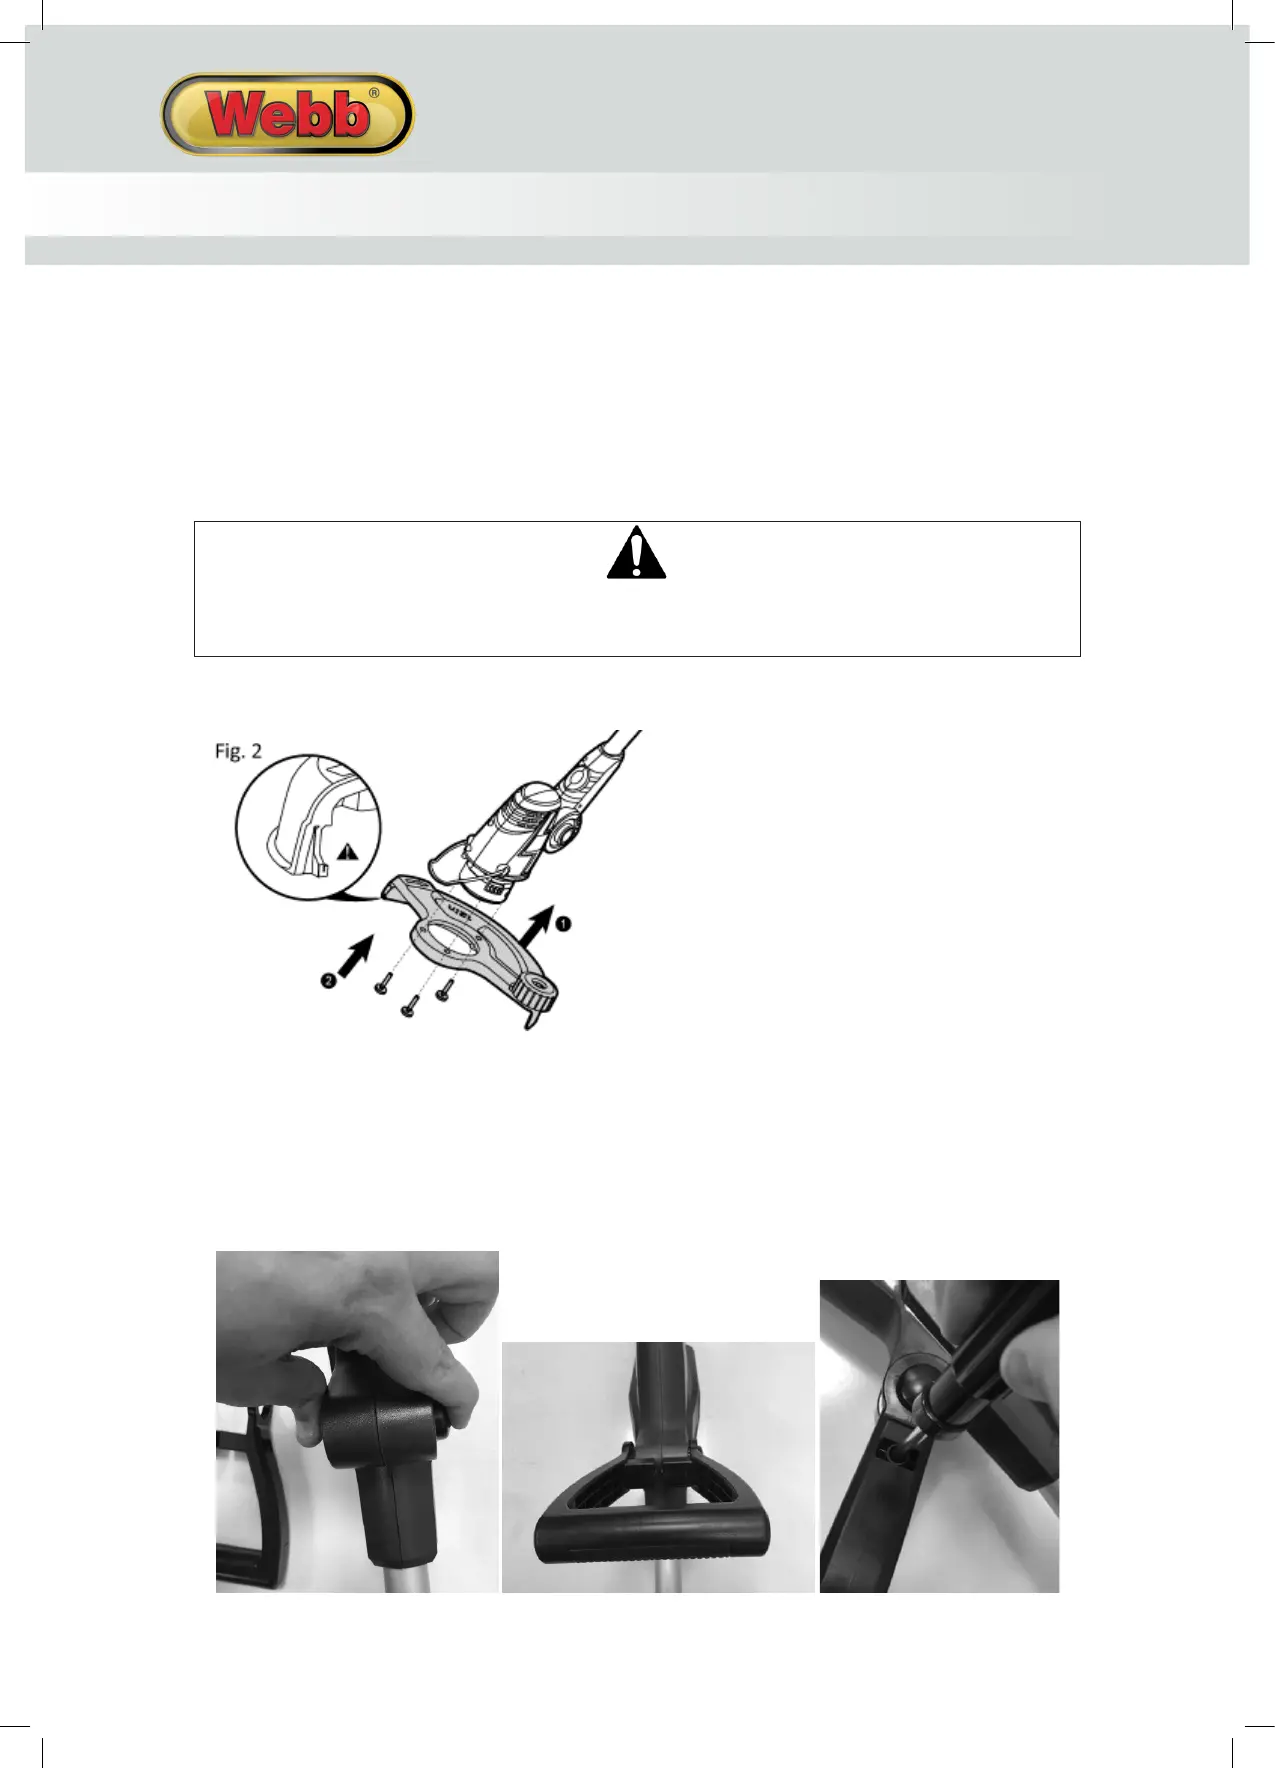
PROTECTIVE GUARD
CAUTION
Risk of injury! On the underside of the protective guard there is a sharp blade designed to cut the
thread. Remove the transportation protection before operating.
Place protective guard in position over the spool and align the three fixing holes in the guard, with those
in the main body. Affix with three fixing screws provided and tighten until secure. Remove any
transportation protection from the cutting blade.
FRONT HANDLE
Press in and hold the locking buttons. Slide the front handle onto the product as illustrated.
Release the locking buttons. Tighten the handle into position with the remaining fixing screw, ensuring
the left and right sections of the handle are secured.
PLANT GUARD
Only follow the below action if the plant guard is not fitted to the machine.
Align the plant guard with the two fixing holes on the front of the motor assembly. Prize apart the two
prongs of the plant guard and slide them into the fixing holes.