Initial set up - Preparation
Before you start commissioning the WP-C199W4 surveillance camera,
please consider the following:
1) The WP-C199W4 surveillance camera must rst be connected to the Internet using
the included RJ45 LAN cable before you can operate the surveillance camera from
your home WiFi network.
2) You should be near the router when you start the initial operation.
3) Screw the WiFi antenna rmly to the gold screw of the surveillance camera before
commissioning.
4) Make sure you have disabled the 5Ghz WiFi network in the router settings.
5) Your smartphone or tablet must be logged on to the same WiFi network as the
surveillance camera.
Initial set-up WP-C199W4 – Outdoor Surveillance Camera
After all preparations have been completed, you can start commissioning the
surveillance camera/s:
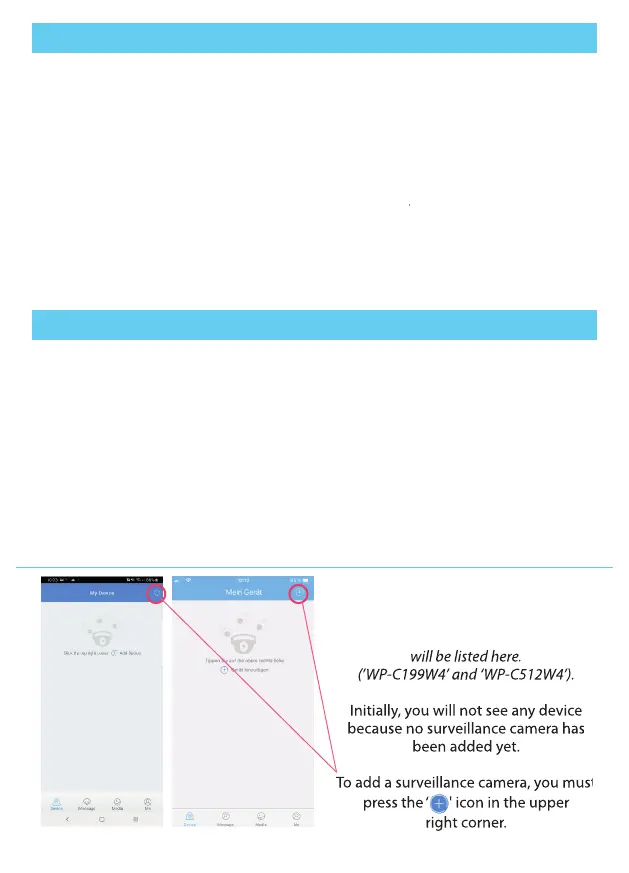
After you sign in to the ADCloud app,
you'll be redirected directly to your device
list. All your active surveillance cameras
will be listed here.
(’WP-C199W4’ and ‘WP-C512W4’).
Initially, you will not see any device
because no surveillance camera has
been added yet.
To add a surveillance camera, you must
press the ‘ ' icon in the upper
right corner.
Android
Apple iOS
(’WP-C199W4’ and ‘WP-C512W4’).
Initially, you will not see any device
because no surveillance camera has
To add a surveillance camera, you must
press the ‘ ' icon in the upper
1) Connect the surveillance camera to the power supply using the included power
supply. The startup process takes about 40 seconds.
2) The boot process is complete after approximately 40 seconds. Now connect the
surveillance camera to your router using the included LAN cable.
3) A green LED on the LAN cable connector of the surveillance camera starts ashing.
4) Now go to the ADCloud app and follow these steps to connect your surveillance
camera/s to your user account in the App.
7
 Loading...