8
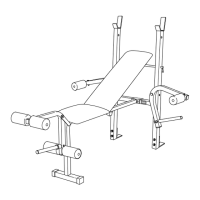
6. Orient the Left Dip Arm (4) as shown, so that the
large hole is on top. Attach the Left Dip Arm to
the left Upright (2) with a 3/8” x 2.85” Bolt (23),
two 3/8” Washers (18), and a 3/8” Nylon Locknut
(19). Do not tighten the Nylon Locknut yet.
Attach the Left Dip Arm (4) to the left Upright
Base (3) with two 3/8” x 3/4” Bolts (22) and two
3/8” Washers (18). Do not tighten the Bolts yet.
Repeat this step with the Right Dip Arm (not
shown).
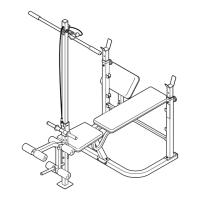
9. Attach a Handle (8) to each Dip Arm (4, 25) with
a 3/8” x 3/4” Bolt (22) and a 3/8” Washer (18).
Slide a Handgrip (12) onto each Handle.
Slide a Bushing (13) and a Handgrip (12) onto
each Dip Arm (4, 25).
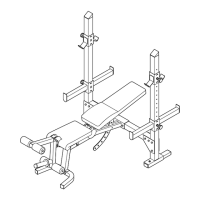
8. Slide a Handgrip (12) onto each end of the Pull-
up Bar (1). Attach the Pull-up Bar to the Uprights
(2) with two 3/8” x 2” Bolts (21) and two 3/8”
Washers (18).
Tighten all of the Bolts and Nylon locknuts
used in steps 2–8.
12
12
2
1
2
21
21
18
18
4
Large Hole
19
18
18
18
23
22
22
2
3
6
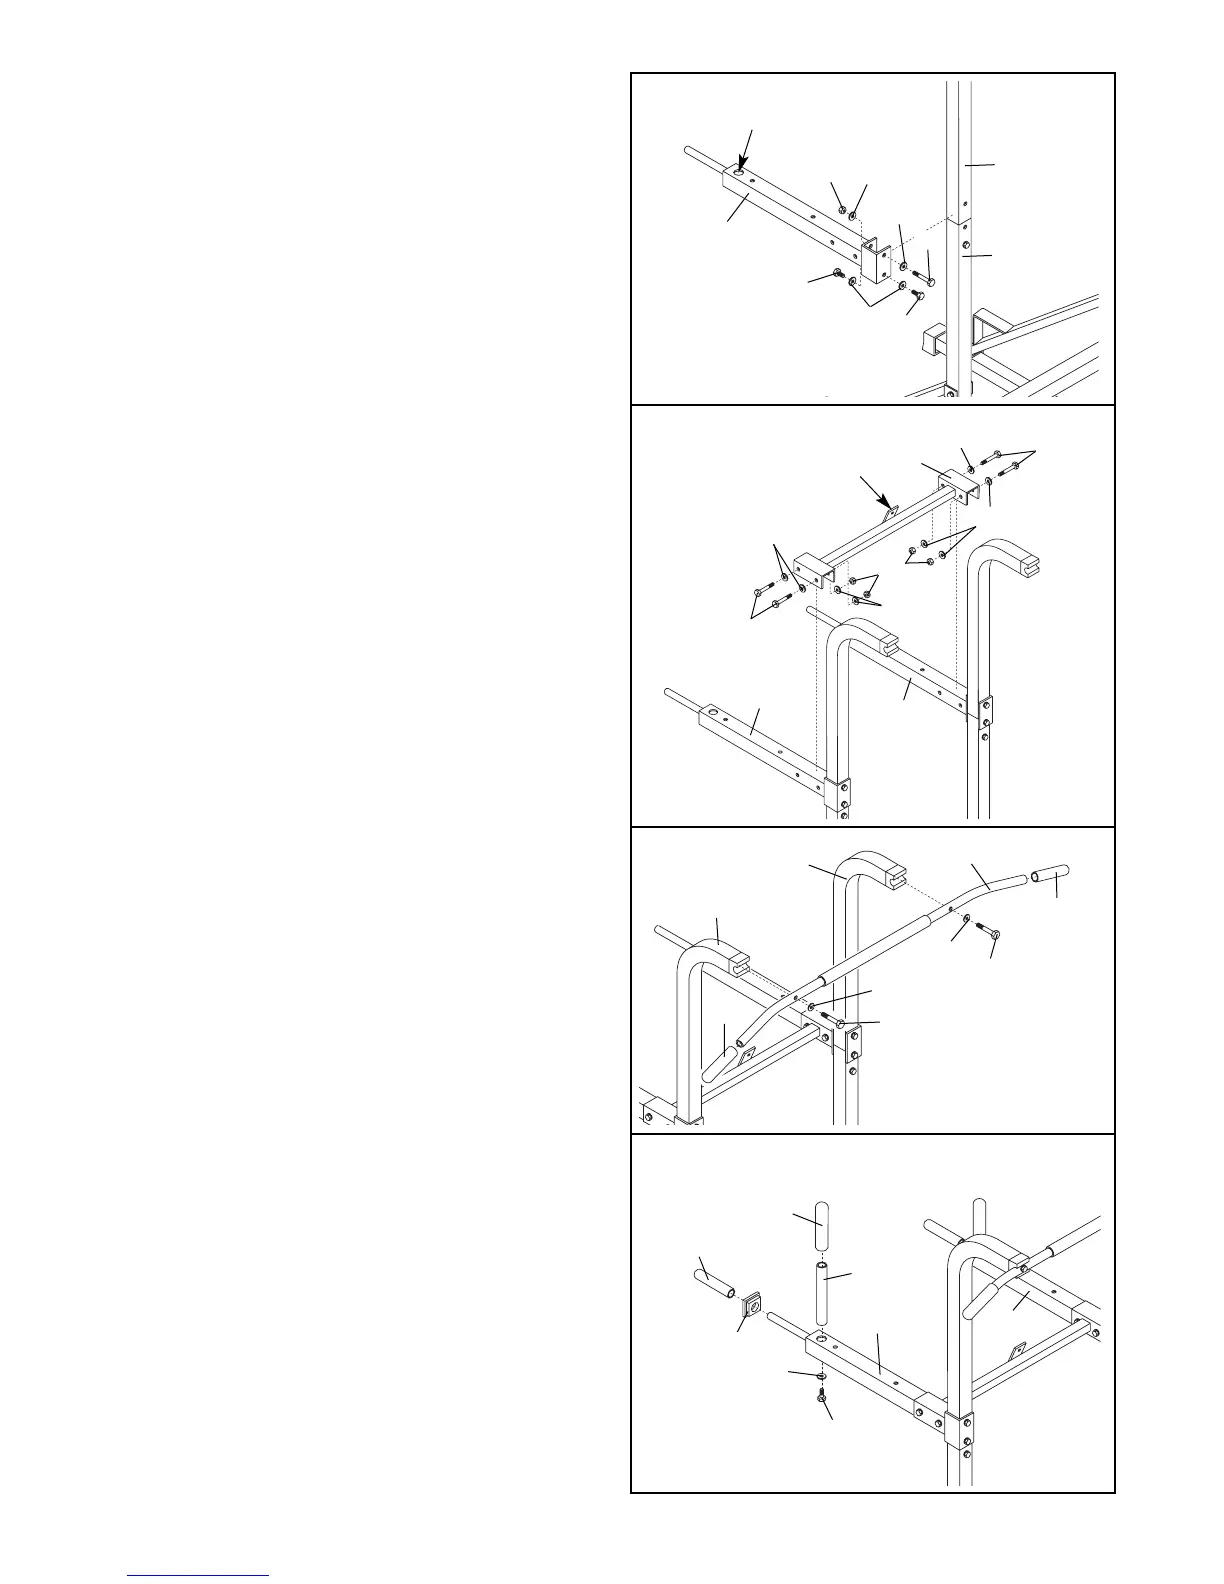
7. Orient the Top Crossbar (6) with the bracket on
the side shown. Attach the Top Crossbar to each
Dip Arm (4, 25) with two 3/8” x 2.85” Bolts (23),
four 3/8” Washers (18), and two 3/8” Nylon
Locknuts (19). Do not tighten the Nylon
Locknuts yet.
6
18
19
23
18
Bracket
23
18
18
7
8
9
4
25
22
25
4
18
12
8
12
13