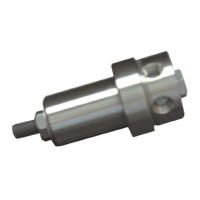
The Welker Instrument Regulators (IR-1, IR-2, IR-4, and IR-6 series) are designed to provide a regulated output pressure for devices that cannot withstand high pressures. These regulators reduce pressure as the fluid travels from the inlet port to the outlet port. The desired output pressure is set by tightening an adjusting screw, which compresses a spring. This spring, in turn, pushes down on either a piston or a diaphragm, which then acts against a poppet. When high pressure is applied to the regulator's inlet port, the poppet moves up, allowing only the set amount of pressure to pass through the device.
In addition to the inlet port, the instrument regulator features three other common ports on the body: the gauge, relief, and outlet ports, all clearly marked. The IR-1, IR-2, and IR-6 series regulators are equipped with a piston assembly, while the IR-4 series uses a diaphragm. An exception is the Model IR-1T, which features a diaphragm despite being bolted together.
Important Technical Specifications:
- Products: Suitable for gaseous fluids or liquids compatible with the materials of construction.
- Materials of Construction: Primarily 316 Stainless Steel, Viton®, PTFE, Buna-N®, and Kel-f®. Other materials are available upon request.
- Connections:
- Sample Outlet Connection: 1/4" NPT (others available)
- Sample Inlet Connection: 1/4" NPT (others available)
- Auxiliary Connections: 1/4" NPT
- Maximum Allowable Inlet Pressure:
- IR-6, IR-2, IR-1: 5,000 psi (344 bar) at -20°F to 100°F (-29°C to 37°C)
- IR-4: 3,600 psi (248 bar) at -20°F to 100°F (-29°C to 37°C)
- Output Range:
- IR-6: 250-1,500 psi (17-103 bar) at -20°F to 100°F (-29°C to 37°C)
- IR-2: 0-500 psi (0-34 bar) at -20°F to 100°F (-29°C to 37°C)
- IR-1: 0-200 psi (0-13 bar) at -20°F to 100°F (-29°C to 37°C)
- IR-4: 0-200 psi (0-13 bar) at -20°F to 100°F (-29°C to 37°C)
Usage Features:
- Installation:
- Before installation, it is crucial to read the Installation, Operation, and Maintenance (IOM) Manual to fully understand the product's application and performance.
- Upon unpacking, inspect the unit for any damages incurred during shipment. Claims for shipping damages must be initiated by the receiver with the shipping carrier.
- When sealing fittings with PTFE tape, ensure proper sealing instructions for the specific tape are followed.
- Connect a pressure gauge to the gauge port and a relief valve to the relief valve port.
- Connect the inlet supply to the regulator's inlet port using appropriate tubing.
- WARNING: Do not turn on the inlet supply before setting the relief valve, as this could lead to over-pressurization of the regulator.
- Welker recommends installing an upstream filter if the fluid contains solid particles; this filter should be connected to the regulator inlet.
- Connect the regulator's outlet port to the instrument's inlet using tubing.
- Setting the Regulator:
- Use a safe auxiliary gas supply to set the relief valve to the proper pressure, referring to the relief valve's IOM.
- WARNING: If using the regulator itself to set the relief, do not exceed the device's output pressure range. The manufacturer can preset the relief prior to shipment if requested.
- Turn on the inlet supply to pressurize the regulator inlet.
- Adjust the output pressure by loosening or tightening the adjusting screw until the gauge displays the desired pressure.
- Once the desired pressure is set, tighten the nut on the adjusting screw to secure it.
- Check the entire system for leaks before putting the regulator into operation.
Maintenance Features:
- General Maintenance:
- Before performing any maintenance or disassembly, it is advisable to have a repair kit readily available in case of unexpected wear or faulty seals.
- All maintenance and cleaning should be performed on a smooth, clean surface.
- NOTE: Welker recommends annual maintenance under normal operating conditions. For severe service, dirty conditions, excessive cycling, or other unique applications, a more frequent maintenance schedule may be necessary.
- NOTE: New seals in spare parts kits are not lubricated. They should be lightly coated with lubrication grease (Dow Corning 111 [DC 111] or equivalent) before installation to facilitate assembly and reduce the risk of damage.
- CAUTION: Maintenance on the instrument regulator should only be performed after the regulator has been isolated from all pressure.
- Recommended Tools:
- 3/16" Allen wrench
- 1/4" Allen wrench
- 6" adjustable wrench
- Small screwdriver
- Small, pointed instrument
- Upper Housing Maintenance:
- Turn off the inlet supply pressure and disconnect the inlet and outlet lines from the regulator.
- Loosen the adjusting nut and adjusting screw to relieve spring tension.
- Piston Assembly Disassembly (for bolted regulators):
- Remove the eight socket head screws and the spring housing.
- Remove the top spring guide and the spring.
- Carefully remove the piston without scratching it.
- Replace both O-ring seals in the piston body.
- Inspect the sealing surfaces of the piston for scratches.
- Push the piston back into place.
- Diaphragm Assembly Disassembly:
- Unscrew and remove the spring housing.
- Remove the top spring guide and the spring.
- Remove the bottom spring guide.
- Remove the diaphragm, inspect for wear, and replace if necessary.
- Set the diaphragm back into place.
- Set the bottom spring guide back into place on top of the diaphragm.
- Reassemble the spring, top spring guide, and spring housing. For IR-4 series, hand-tighten the housing. For IR-1, 2, and 6 series, cross-bolt the eight socket head screws.
- Lower Housing Maintenance:
- Unscrew the flow ring from the regulator body.
- Replace the seal on the flow ring.
- Remove the poppet spring and the poppet.
- Examine the poppet and poppet spring; replace if necessary.
- Use a pointed instrument to carefully remove the seat from the body.
- Examine the seat and replace if necessary.
- Set the new or inspected seat back into place.
- NOTE: Debris or scratches on either the poppet or seat will prevent positive shut-off of the regulator.
- Guide the poppet into the seat.
- Reattach the poppet spring and flow ring.
- Tighten the flow ring securely.
- The unit is now ready for reinstallation.