PHONE: (269)345.1132 • FAX: (269) 345-0095
e
saw
OPERATING & MAINTENANCE
INSTRUCTIONS
MODEL 8
SPECIFICATIONS SEPTEMBER, 1971
Capacity:
Rectangular................................................... l6” (w) x 9" (h)
Rounds ....................................................................... 9" dia.
45 °Angle ........................................... 8-3/4" (w) x 9" (h)
With special guides .................................. 23" (w) x 9" (h)
or 24" (w) x
8" (h)
Selective
blade speeds,
f
p rn 50, 100, 175, 275
Motor.. .......................................................................... 1 H.P.
Drive. .......................................................................... "V" belt
Blade size ........................................... 11' 6" x 3/4" x .032"
Swivel vise ............................................................. to
45
0
Height to top of
bed .................................................. 25-1/2”
Width of bed .......................................................... 10-1/4"
Floor space ............................................................... 24" x 72"
Approx. shipping weight ............................................ 590 lbs.
with wet
cutting system ....................................... 650 lbs.
PLEASE READ THIS MANUAL CAREFULLY
IT WAS PREPARED TO HELP YOU
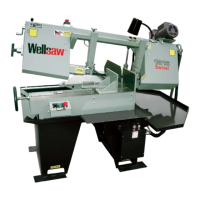
The Model 8 WELLS METAL CUTTING BAND
SAW was designed for efficient performance, and
with proper care will give you many years of de-
pendable service.
After final assembly, each saw is inspected and
subjected to a test run; no adjustment should be
necessary.
This manual has been prepared to assist you in the
proper operation and maintenance of your new
WELLS Metal Cutting Band Saw. If you should desire
additional information or assistance, we suggest you
contact your dealer's service representative.
INSTALLATION
Upon receipt of machine, uncrate and check all
parts. Report to your carrier any damage to machine
and file Proof of Loss Claim with same.
Be sure motor specifications correspond with your power
line.
Place machine so that each leg is carrying its share of the
load.
Each machine is shipped with one all-purpose blade
installed and ready for use.
SECTION I — OPERATING INSTRUCTIONS
CUTTING TIPS
1. For longer blade life, start each cut carefully.
2. For new blades, reduce feeding pressure on first two
cuts.
3. Keep blade guides as close to vise jaws as pos-
sible.
4. Make sure all four legs are in solid contact with
floor.
PLACING BLADE ON SAW
1. Raise frame to extreme height.
2. Remove idle wheel guard.
3. Remove blade guard on high side of frame.
4. Loosen blade take up screw and remove old
blade.
5. Uncoil new blade. Make certain that the blade
teeth point in direction of blade travel, which is
toward the motor. If not, turn the blade inside
out to have proper tooth direction.
6. Place new blade between the bearings of the roller
guides and on band wheels.