3. Tighten the tip release screw fully by rotating in a clockwise direction.
Operation
Warning: Thoroughly read and understand all instructions before using this product.
Save this manual.
Warning: Operating time at no more than 30 minutes at rated load followed by a
complete cool down of the tool.
WARNING: Disconnect the engraver from the power supply before making any
adjustments or maintenance procedures.
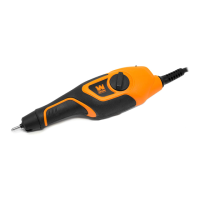
The engraver can be used to permanently mark metal, glass, plastic, wood, ceramics and much
more.
1. Before using the engraver you must ensure there is an engraving tip installed.
2. Connect the engraver plug to the power supply and while holding the engraver firmly, push
up on the on/off switch with your thumb.
NOTE: To turn the tool on, press the ON/OFF Switch to the (I) position. To turn the tool off,
push the ON/OFF Switch to the (O) position.
3. Hold the engraver at an angle, like you would hold a pen. Do not press down hard while
engraving, use light pressure while guiding the point over the work to be completed.
Adjusting the depth of engraving
1. The stroke adjustment dial located on the side of the engraver controls the stroke length and
therefore the depth of engraving.
2. For a fine mark turn the stroke adjustment dial counterclockwise to position ‘1’.
3. For a deeper, thicker mark turn the stroke adjustment dial clockwise to position ‘5’.
NOTE: It is recommended that you practice on scrap material before you start.
 Loading...