EasyManua.ls Logo

Wen 21D

Wen 21D
12 pages
To Next Page IconTo Next Page
Loading...
13 WATT
ELECTRIC ENGRAVER
For replacement parts visit
WENPRODUCTS.COM
Your new tool has been engineered and manufactured to WEN’s highest standards for de-
pendability, ease of operation, and operator safety. When properly cared for, this product
will supply you years of rugged, trouble-free performance. Pay close attention to the rules
for safe operation, warnings, and cautions. If you use your tool properly and for its intended
purpose, you will enjoy years of safe, reliable service.
IMPORTANT:
Have product questions? Need technical support?
Please feel free to contact us at:
NOTICE: Please refer to wenproducts.com for the most up-to-date instruction manual.
NEED HELP? CONTACT US!
Question and Answer IconNeed help?

Do you have a question about the Wen 21D and is the answer not in the manual?

Wen 21D Specifications

General IconGeneral
BrandWen
Model21D
CategoryEngraver
LanguageEnglish

Summary

Specifications

General Safety Rules

Electrical Safety

Precautions related to power cords, outlets, and grounding to avoid electric shock.

Personal Safety

Recommendations for personal protective equipment and proper attire during operation.

Specific Safety Rules for the Engraver

Personal Safety Precautions

Mandatory safety gear and attire recommendations for operating the engraver.

Flammable Atmospheres

Warning against using the tool in environments with flammable liquids or gases.

Disconnect Power Before Maintenance

Always unplug the tool before making adjustments, changing parts, or cleaning.

Know Your Engraver

Assembly Instructions

Steps for assembling the engraver, focusing on installing the engraving tip.

Installing the Engraver Tip

Detailed steps for loosening the tip screw, inserting the tip, and tightening it securely.

Operation

Turning the Engraver On and Off

Procedure for powering the engraver on and off, including connecting to the power supply.

Adjusting Engraving Depth

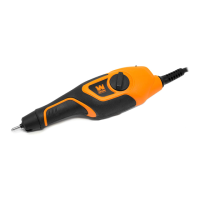
How to use the depth adjustment knob to control stroke length and engraving depth.

Exploded View & Parts List

Related product manuals