6
ASSEMBLY
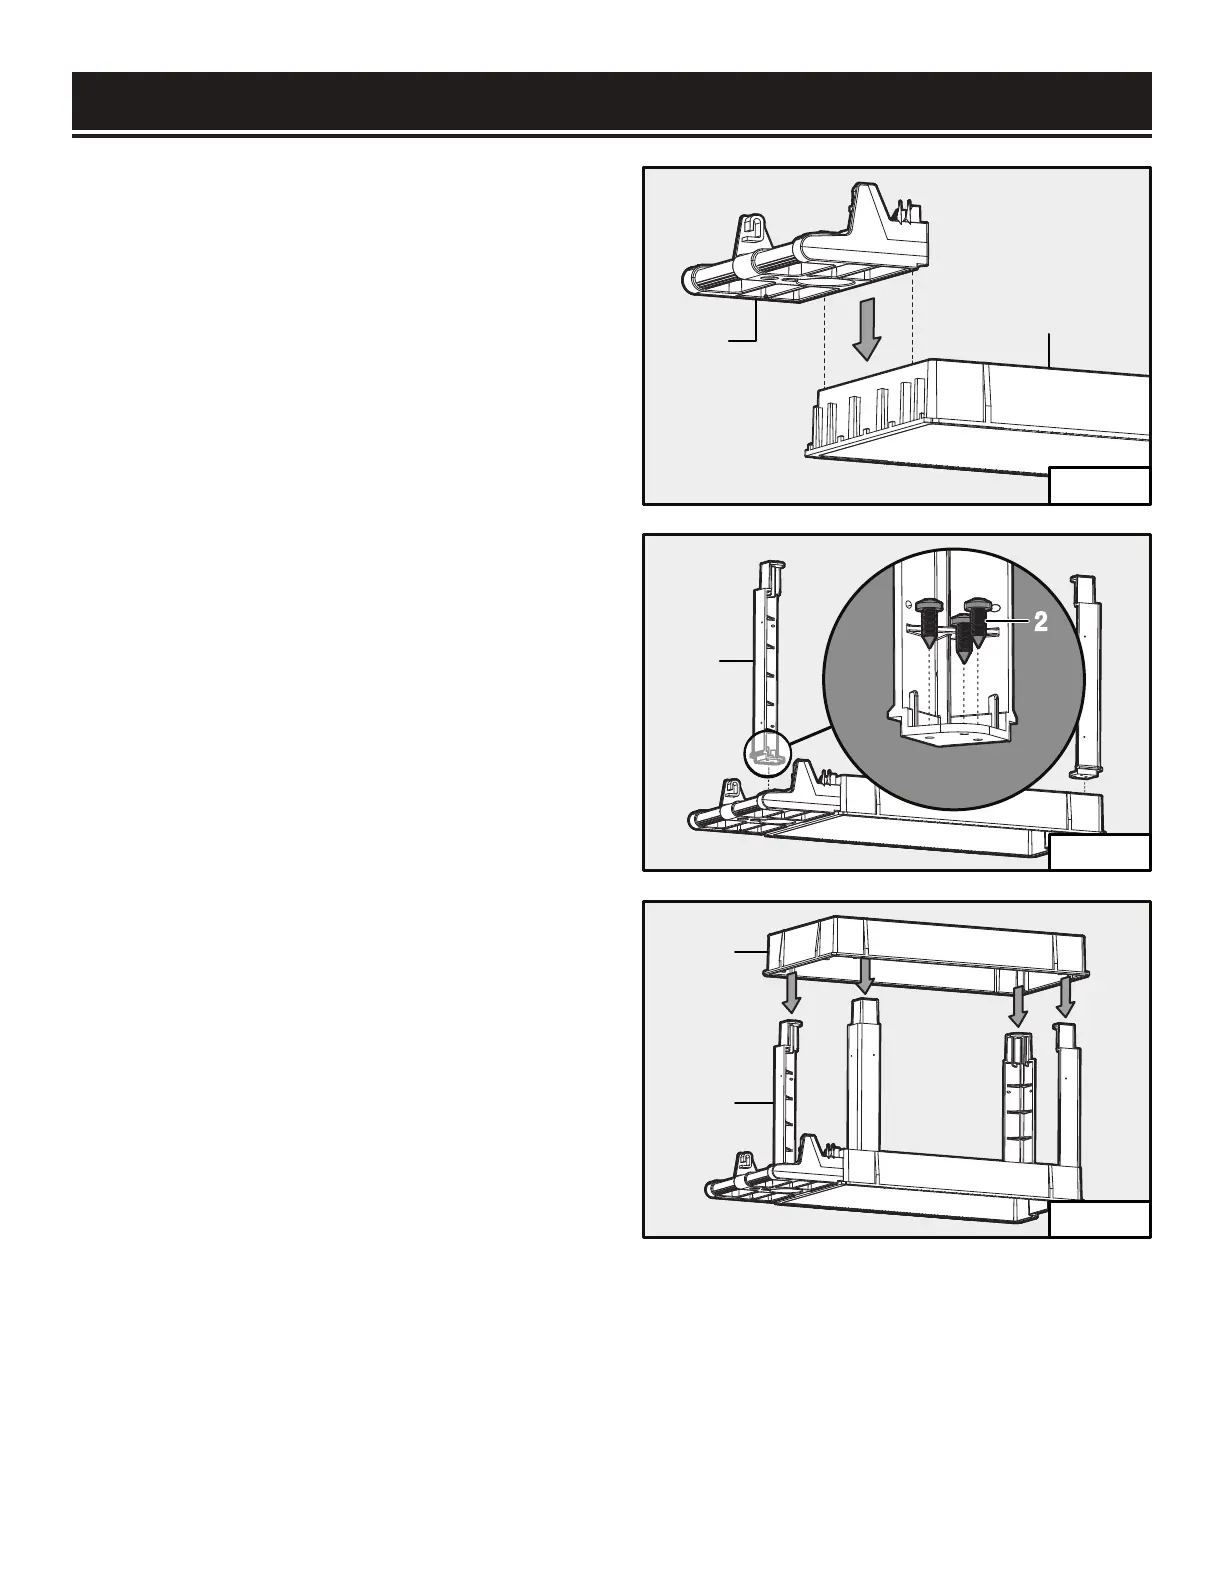
1. Place the upper tray (Fig. 1 - 1) upside-down on a
flat work surface.
2. Turn the push handle (Fig. 1 - 2) upside down
with the cup holder towards the tray. Using a rubber
mallet, tap the push handle down into the grooves on
the tray. Make sure the handle is all the way on the
tray.
NOTE: To overcome the friction between the two
plastic surfaces, rub a little petroleum jelly onto the
grooved surface. The two parts should slide together
with a few gentle taps of the rubber mallet.
3. Locate two of the legs (Fig. 2 - 1), taking note of
the positions of the bottom flanges. Place one nearest
the handle and the other diagonally across the shelf
tray corner. Using a rubber mallet, tap the legs onto
the upper tray until the tab with the three screw holes
is in contact with the shelf tray. Repeat this process
with the other two legs so all four legs are in solid
contact with the shelf tray.
4. Insert and tighten three screws (Fig. 2 - 2) per leg
so that the legs are secured in the shelf tray.
5. Now for the lower tray (Fig. 3 - 1). Turn the shelf
tray upside down and place it onto the four legs (Fig.
3 - 2). The flanges on the four legs should fit into the
depressions in this shelf tray. If all 12 screws were
correctly secured through the four legs into the shelf
tray, everything should fit together. Gently tap shelf
tray onto the four legs until the tabs and shelf tray
depressions are in contact with each other.
Fig. 1
1
2
Fig. 2
Fig. 3
1
2
1
2