11
ASSEMBLY & ADJUSTMENTS
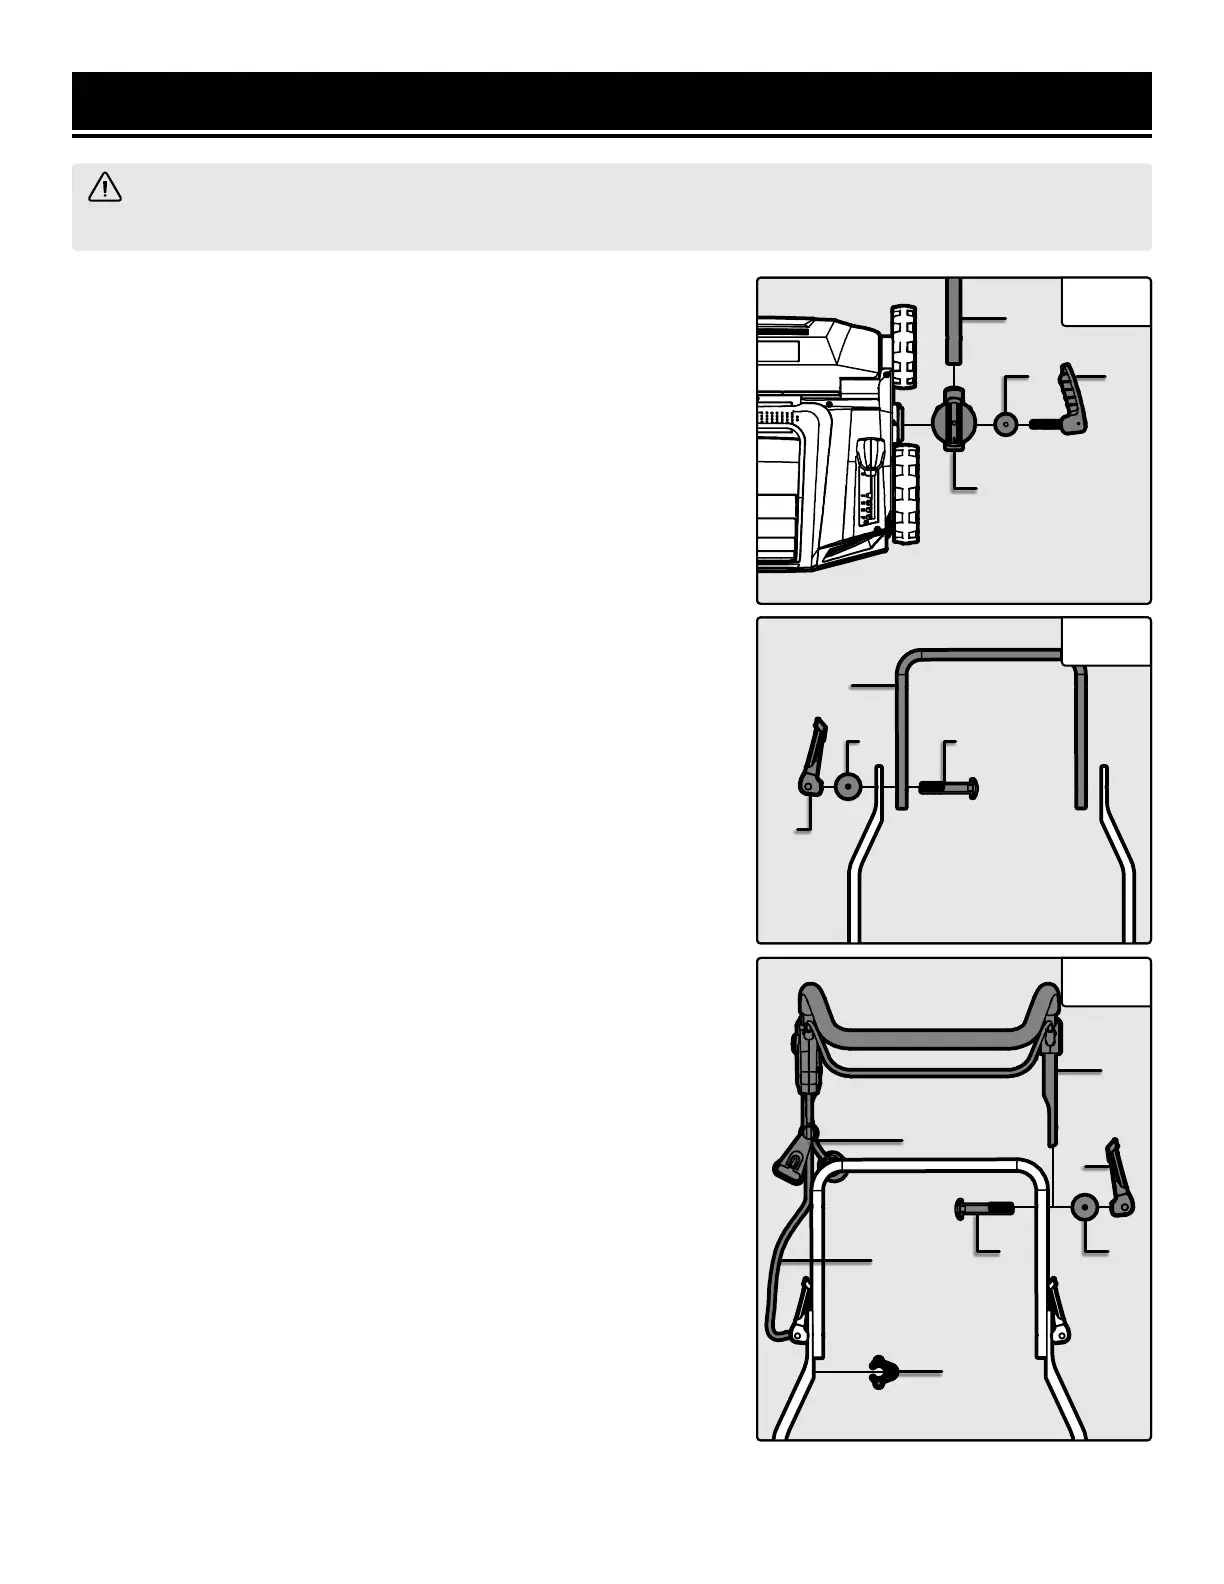
ASSEMBLING THE HANDLE
1. Place the lower handle (Fig. 1 - 1) into the angle adjustment bracket
(Fig. 1 - 2). NOTE: Make sure the handle is seated completely in the
adjustment bracket.
2. Place a washer (Fig. 1 - 3), concave side facing away from the knob,
onto the threaded rod of an angle adjustment cam knob (Fig. 1 - 4).
3. Screw the cam knob through the lower handle, adjustment bracket,
and into the threaded hole on the dethatcher / scarifier body. To lock
the cam knob in place, push the knob to the UP position as shown in
Fig. 1.
4. Repeat steps 1 - 3 on the other side of dethatcher / scarifier with
the second lower handle.
NOTE: There are three height positions that you can adjust the handles
to. Unlock the angle adjustment cam knobs by pushing them to the
DOWN position. Adjust the handles to your desired height and relock
the angle adjustment cam knobs by pushing them to the UP position.
Make sure they are both securely locked before beginning operation.
5. Install the middle handle (Fig. 2 - 1) onto the two lower handles
using two handle cam knobs (Fig. 2 - 2), two washers (Fig. 2 - 3), and
two bolts (Fig. 2 - 4), one on either side. To lock the handle cam knobs
in place, push the knob to the UP position as shown in Fig. 2. NOTE:
Make sure that the middle handle is installed on the inside of the lower
handles as shown in Fig. 2.
6. Slip the extension cord holder (Fig. 3 - 1) onto the upper handle
(Fig. 3 - 2). Make sure that it is installed on the same side as the safety
lock as shown in Fig. 3.
7. Install the upper handle onto the middle handle using two handle
cam knobs (Fig. 3 - 3), two washers (Fig. 3 - 4), and two bolts (Fig.
3 - 5), one on either side. To lock the handle cam knobs in place, push
the knob to the UP position as shown in Fig. 3. NOTE: Make sure that
the upper handle is installed on the outside of the middle handle as
shown in Fig. 3.
8. Slip the power cord (Fig. 3 - 6) through the cable clip (Fig. 3 - 7)
and secure the cable clip right below the lower and middle handle
connection point as shown in Fig. 3.
WARNING! Make sure that the machine is OFF and disconnected from the power source before assembling
or making any adjustments.
Fig. 1
Fig. 2
Fig. 3
1
2
2
3 4
1
2
3 4
4
3
5
6
7
1

 Loading...