ASSEMBLY & ADJUSTMENTS
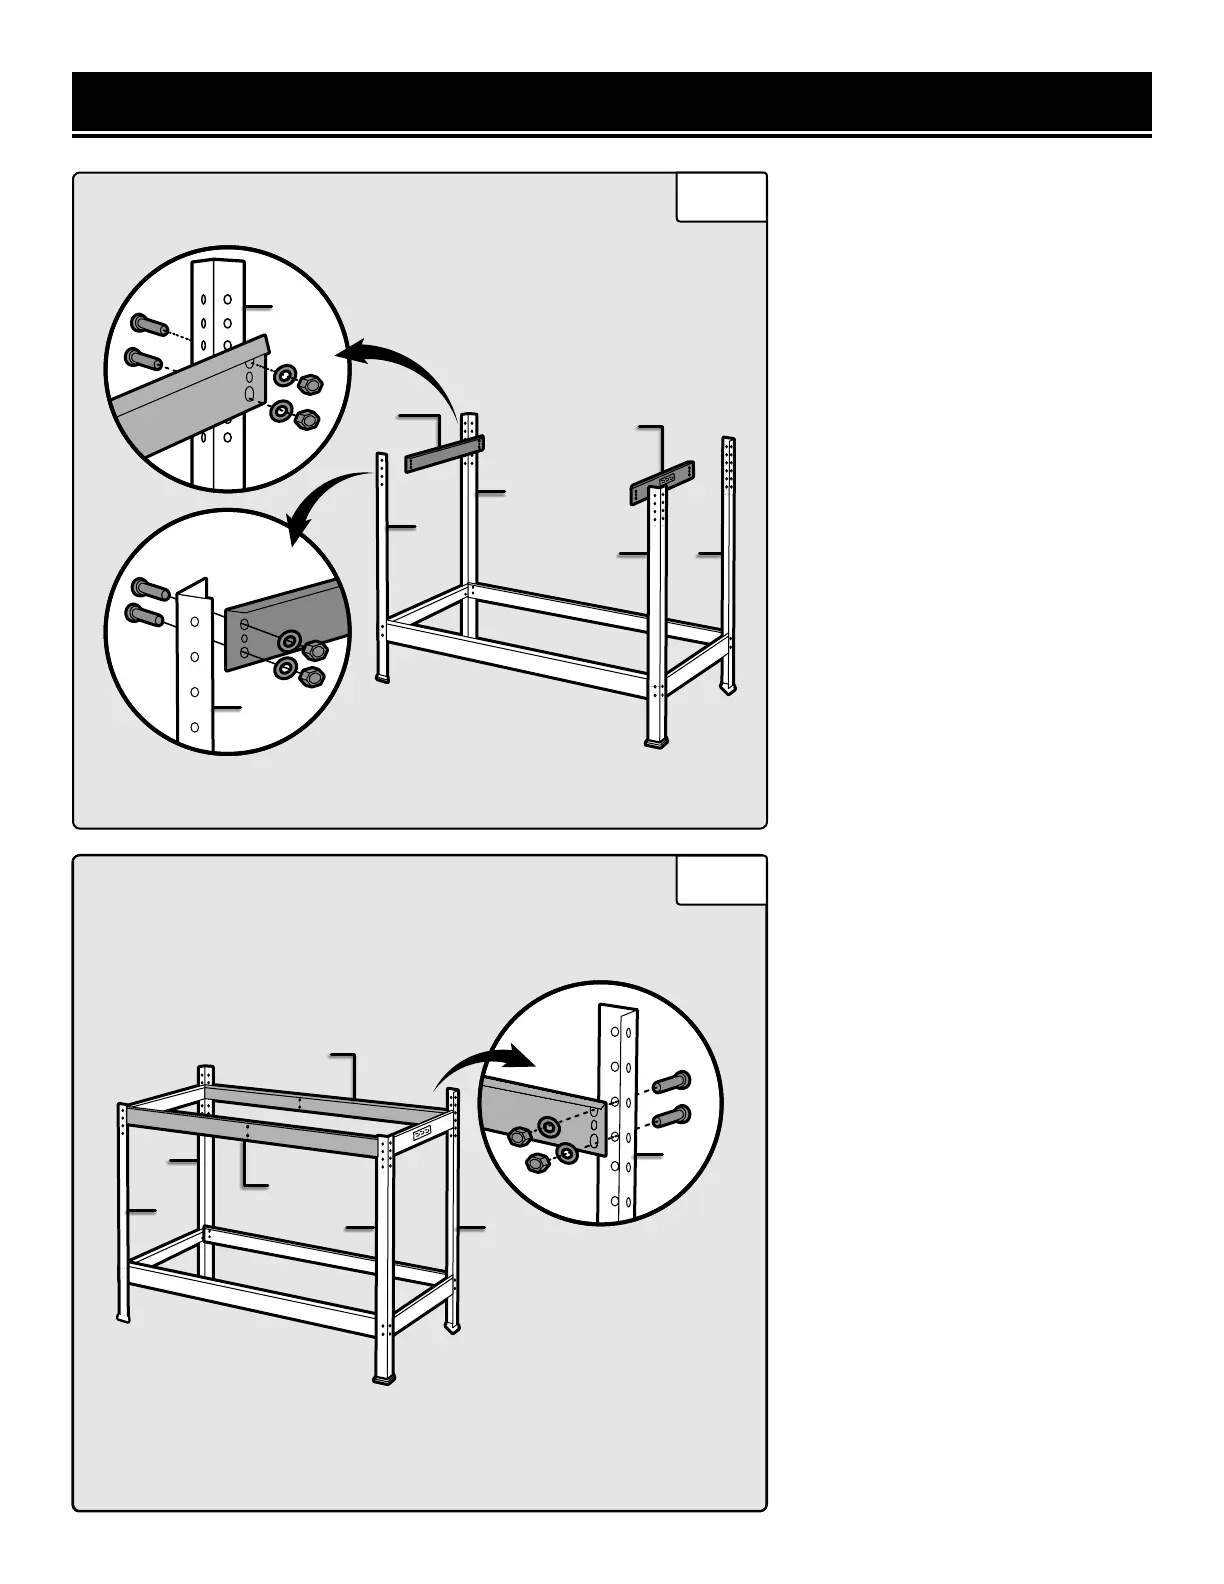
Fig. 4
Fig. 5
INSTALLING UPPER SIDE
BEAMS (4, 4A)
4. Attach one side beam (Fig. 4 - 4)
and the side beam with power strip
opening (Fig. 4 - 4A) to the top two
holes on the front posts (Fig. 4 - 1)
and middle two holes on the back
posts (Fig. 4 - 2), using M6x10 bolts,
washers, and nuts. Assemble the
beams with the flanges on the top.
NOTE: The side beam with power
strip opening can be attached to ei-
ther the right or left side.
INSTALLING UPPER FRONT &
BACK BEAMS (6)
5. Attach the upper beams (Fig. 5 -
6) to the top two holes on front posts
(Fig. 5 - 1) and the middle two holes
on the back posts (Fig. 5 - 2), using
M6x10 bolt, washer, and nut. One of
the beams will have a WEN label, it
is recommended to assemble that
beam in the front of the unit.
NOTE: All beams should be mounted
inside of the posts . All flanges on the
beams should be facing upwards.
10
4
1
1
1
2
2
2
4A
6
6
1
2
1 2
2
 Loading...