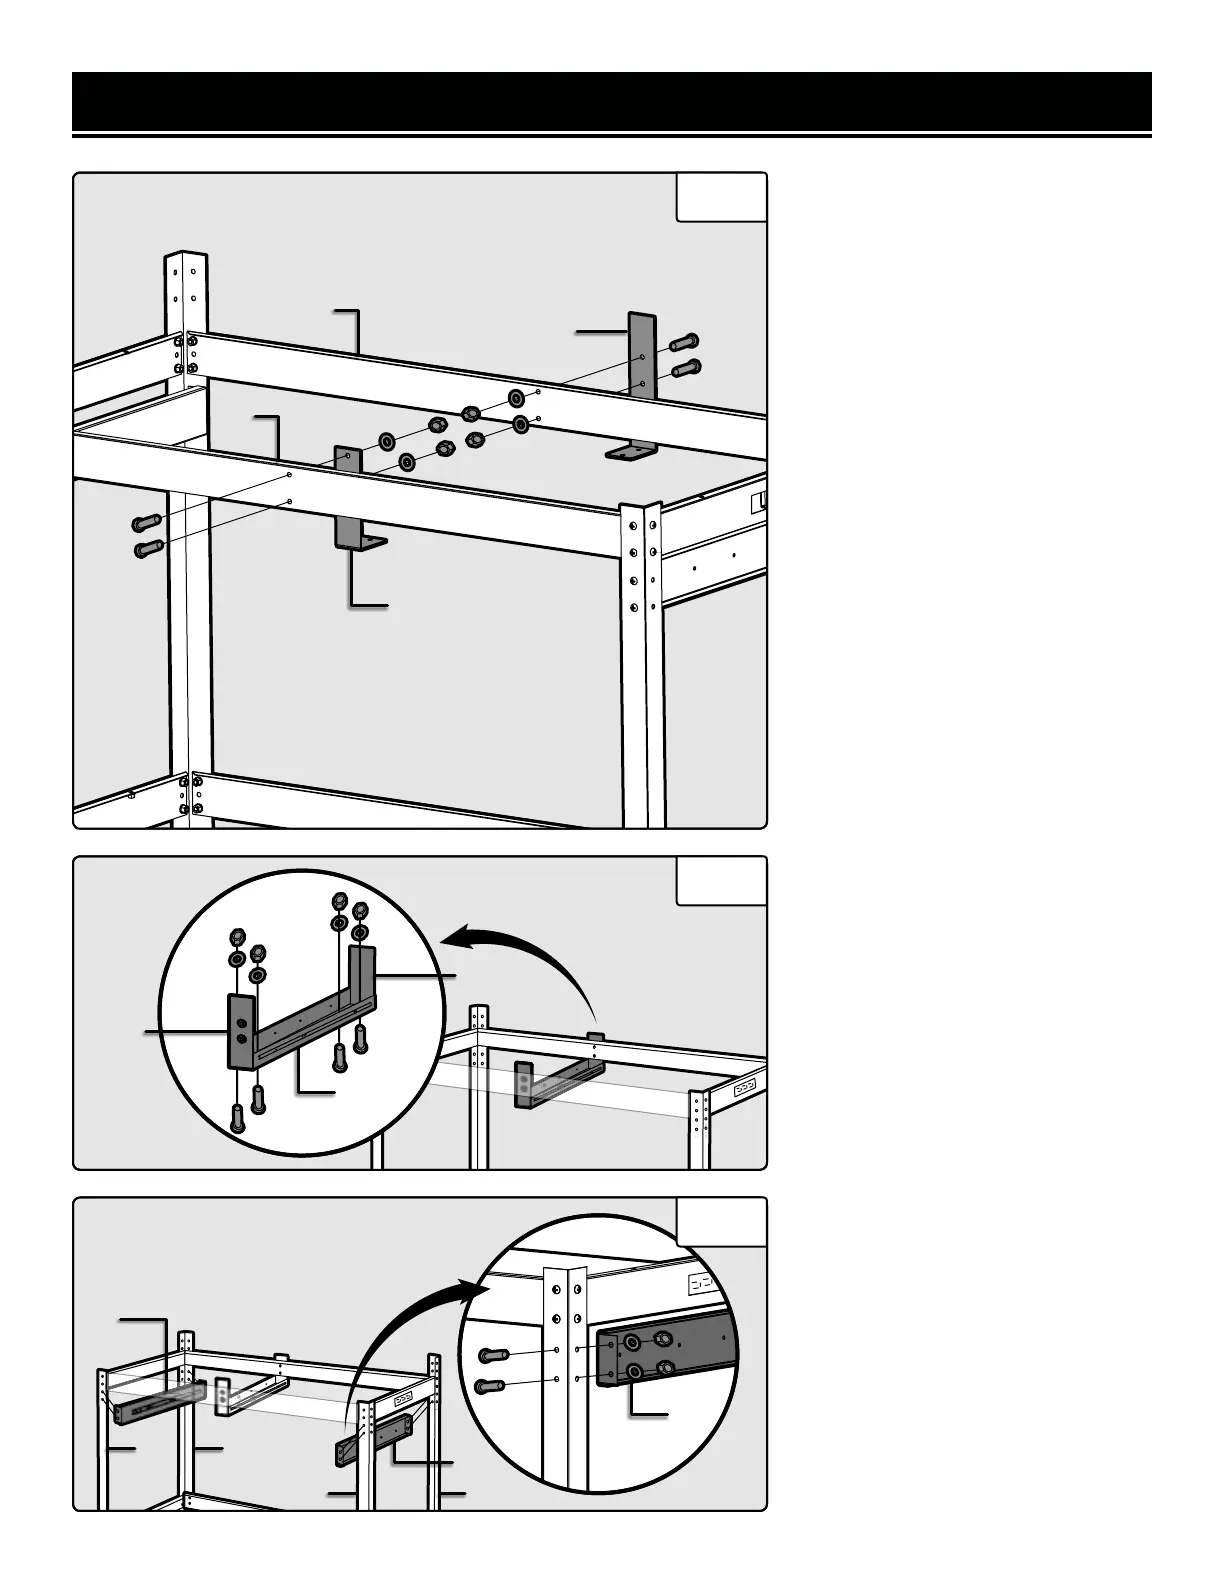
ASSEMBLY & ADJUSTMENTS
Fig. 6
Fig. 7
MOUNTING DRAWER
BRACKETS (7F, 7B)
6. Attach the front drawer bracket
(Fig. 6 - 7F) to the inside of the front
top beam (Fig. 6 - 6), and the back
drawer bracket (Fig. 6 - 7B) to the
outside of the back top beam (Fig.
6 - 6), using M6x10 bolts, washers,
and nuts.
ATTACHING MIDDLE DRAWER
MOUNT (8)
7. Attach the front drawer bracket
(Fig. 6 - 7F) to the inside of the front
top beam (Fig. 6 - 6) and the back
drawer bracket (Fig. 6 - 7B) to the
outside of the back top beam (Fig.
6 - 6), using M6x10 bolts, washers,
and nuts.
NOTE: The silver drawer brackets on
the middle drawer mount (Fig. 7 - 8)
should be assembled towards the
front of the workbench so that the
drawers can be properly installed
later.
ATTACHING LEFT & RIGHT
DRAWER MOUNTS (9L, 9R)
8. Attach the left (Fig. 8 - 9L) and
right (Fig. 8 - 9R) drawer mounts to
the inside of the front (Fig. 8 - 1) and
back (Fig. 8 - 2) posts, using M6x10
bolts, washers, and nuts.
NOTE: The open end of the drawer
mounts should be facing towards
the front so the drawers can be as-
sembled later.
ATTACHING DRAWER
HANDLES (14)
9. Attach one drawer handle (Fig. 9 -
14) to the front drawer panel, using
M4x10 bolts, washers, and nuts (A).
See Figure 9 on the next page.
Repeat step 9 to attach the other
handle to the second front drawer
panel.
11
7F
7B
6
6
7F
7B
8
9R
1
1
2
2
9L
Fig. 8
9R
 Loading...