Do you have a question about the Weslo pursuit 350 and is the answer not in the manual?
Instructions and warnings must be read before using the exercise cycle.
Owner ensures all users are informed of precautions.
Exercise cycle is for home use, not commercial or rental settings.
Use indoors on a level surface, with adequate clearance around the unit.
Inspect and tighten parts regularly; replace worn parts immediately.
Keep children under 12 and pets away from the exercise cycle.
Wear appropriate clothes and athletic shoes; avoid loose clothing.
Maximum user weight is 250 pounds.
Keep your back straight while exercising; do not arch your back.
Stop exercising immediately and cool down if experiencing pain or dizziness.
Pedals continue to move until the flywheel stops; no free wheel.
Pulse sensor is not a medical device; accuracy may vary.
Order replacement warning decals if missing or illegible.
Consult a physician before starting any exercise program, especially if over 35 or with health problems.
Read manual carefully for benefits and questions; note model/serial numbers.
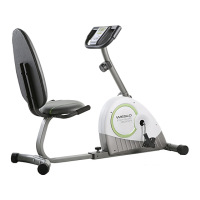
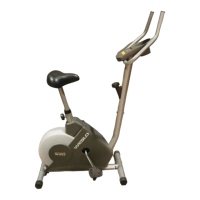
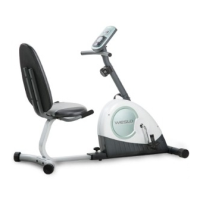
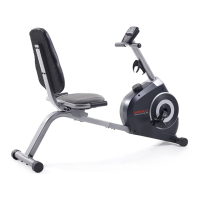
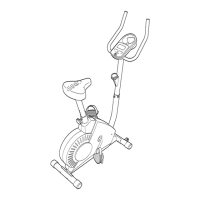
Familiarize yourself with the labeled parts of the exercise cycle.
Warning about machine misuse, children, pedals, weight limit, and labels.
Assembly requires two persons, cleared area, and specific tools.
Identify small parts used for assembly using key numbers and quantities.
Insert and attach the Rear Stabilizer to the Frame using screws.
Orient and attach the Front Stabilizer to the Frame using screws.
Attach the Left and Right Upright Covers to the Frame with screws.
Attach the Seat to the Seat Post using washers and locknuts.
Insert Seat Post into Frame, adjust height, and secure with Seat Knob.
Connect extension wire, reed switch wire, and resistance cable to the upright.
Insert the Upright into the Frame and attach with screws and washers.
Install four AA batteries into the Console, ensuring correct orientation.
Connect console wire to extension wire and secure console to upright with screws.
Tighten pedals firmly counterclockwise (left) and clockwise (right); attach pedal straps.
Ensure all parts are tightened; place mat under cycle.
Adjust seat height for proper knee bend at pedal's lowest point.
Turn resistance knob clockwise to increase, counterclockwise to decrease.
Console displays speed, time, distance, calories, fat calories, and pulse.
Turn on console, select modes, view data, and understand unit settings (miles/km).
Place thumb on sensor to measure heart rate after stopping pedaling.
Console turns off automatically or pauses if pedals stop moving.
Inspect and tighten parts regularly; clean with damp cloth, keep liquids away from console.
Replace batteries when console display dims; see assembly step 7.
Adjust reed switch if console feedback is incorrect by sliding it near the magnet.
Adjust belt tension by tightening nylon locknuts on the flywheel if pedals slip.
Use heart rate chart to find training zones for fat burning and aerobic exercise.
Exercise at low intensity for sustained periods to burn fat effectively.
Perform aerobic exercise at high intensity to strengthen cardiovascular system.
Include warm-up, training zone exercise, and cool-down in each workout.
Aim for three workouts per week, increasing frequency as fitness improves.
Bend forward from hips, reaching for toes; stretches hamstrings and back.
Sit with one leg extended, reach for toes of the extended leg.
Lunge forward with one leg straight, back foot flat; stretches calves and ankles.
Stand, balance on one leg, grasp foot and pull heel towards buttocks.
Sit with soles of feet together, knees outward, pull feet towards groin.
Provide model, product name, serial number, and key number/description for parts.
| Brand | Weslo |
|---|---|
| Model | pursuit 350 |
| Category | Exercise Bike |
| Language | English |