Do you have a question about the Western MVP and is the answer not in the manual?
Read installation instructions and labels before installing or operating the snowplow.
Warnings about explosive gases, acid burns, and proper battery handling during maintenance.
Recommended fastener torque values in ft.-lbs for SAE and Metric grades for assembly.
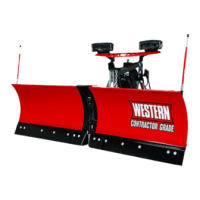
Step-by-step guide for assembling the A-frame to the snowplow wings and connecting rams.
Instructions for attaching the rubber flap to the back of each cutting edge.
Steps to position and secure the stand to the A-frame for snowplow stability.
Guide for assembling the lift frame to the A-frame lugs and stand lugs.
Instructions on how to position and attach the center deflector to the A-frame.
Further steps for center deflector installation, including drilling and attaching.
Instructions for aligning and attaching the rubber deflector with the blade.
Steps to attach the blade guide rod to the plow ribs using cap screws.
Connecting the lift channel, mounting the hydraulic unit, and attaching hydraulic fittings and hoses.
Mounting the hydraulic unit, connecting hoses, and securing brackets.
Routing and connecting hydraulic hoses to angling rams and the hydraulic unit.
Final steps for connecting hoses to the base end of rams and securing them to the hydraulic unit.
Instructions for assembling light brackets and attaching headlamps to the lift frame.
Guide for routing wiring harness from headlamps to hydraulic unit and connecting to valve manifolds.
Details on wiring solenoids and securing the harness to the vehicle.
Steps for connecting the battery cables to the hydraulic unit's motor terminals.
Identifying vehicle wires, disconnecting battery, and mounting the motor relay.
Routing cables, connecting harness to motor relay, and vehicle terminals.
Mounting connector brackets, feeding harness, inserting terminals, and connecting vehicle wires.
Instructions for locating and securely mounting the control bracket in the vehicle cab.
Refers to separate instructions for vehicle headlights and switching relays.
Guide to filling the hydraulic reservoir with fluid to the correct level.
How to adjust the quill on the main block valve to control blade drop speed.
Procedure to check and adjust coupling lug height for proper stand pinning.
Steps to ensure all fasteners and connections are tight and check for oil leaks.
Instructions for checking operation of vehicle and plow lights, turn signals, and headlamps.
| Brand | Western |
|---|---|
| Model | MVP |
| Category | Snow Blower Accessories |
| Material | Steel |
| Color | Black |