W2069 WSW PRIME RANGE Built-in Unit O&M 20231025.docx Page 6 Westin
6. OPERATING INSTRUCTIONS
Radio Remote Controlled Models
• Switch on the power at the fused spur.
• Then Immediately turn on the remote control ( ).
• Then immediately press and hold ( ) until the lights illuminate.
Should the extractor fail to respond to commands from the remote-
control, please check that the power is ‘on’ and the internal
appliance reset switch is in the ‘ON’ position (factory default). The
reset switch is a latching red push-switch located in the chamber
behind the door panel / filter.
If you experience interference problems, or the remote appears to
be faulty from new, then a different radio transmission code may
be required.
Refer to the instruction leaflet included with the remote control
regarding transmission code changes before seeking assistance.
Refer to the instruction leaflet included with the radio remote control
console regarding pairing the device, transmission codes and
factory reset procedures.
Pushbutton Models
Other Control Systems
Because this is a custom-made product, an alternative control
system may have been specified during the design phase.
Most commonly this alternative control system will be a
continuously variable rotary fan speed controller plus light
control mounted on the extractor (usually the baseplate). With
most such control systems, you will find on/off switches for the
fan and lights and a rotating knob to adjust the fan speed.
Sometimes the switch and knob are combined into a single unit,
like a domestic lighting dimmer switch, which is pressed for
on/off function and turned for speed.
In some cases, the fan control may have been specified as a
separate item that does not form part of the extractor (e.g. a
wall mounted controller). Such controllers may have been
supplied by the manufacturer or a third party and are not
covered by this manual.
If you are unsure how to operate your unit then please call the
manufacturer for assistance.
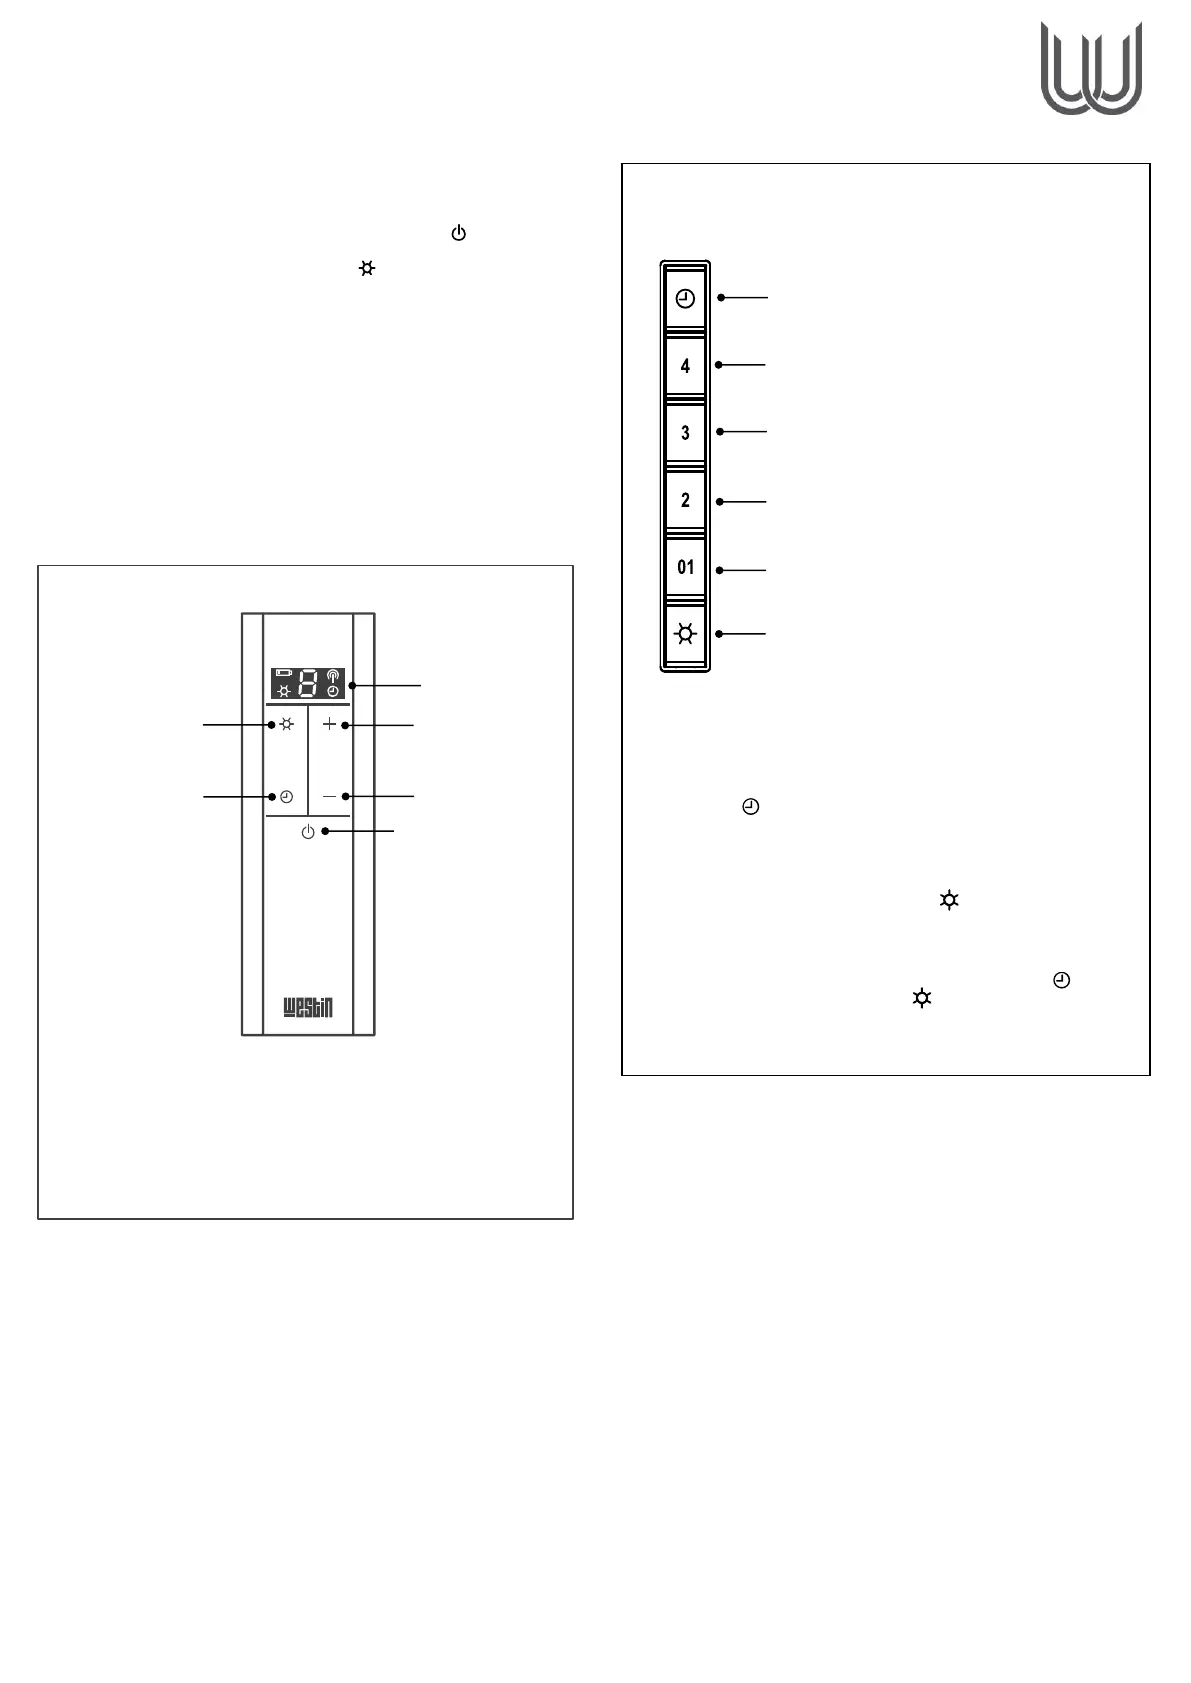
Pushbutton Functions
(For models with pushbutton controls)
The extractor controller automatically switches off the
appliance if there has been no operator action for 4 hours.
After 30 hours accumulated running GREASE FILTER
CLEANING will be signalled by all 6 indicators flashing. Reset
by pressing ( ).
**Speed 4 reduces automatically to Speed 3 after 5 minutes
Light Dimming
To adjust the light intensity, press & hold ( ) until desired intensity is
achieved.
Colour Changing
Ensure that the fan, lights & timer are off. Press and hold ( ) until the
lights illuminate. Then press and hold ( ) until the desired light colour
is achieved. Press SPEED 1 button to confirm the desired light
preference. (or + if using the remote control).
 Loading...