Do you have a question about the Westinghouse Morris and is the answer not in the manual?
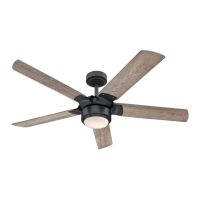
Diagram and notes for installing the fan downrod on normal ceilings.
Inspect fan contents and turn off power before installation to avoid electrical shock.
Ensure the outlet box is suitable for fan support and securely fastened to the ceiling structure.
Install the mounting bracket to the outlet box using the screws and washers provided with the outlet box.
Choose between normal downrod or extended downrod installation based on ceiling height and preference.
Remove the clamp pin and cross pin from the downrod assembly to prepare for installation.
Place the downrod assembly into the canopy and feed motor wires through the assembly.
Align downrod with coupling, install cross pin and clamp pin, then tighten set screws to secure the assembly.
Loosen the set screw to remove the downrod ball from the downrod for extended installation.
Slide the downrod ball off the downrod and remove the pin as part of the extended downrod setup.
Re-install the pin and set screw to properly secure the downrod ball to the extended downrod.
Lift the fan assembly onto the mounting bracket and rotate until the downrod ball notch engages the bracket.
Information on the remote control unit's 16 code combinations and factory-set frequency switches for interference prevention.
Instructions for making the necessary wiring connections from the house and motor to the remote receiver unit.
Align the canopy's keyholes with mounting bracket screws, then rotate and tighten to securely attach the fan canopy.
Mount the inside canopy cover ring onto the mounting bracket screws using its keyhole slots and twist to lock.
Prepare blade brackets by removing screws, stabilizer tabs, and nuts; discard stabilizer tabs as instructed.
Insert each fan blade into its bracket, align the holes, and tighten securely with the Allen wrench.
Remove one screw from the light kit plate support and loosen the other two screws before attaching the light kit.
Place keyslot holes of light kit plate onto screw heads, twist to engage, install screw, and tighten all screws to secure the plate.
Connect motor wires to light kit wires using the 9-pin molex plug, then attach the light kit to the plate.
Align indentations on glass with plate protrusions, lift glass, and twist clockwise to lock it securely in place.
Unlock and remove glass to access the fan direction slide switch; replace glass after changing the direction.
Mount the transmitter holder onto the wall using provided screws and place the remote transmitter into the holder.
Learn how to operate fan speed, light on/off, and light dimmer functions using the remote control buttons.
Understand fan operation for different weather conditions and the effects of airflow direction.
Follow maintenance advice for checking connections, cleaning, and ensuring the fan's longevity and appearance.
Steps to troubleshoot why the fan may not start, including checking power sources and connections.
Guidance on resolving common issues like fan noise or wobbling by checking screws and ensuring proper assembly.
Troubleshooting steps for the fan's light fixture not working, focusing on bulbs and wiring connections.
Details on the limited lifetime warranty for materials and workmanship, including coverage terms and limitations.
A list of all included fan parts and hardware, with corresponding numbers for easy identification.
| Brand | Westinghouse |
|---|---|
| Model | Morris |
| Category | Fan |
| Language | English |