14 15
ETL-ES-Techno-WH14 ETL-ES-Techno-WH14
WIRING OPTIONS
OPCIÓN DE CABLEADO
16
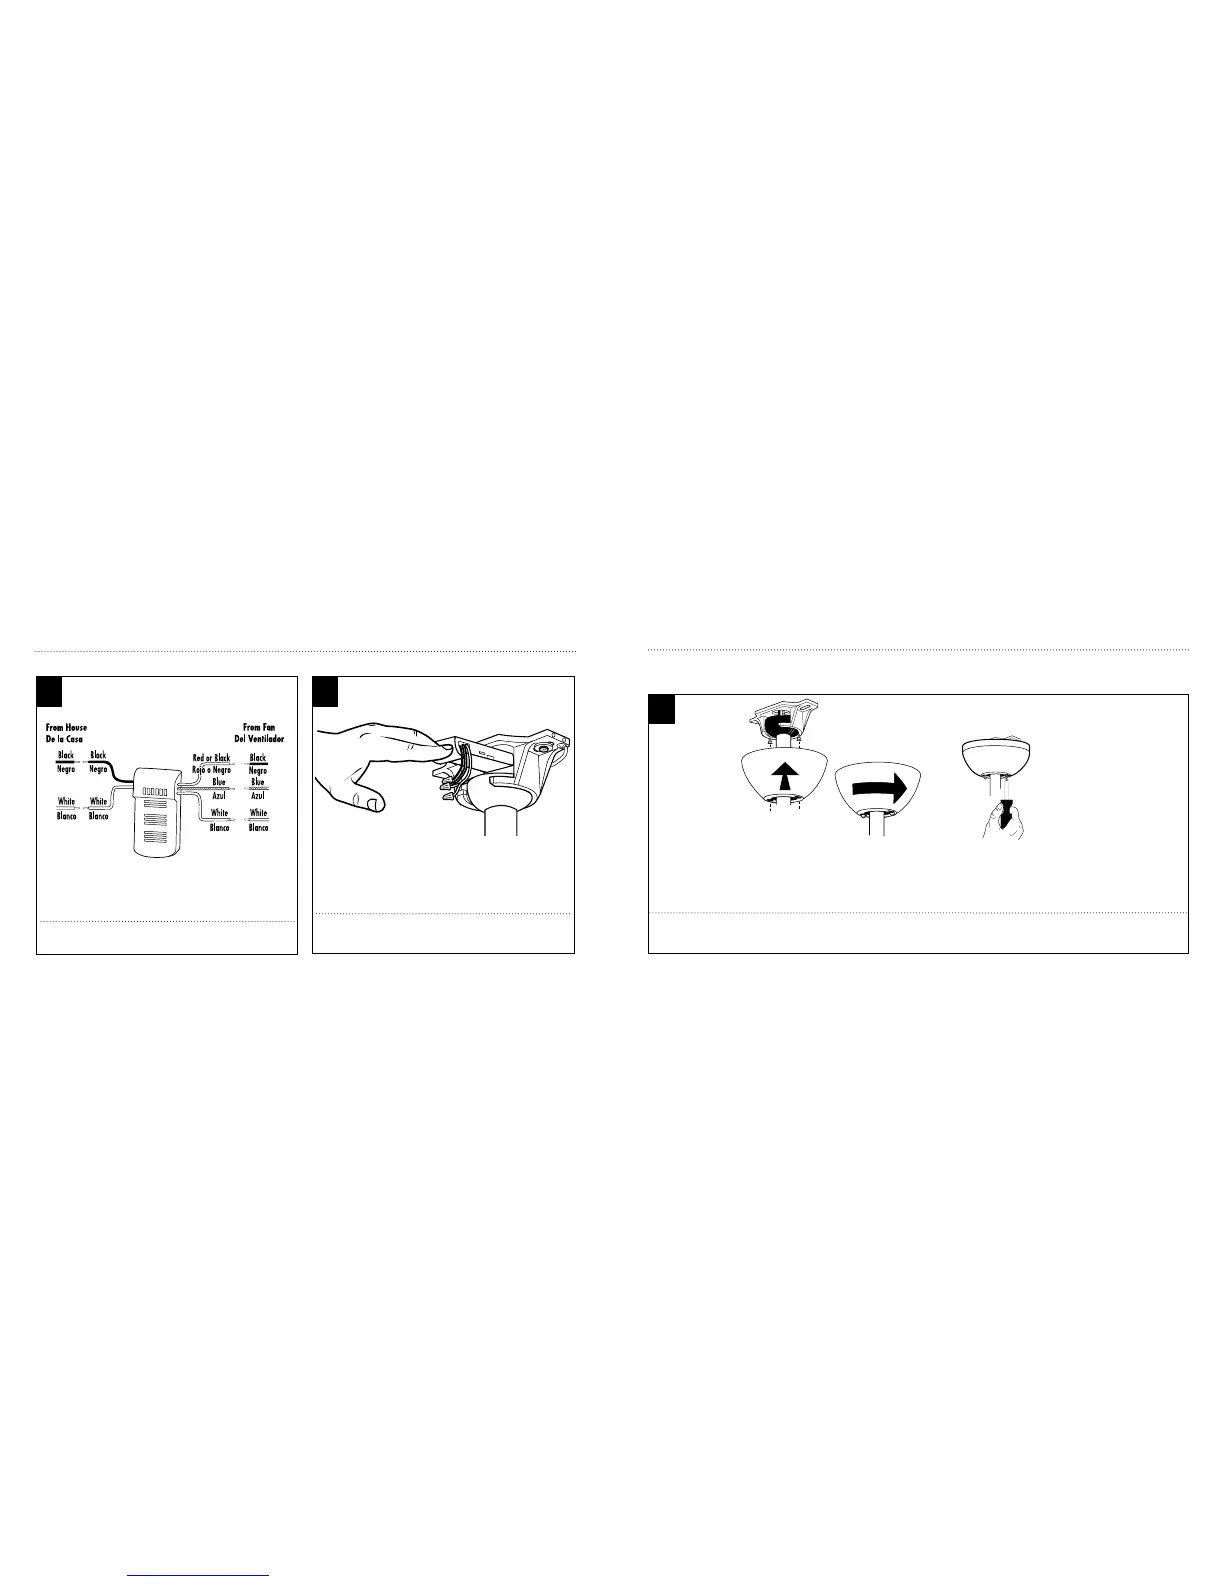
Once wiring step has been completed, slide the wired remote receiver in between the
mounting bracket and the top of the downrod ball for downrod fans.
Para los ventiladores con vara de extensión, al terminar la instalación de los alambres,
deslice el receptor remoto alámbrico entre el soporte de montaje y la parte superior de
la esfera de la vara.
15
Make wiring connections from the house and the motor to the remote receiver as shown
above. Connect using wire nuts (provided).
Haga las conexiones de cableado del alojamiento y el motor al receptor remoto como se
indica más arriba. Utilice las tuercas para cables incluidas.
SECURE TO CEILING
ASEGURE EL VENTILADOR AL CIELORRASO
Loosen the 2 screws on the bottom of mounting bracket. (do not remove) Raise the canopy up and align the keyholes on the bottom of the canopy with the 2 screws on
the bottom of mounting bracket. Rotate the canopy until both screws from the mounting bracket drop into the slot recesses. Tighten screws securely.
Afloje los 2 tornillos de la parte inferior del soporte de montaje (no los extraiga completamente). Suba el dosel y alinee las bocallaves de la parte inferior del dosel con
los 2 tornillos de la parte inferior del soporte de montaje. Gire el dosel hasta que ambos tornillos del soporte de montaje caigan dentro de las ranuras. Apriete los tornil-
los asegurándolos.
17