11
3. Use a ¹⁵⁄₁₆" (2.4 cm) combination wrench and an adjustable
wrench to attach the flexible connector to the adapters.
IMPORTANT: All connections must be wrench-tightened. Do
not make connections to the gas regulator too tight. Making
the connections too tight may crack the regulator and cause
a gas leak. Do not allow the regulator to turn when tightening
fittings.
Complete Connection
1. Check that the gas pressure regulator shutoff valve is in the
“on” position.
2. Open the manual shutoff valve in the gas supply line. The
valve is open when the handle is parallel to the gas pipe.
3. Test all connections by brushing on an approved
noncorrosive leak-detection solution. If bubbles appear, a
leak is indicated. Correct any leak found.
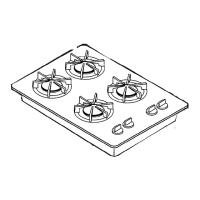
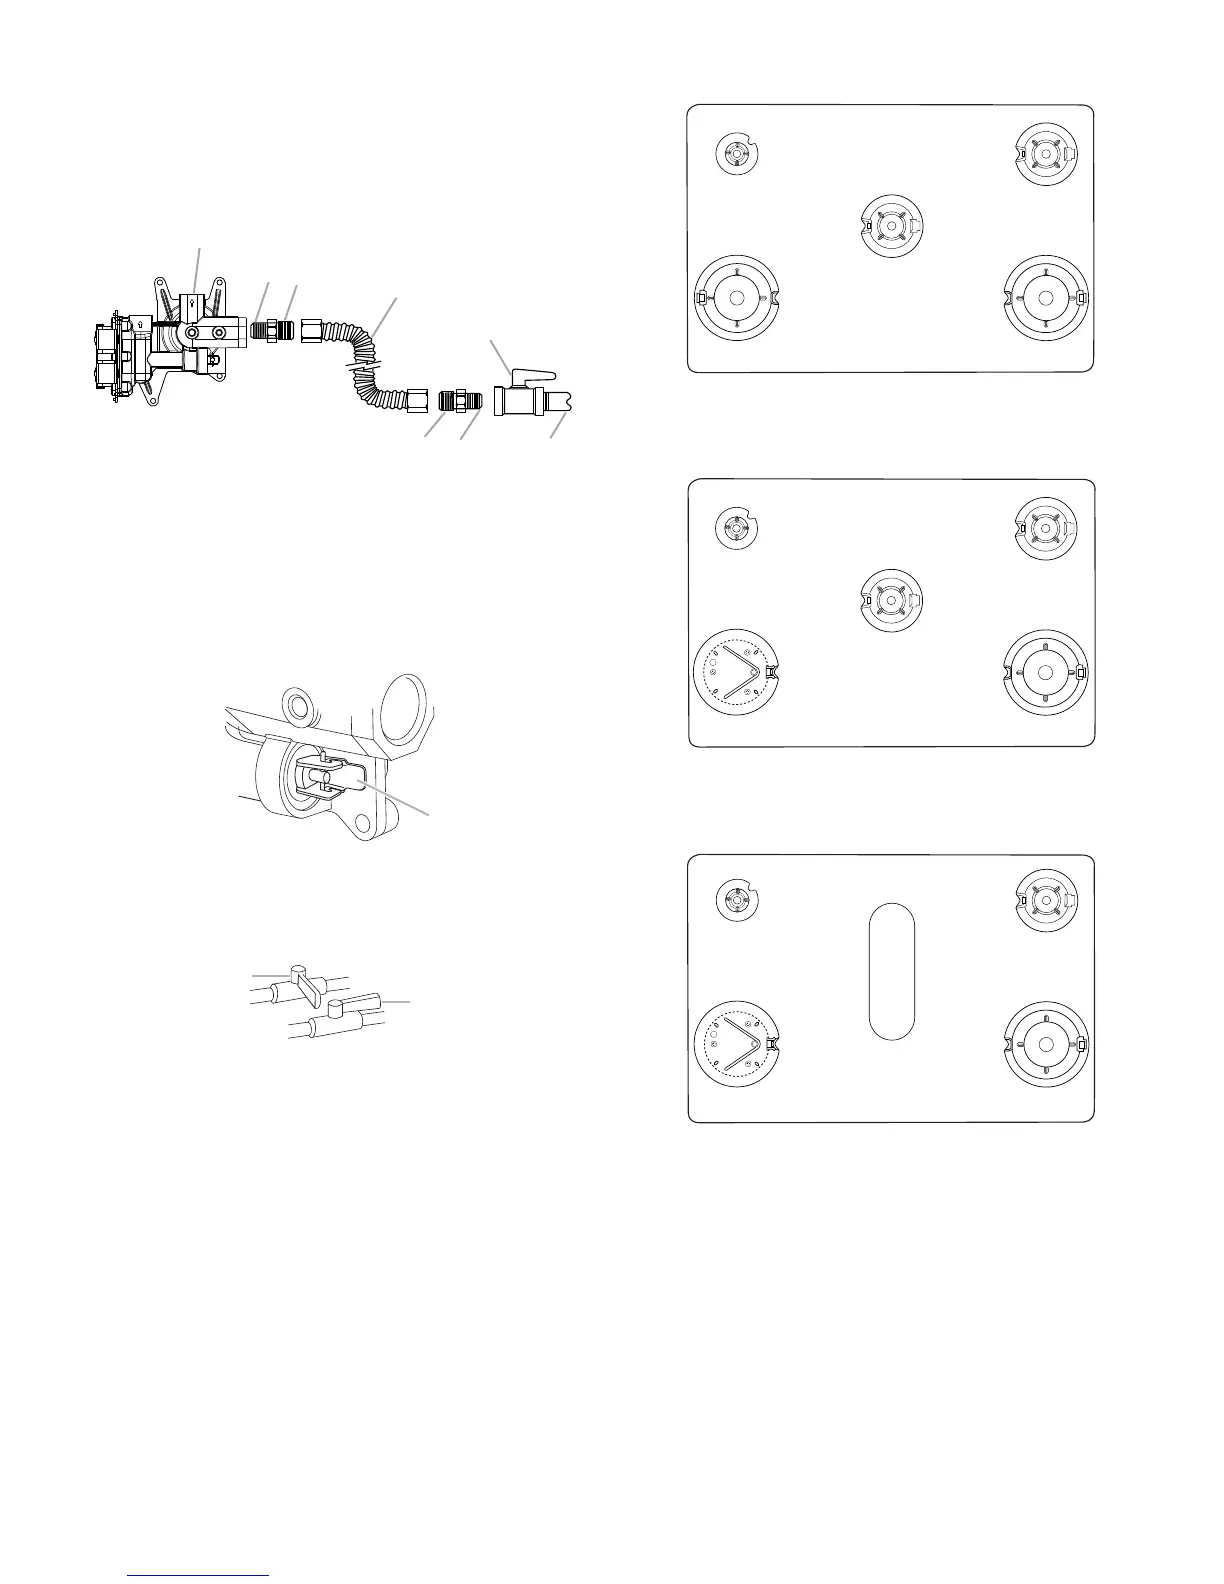
4. Remove cooktop burner caps and bases from package
containing parts. Place the burner bases as indicated by the
following illustration for your model:
For models MGS8880D, WEG730H0D, and WEG760H0D:
For models KSGG700E and KSGB900E:
For model JGS1450D:
A. Gas pressure regulator
B. Use pipe-joint compound.
C. Adapter (must have ½"
[1.3 cm] male pipe thread)
D. Flexible connector
E. Manual gas shutoff valve
F. ½" (1.3 cm) or ¾" (1.9 cm) gas
pipe
G. Use pipe-joint compound.
H. Adapter
A. Gas pressure regulator shutoff valve
shown in the “on” position
A. Closed valve
B. Open valve
A. Small
B. Large
C. Medium D. Medium
E. Large
A. Small
B. X-Large
C. Medium D. Medium
E. Large
A. Small
B. X-Large
C. Oval D. Medium
E. Large