Do you have a question about the Whirlpool COOK20 MWP201SB and is the answer not in the manual?
Covers flammable materials, drying, ignition, unattended use, chemicals, door safety, and intended use.
Guidelines for children using the appliance, age limits, supervision, and keeping cord away.
Risks of superheating liquids and steps to prevent sudden boiling over.
Steps for cleaning the oven interior, exterior, and door.
Steps to take if the oven does not work before calling service.
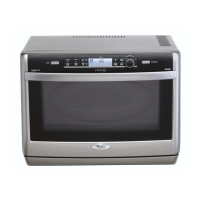
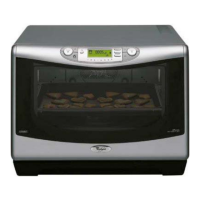
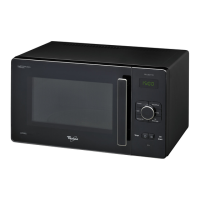
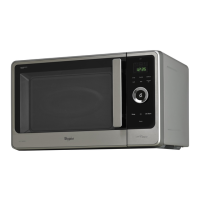
Identifies buttons and icons on the microwave control panel.
Describes the automatic safety function that locks the oven.
How to pause, continue, or stop the cooking process.
How to respond to prompts to add, stir, or turn food during cooking.
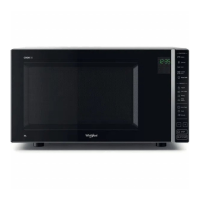
This document outlines the functions, usage, and maintenance of the Whirlpool COOK 20 microwave oven, designed for domestic use. It emphasizes safety precautions and proper handling to ensure optimal performance and longevity of the appliance.
Before connecting the microwave, users must verify that the voltage on the rating plate matches their home's voltage. It is crucial not to remove the microwave inlet protection plates located on the side of the oven cavity wall, as these prevent grease and food particles from entering the microwave inlet channels. The oven should be placed on a stable, even surface capable of supporting its weight and the food utensils. Care must be taken when handling the appliance. For adequate ventilation, the oven needs to be positioned at a distance from other heating sources, with at least 30 cm of space above it. The areas underneath, above, and around the oven must be clear to allow proper airflow. The microwave oven is not designed to be placed in a cabinet.
Upon receipt, users should inspect the appliance for any damage, ensuring the oven door closes firmly against the door support. The oven should be emptied and its interior cleaned with a soft, damp cloth. It is critical not to operate the appliance if the mains cord or plug is damaged, if it is not working properly, or if it has been damaged or dropped. The mains cord or plug should never be immersed in water and must be kept away from hot surfaces to prevent electrical shock, fire, or other hazards. Extension cords are not recommended; if the power supply cord is too short, a qualified electrician or serviceman should install an outlet nearby. This appliance requires proper earthing to prevent electric shock and must be connected to a properly installed earthed socket or fused earthed switched spur. Any doubts regarding earthing instructions should be clarified with a qualified electrician or serviceman.
After connecting, the oven will only operate if the door is firmly closed. Poor television or radio reception may occur if the oven is placed too close to a TV, radio, or aerial. The manufacturer disclaims responsibility for any injuries or damages resulting from non-compliance with earthing requirements.
Users are advised to read all safety instructions carefully and keep them for future reference. Flammable materials should not be heated or used in or near the oven, as fumes can cause a fire or explosion. The microwave oven should not be used for drying textiles, paper, spices, herbs, wood, flowers, fruit, or other combustible materials, as this poses a fire risk. If material inside or outside the oven ignites or emits smoke, the oven door must be kept closed, the oven turned off, and the power cord disconnected or power shut off at the fuse or circuit breaker panel. Overcooking food should be avoided to prevent fire.
The oven should not be left unattended, especially when using paper, plastic, or other combustible materials during cooking. Paper can char or burn, and some plastics can melt when heated. Leaving the oven unattended when using a lot of fat or oil is dangerous, as they can overheat and cause a fire. Corrosive chemicals or vapors should not be used in this appliance, which is designed specifically for heating or cooking food, not for industrial or laboratory use. Heavy items should not be hung or placed on the door, as this can damage the oven opening and hinges. The door handle is not intended for hanging objects.
The microwave oven is intended for heating food and beverages. Drying food or clothing, or heating warming pads, slippers, sponges, damp cloths, and similar items, can lead to injury, ignition, or fire. This appliance can be used by children aged 8 years and above, and by persons with reduced physical, sensory, or mental capabilities, or lack of experience and knowledge, provided they receive supervision or instruction on safe use and understand the associated hazards. Children should not play with the appliance. Cleaning and user maintenance should not be performed by children unless they are over 8 years old and supervised. The appliance and its cord must be kept out of reach of children under 8 years. This appliance is not intended for use by persons (including children) with reduced physical, sensory or mental capabilities, or lack of experience and knowledge, unless supervised by a person responsible for their safety. Children should be supervised to ensure they do not play with the appliance.
Airtight sealed containers should not be used for heating, as pressure can build up and cause damage or explosion upon opening. The door seals and door seal areas must be regularly inspected for damage. If these areas are damaged, the appliance should not be operated until repaired by a trained service technician. The appliance is not designed for operation via an external timer or separate remote-control system. Whole eggs, with or without shells, should not be cooked or reheated in the microwave, as they may explode even after heating has ended.
This appliance is for domestic use only. It should not be operated without food in the oven when using microwaves, as this can damage the appliance. The ventilation openings must not be covered; blocking air intake or exhaust vents can cause damage and poor cooking results. When practicing oven operation, a glass of water should be placed inside to absorb microwave energy and prevent damage. The appliance should not be stored or used outdoors, near a kitchen sink, in a wet basement, near a swimming pool, or similar locations. The cavity should not be used for storage. Wire twist-ties must be removed from paper or plastic bags before placing them in the oven. Deep-frying is not recommended in the microwave, as oil temperature cannot be controlled. Hot pads or oven mitts should always be used when touching containers, oven parts, and pans after cooking, as accessible parts can become hot, posing a burn risk to young children.
Overheating liquids, such as beverages or water, beyond their boiling point can occur without visible bubbling, leading to a sudden boil-over. To prevent this, users should avoid straight-sided containers with narrow necks, stir the liquid before placing the container in the oven, and leave a teaspoon in the container. After heating, allow the liquid to stand for a short time, stir again, and then carefully remove the container. When heating baby food or liquids in baby bottles or jars, always stir and check the temperature before serving to ensure even heat distribution and prevent scalding or burns. The lid and teat must be removed before heating.
Various accessories are available on the market; users should ensure they are suitable for microwave use. Utensils must be oven-proof and allow microwaves to pass through them during cooking. When placing food and accessories in the microwave, ensure they do not contact the oven interior, especially metal or metal parts. Contact with metal accessories can cause sparking and damage the oven during operation. The turntable must be able to turn freely before starting the oven; if not, a smaller vessel should be used.
The turntable support should be used under the glass turntable, and no other utensils should be placed on it. The turntable support must be fitted in the oven. The glass turntable is used for all cooking methods, collecting dripping juices and food particles to prevent staining and soiling the oven interior. The glass turntable should be placed on the turntable support. Both the turntable support and glass turntable are dishwasher safe.
Cleaning is the only maintenance required and must be performed with the microwave oven disconnected. Failure to maintain a clean oven can lead to deterioration of the surface, affecting the appliance's lifespan and potentially creating a hazardous situation. Metal scouring pads, abrasive cleansers, steel-wool pads, gritty washcloths, and similar items should not be used, as they can damage the control panel and the oven's interior and exterior surfaces. A soft cloth with mild detergent or a paper towel with spray glass cleaner should be used; do not spray directly on the oven.
Regularly, especially after spills, remove the turntable, turntable support, and wipe the oven base clean. The oven is designed to operate with the turntable in place; do not operate it when the turntable has been removed for cleaning. Use a soft, damp cloth with mild detergent to clean the interior surfaces, the front and rear of the door, and the door opening. Prevent grease or food particles from building up around the door. For stubborn stains, boil a cup of water in the oven for 2 or 3 minutes; the steam will soften the marks. Adding lemon juice to the water and boiling it for a few minutes can eliminate odors. Steam cleaning appliances should not be used for cleaning the microwave oven. The oven should be cleaned regularly, and food deposits removed. The ceiling beneath may also require regular cleaning with a soft, damp cloth and mild detergent.
If the oven does not work, do not call for service until the following checks have been made:
The European Directive 2012/19/UE on Waste Electrical and Electronic Equipment (WEEE) mandates that old household electrical appliances must not be disposed of in the normal unsorted municipal waste stream. Old appliances must be collected separately to optimize material recovery and recycling, reducing environmental and health impacts. The crossed-out "wheeled bin" symbol on the product signifies this obligation. Consumers should contact their local authority or retailer for information on correct disposal.
The control panel features various icons and buttons:
Other buttons include:
The oven enters Stand-by mode when the clock is displayed (or ":" if not set). ECO STANDBY is a power-saving function. To enter ECO Standby mode, press "+" and "-" buttons simultaneously. After cooking, the display shows time or ":" for 10 seconds before entering ECO Standby. Pressing "+" and "-" again exits this mode.
This automatic safety function activates one minute after the oven returns to "Stand-by mode." When active, the door must be opened and closed to start cooking; otherwise, the display will show "door."
To pause cooking, open the door to check, add, or turn food. Pressing the STOP button during cooking will also pause the function, maintaining settings for 5 minutes. To continue, close the door and press START. To stop cooking without continuing, remove the food, close the door, and press the STOP button. When cooking finishes, the display shows "End," and an acoustic beep sounds once a minute for 2 minutes. Reducing or stopping the programmed cooling cycle does not negatively impact product function.
Depending on the selected function, the oven may pause and prompt the user to add, stir, or turn food. When prompted, open the door, perform the action, close the door, and press START. If the door is not opened within 2 minutes of the prompt, the oven will continue cooking, though the final result may not be optimal.
To set the clock:
This automatic cleaning cycle helps clean the oven cavity and remove unpleasant odors. Before starting:
This function allows making healthy, natural yogurt.
To cook with microwave power:
Suggested uses for different power levels:
This function is for defrosting meat, poultry, fish, and vegetables.
Suggested uses for different food types:
For best results, defrost directly on the cavity bottom. If food is warmer than -18°C, choose a lower weight; if colder, choose a higher weight. Separate pieces as they begin to defrost.
This function offers automatic recipes for optimal softening/melting.
Recipes include:
This function facilitates bread dough rising.
This function offers automatic recipes for optimal cooking results.
Recipes include:
This function keeps dishes warm automatically.
| Capacity | 20 Liters |
|---|---|
| Power Output | 700 Watts |
| Control Type | Electronic |
| Color | Black |
| Type | Countertop |
| Exterior Dimensions | 442 x 355 x 258 mm |