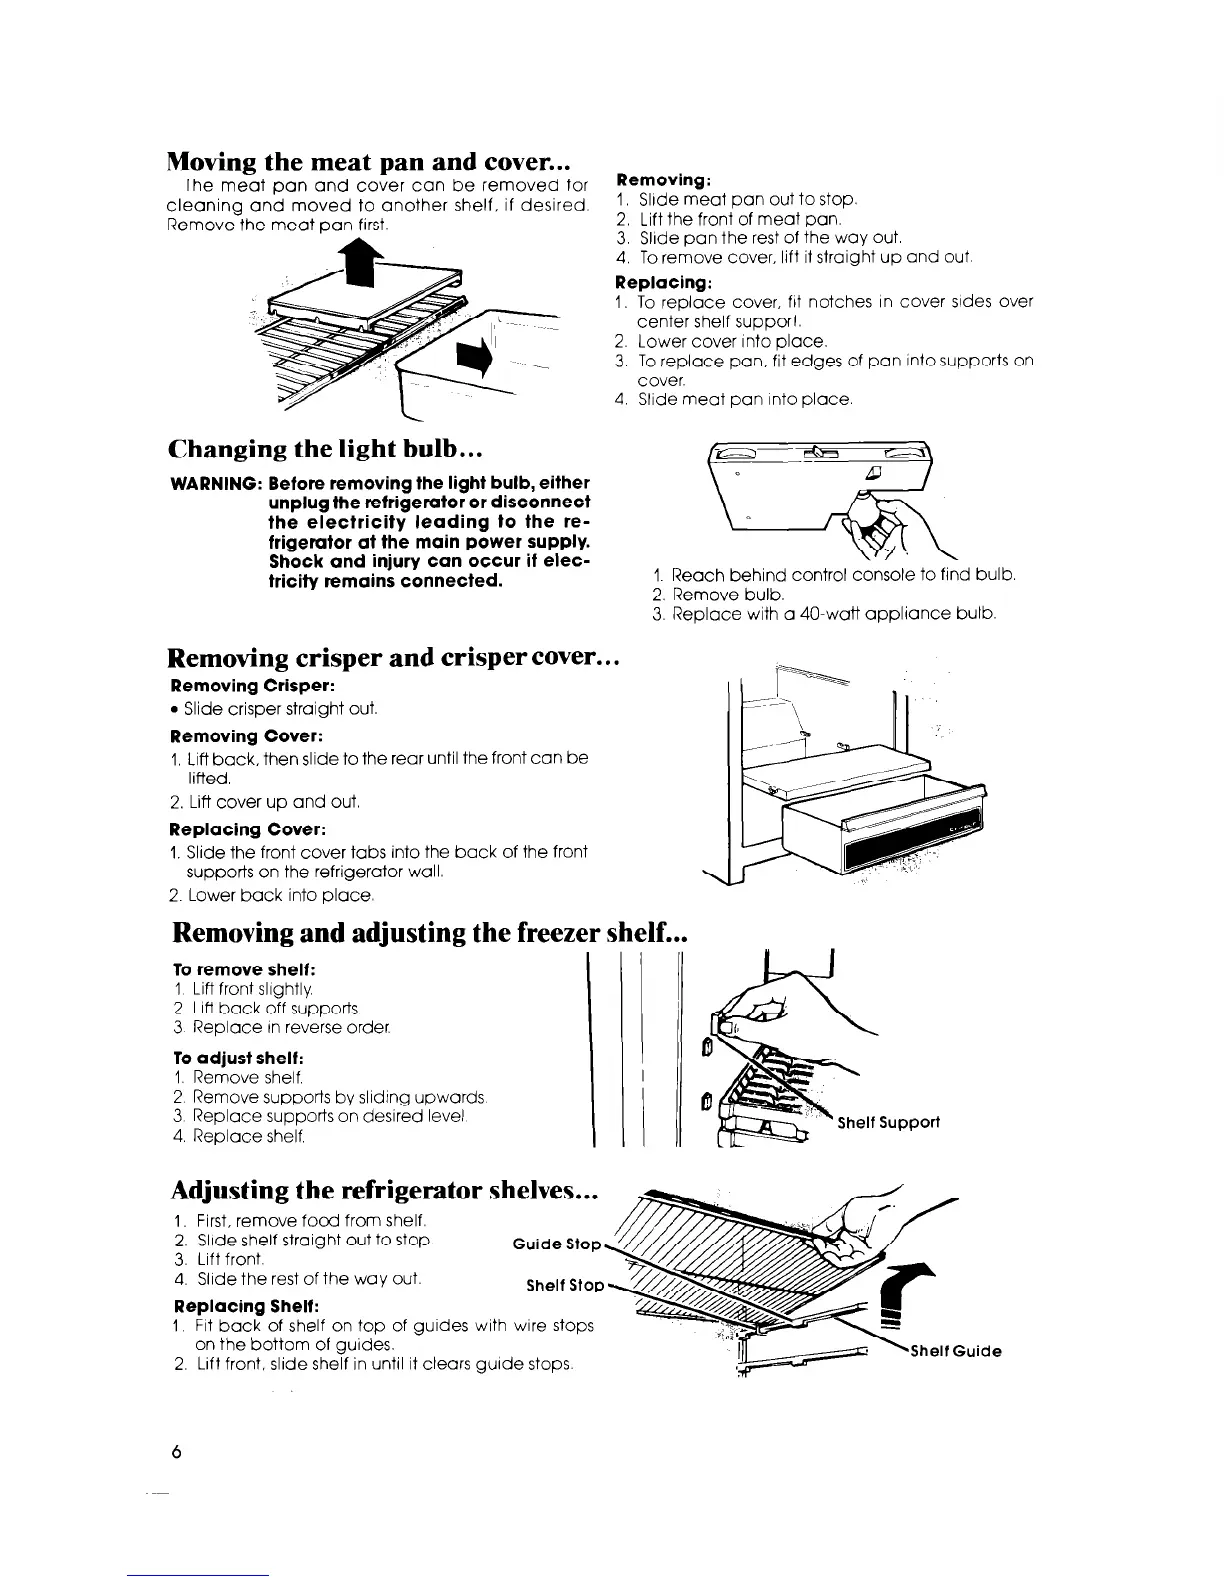
Moving
the meat pan and cover...
The meat pan and cover can be removed for
cleaning and moved to another shelf, if desired.
Remove the meat pan first.
Removing:
I, Slide meat pan out to stop.
2. Lift the front of meat pan.
3. Slide pan the rest of the way out.
4. To remove cover, lift it straight up and out
Replacing:
I, To replace cover, frt notches In cover sides over
center shelf support.
2. Lower cover Into place.
3. To replace pan, fit edges of pan into supports on
cover.
4. Slide meat pan into place.
Changing the light bulb.. .
WARNING: Before removing the light bulb, either
unplug the refrigerator or disconnect
the electricity leading to the re-
frigerator at the main power supply.
Shock and injury can occur if elec-
tricity remains connected.
Removing crisper and crisper
cover.. .
Removing Crisper:
l
Slide crisper straight out.
Removing Cover:
1. Lift back, then slide to the rear until the front con be
lifted.
2. Lift cover up and out.
Replacing Cover:
1. Slide the front cover tabs into the back of the front
supports on the refrigerator wall.
2. Lower back into place.
Removing and adjusting the freezer shelf...
To remove shelf:
1 Lift front slightly.
2. L1f-t back off supports
3 Replace tn reverse order.
To adjust shelf:
1. Remove shelf.
2 Remove supports by slrdrng upwards
3. Replace supports on desired level
4. Replace shelf.
1. Reach behind control console to find bulb.
2. Remove bulb.
3. Replace with a 40.watt appliance bulb.
Adjusting the refrigerator shelves...
I, First, remove food from shelf.
2. Slide shelf straight out to stop.
3. Lift front.
Guide Stop-
4. Slide the rest of the way out.
Replacing Shelf:
Shelf Stop
I. Fit back of shelf on top of guides with wire stops
on the bottom of guides.
2. Lift front, slide shelf in until it clears guide stops.
Shelf Guide
6