3
INSTALL POWER STRIP
The workbench power strip can be installed on either the 6 ft (1.8 m) or the 8 ft (2.4 m) workbench. Before installing the power strip, verify the
size of your workbench (6 ft or 8 ft) (1.8 m or 2.4 m) and follow the corresponding installation instructions.
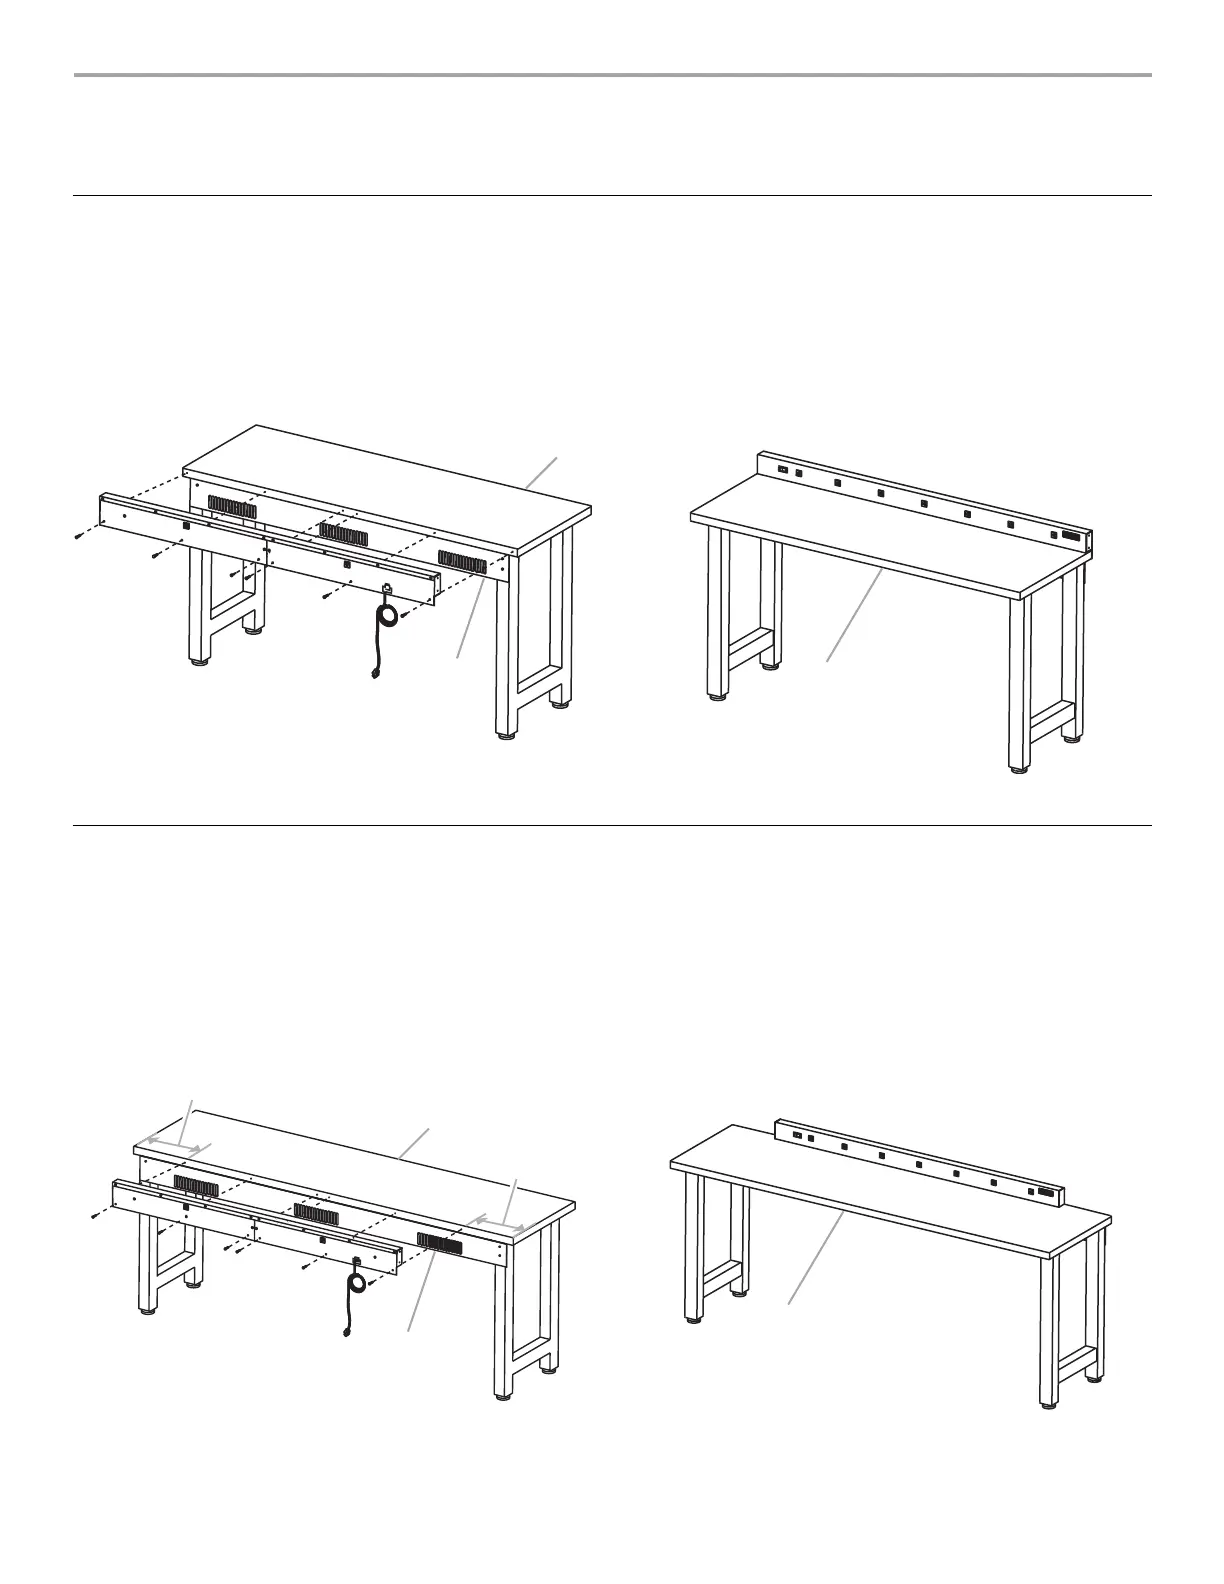
6 ft (1.8 m) Workbench
1. Remove the power strip and tool caddies from the box. Locate
the hardware packed in one of the tool caddies, and verify
contents. See “Parts Supplied.”
2. Place and align the power strip on the back edge of the
workbench.
3. Hold the power strip in place. Using the six holes in the power
strip back panel as a template, mark the workbench.
Before Installation
4. Using a ³⁄₁₆" wood drill bit, drill ³⁄₄" to 1" deep starter holes where
marked.
NOTE: While drilling, hold the drill level.
5. Using the six ¹⁄₄" lag bolts (provided), attach the power strip to
the workbench.
NOTE: Hand tighten each lag bolt. When all six lag bolts are in
place, tighten them completely with a ⁷⁄₁₆" socket wrench. Do not
overtighten.
After Installation
8 ft (2.4 m) Workbench
1. Remove the power strip and tool caddies from the box. Locate
the hardware packed in one of the tool caddies, and verify
contents. See “Parts Supplied.”
2. Measure 12" (30.48 cm) from an edge of the workbench and
mark a line.
3. Use the line as a guide to center the power strip on the back
edge of the workbench.
Before Installation
4. Hold the power strip in place. Using the six holes in the power
strip back panel as a template, mark the workbench.
5. Using a ³⁄₁₆" wood drill bit, drill ³⁄₄" to 1" deep starter holes where
marked.
NOTE: While drilling, hold the drill level.
6. Using the six ¹⁄₄" lag bolts (provided), attach the power strip to
the workbench.
NOTE: Hand tighten each lag bolt. When all six lag bolts are in
place, tighten them completely with a ⁷⁄₁₆" socket wrench. Do not
overtighten.
After Installation
A. Front
B. Back
A
B
A. Front
A
A. Front
B. Back
12"
(30.48 cm)
12"
(30.48 cm)
A
B
A. Front
A