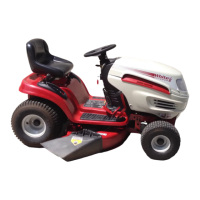
Why does my White Outdoor LT-942 engine run erratic?
O
ovincentAug 3, 2025
If your White Outdoor Lawn Mower's engine runs erratically, try these steps: First, push the CHOKE control in (if equipped) or move the throttle control out of the CHOKE position. Next, connect and tighten the spark plug wire(s). Clean the fuel line and fill the tank with clean, fresh gasoline (less than 30 days old). Replace the fuel filter (if equipped). Clear the vent or replace the cap if damaged. If the problem persists, drain the fuel tank and refill it with clean, fresh gasoline (less than 30 days old). Lastly, replace the air cleaner cartridge/element or clean the pre-cleaner (if equipped).
B
Bruce HarrisAug 8, 2025
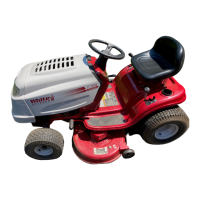
What to do if White Outdoor LT-942 has excessive vibration?
J
jenniferweissAug 8, 2025
To address excessive vibration in your White Outdoor Lawn Mower, start by tightening the blade and spindle. If the vibration continues, balance the blade. If balancing doesn't resolve the issue, replace the blade.
S
Susan RodriguezAug 12, 2025
Why White Outdoor LT-942 engine overheats?
M
mikaylakeithAug 12, 2025
If your White Outdoor Lawn Mower is overheating, ensure the crankcase is filled with the proper capacity and weight of oil. Additionally, clean any grass clippings and debris from around the engine’s cooling fins and blower housing.
J
Jake GrayAug 16, 2025
Why White Outdoor LT-942 Lawn Mower has uneven cut?
J
Jared MartinezAug 16, 2025
If your White Outdoor Lawn Mower is producing an uneven cut, perform a side-to-side deck adjustment. Additionally, sharpen or replace the blade. Check the tire pressure in all four tires.
E
Emily MaysAug 20, 2025
What to do if White Outdoor Lawn Mower engine hesitates at high RPM?
W
William GrossAug 21, 2025
If your White Outdoor Lawn Mower engine hesitates at high RPM, remove the spark plug(s) and reset the gap.
B
Bianca BarrettAug 26, 2025
Why White Outdoor LT-942 idles poorly?
M
Michaela RobertsAug 26, 2025
To address poor idling in your White Outdoor Lawn Mower, replace the spark plug(s) and set the plug(s) gap. Also, replace the air cleaner cartridge/element or clean the pre-cleaner, if so equipped.
Z
Zachary ParsonsAug 29, 2025
How to make White Outdoor LT-942 Lawn Mower mulch grass?
C
carralanAug 29, 2025
If your White Outdoor Lawn Mower is not mulching grass effectively, place the throttle control in the FAST position. Avoid mowing when the grass is wet; wait until it's drier. Mow once at a high cutting height, then mow again at your desired height, or make a narrower cutting swath. Also, sharpen or replace the blade.
Tractors come equipped with a mulch kit which incorporates special blades, already standard on your tractor, in a process of recirculating grass clippings.
If the tractor turns tighter in one direction than the other, or if the ball joints are being replaced due to damage or wear, the steering drag links may need to be adjusted.
Each end of the tractor's front pivot bar may be equipped with a grease fitting. Lubricate with a grease gun after every 25 hours of tractor operation.
A hex plug can be found on your tractor's deck surface. This plug can be replaced with a water port to be used as part of a separately-available deck wash system.
To remove the cutting deck, proceed as follows: Place the PTO (Blade Engage) knob (or lever) in the disengaged (OFF) position and engage the parking brake.