PureEarth Technologies, Inc.
352 Friendship Court Marietta, GA 30064
(800) 669-1376 sales@pure-earth.com
After hours (M-F 9-5 ET) technical support: 678-756-5383
WH-EXL WHOLE HOUSE FILTER – KDF/GAC
ASSEMBLY INSTRUCTIONS
We think installing our filter is very easy (if you are somewhat mechanically inclined and have a little experience
doing basic plumbing).
Note: If you have an electric water heater we recommend that you turn off the electricity to the heater while
installing filter. Once you are satisfied with the installation, turn on a few hot and cold water faucets, and let them
run. Once you are certain that there is no more air in your pipes, then turn the electricity back on to the water
heater.
Your kit should include:
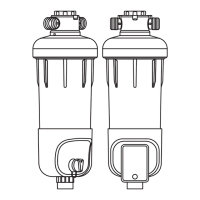
Tall fiberglass mineral tank with distributor tube
Box of granulated activated carbon (coconut shell for the standard unit, catalytic carbon for the WH-EXL–
CC model)
Box of Zeolite media (this is an optional add-on that only comes with the WH-EXL-CC-Z model)
Large funnel for pouring media into tank
KDF Media-Guard cartridge (there may be some loose KDF fines in the package – this is normal due to a
minute amount of media being slightly less than standard mesh size)
Autotrol 263/740 Logix control valve
Autotrol by-pass valve assembly
Tailpieces for valve – either copper or CPVC as specified
Autotrol Manual, Installer Quick-Start Guide, Home-owner Guide
Sediment Post Filter with 1 micron pleated cartridge (installs AFTER the unit to polish water)
Step 1:
Location of your filter is important. It should be in a non-freezing area (34-120 degrees F). It may be installed
outdoors in certain conditions – see the Logix manual for more details.
Step 2:
You will need a standard outlet that is not controlled by a switch, which can be 50 feet from your filter.
Step 3:
You will need a drain for the backwashing cycles. This should be no longer than 20 feet from the filter. You will
need to purchase this flexible 1/2 i.d. / 5/8” o.d. polyethylene plastic pipe (see step 6). This backwashing drain line
will be under pressure when the backwash cycle is working. Make sure the drain line is secured. The drain line will
need to drain into a drain, which should be a minimum of 1 1/2” size, and ideally be below the top of the filter valve.
Local codes should be adhered to. Note: Never connect the drain line directly into a drain. Allow an airgap
between the drainline and waste line to prevent possibility of back- siphonage.
Step 4:
Once you have determined the exact location of your filter, it is time to fill the media/mineral tank with the furnished
media.
The distributor tube is mounted in the center of the tank and the open end should be sticking 1 1/4" out of the
mineral tank.
There should be a plug in the open end of the distributor tube. This is to keep any media from falling into the
distributor tube while pouring the media into the mineral tank.
Place the funnel (provided) into the mineral tank. If your unit comes with Zeolite, pour the contents into the tank.
Scoop the GAC media into the mineral tank. Be careful to keep the distributor tube centered as best you can,
while filling. There should only be enough media to fill the tank about 1/3 to 1/2 full. It is necessary for the media to
have room to move during the backwash cycle.
Once the filling of the mineral tank is completed, carefully remove the plug from the distributor tube.