9
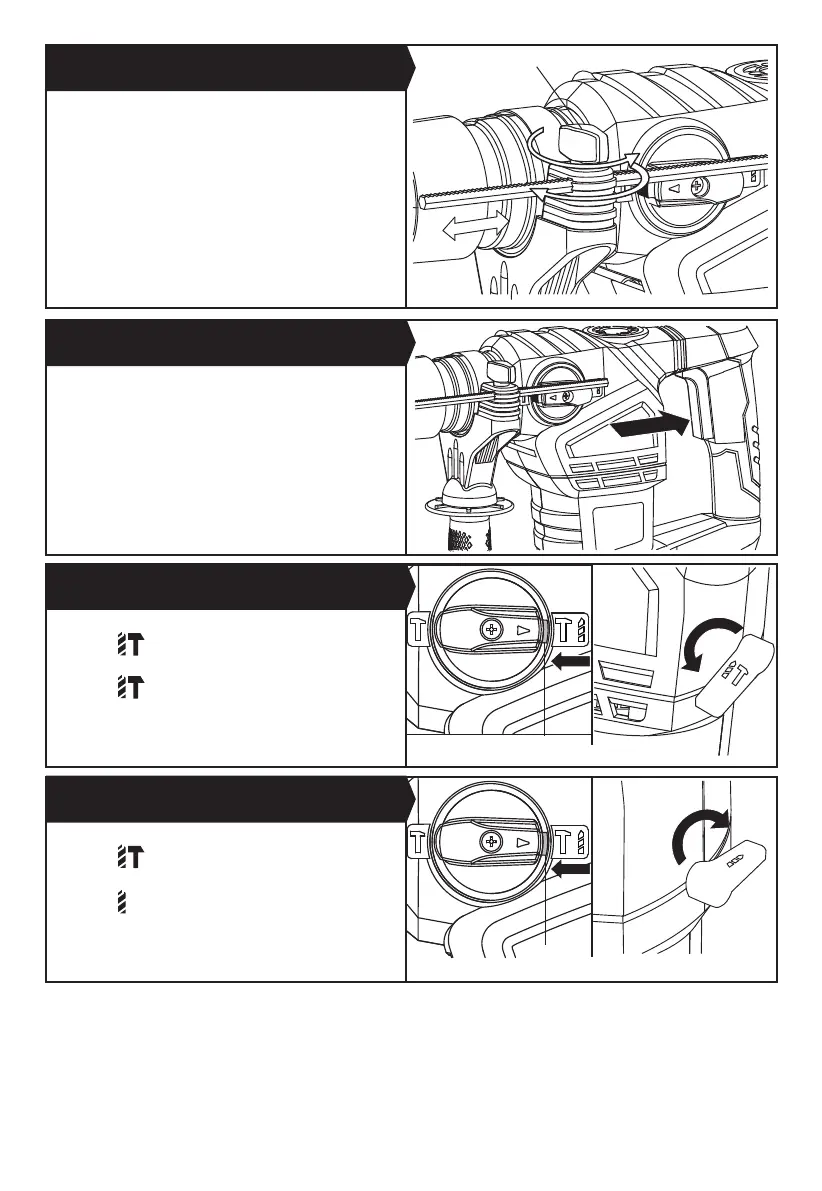
The depth gauge (8) can be used to set a constant depth
to the drill.
Rotate the locking screw on the top of the handle anti-
clockwise to loosen, insert the depth gauge (8) into the
handle.
Adjust it to the desired depth. Rotate the locking screw
clockwise to tighten.
Depress the On/Off switch (5) to start and release it to
stop your tool.
1. Adjust the hammer or chisel action selector (2) to
position “ “ . (See Fig. E1)
2. Adjust the hammer or drilling action selector (13) to
position “ “ .(See Fig. E2)
3. You are now set up for hammer drilling into masonry.
NOTE: Press the selector switch lock button before
adjusting the dial selector everytime.
1. Adjust the hammer or chisel action selector (2) to
position “ “. (See Fig. F1)
2. Adjust the hammer and drilling action selector (13) to
position “ “ . (See Fig. F2)
3. You are now set up for drilling without hammer..
NOTE: Press the selector switch lock button before
adjusting the dial selector everytime.
4. USING THE DEPTH GAUGE (See Fig. C)
5. ON/OFF SWITCH (See Fig. D)
6. HAMMER DRILL FUNCTION (See Fig. E1, E2)
7. DRILLING FUNCTION (See Fig. F1, F2)
Fig. C
Fig. D
Fig. E1
Fig. F1
Fig. E2
Fig. F2
lock button
lock button
locking screw