9
CAUTION: Danger of kickback! Always grip
the machine with both hands. Maintaining good
control will help avoid the risk of serious personal injury.
The workpiece must always be properly supported and
clamped so that both hands will be free to control the
planer.
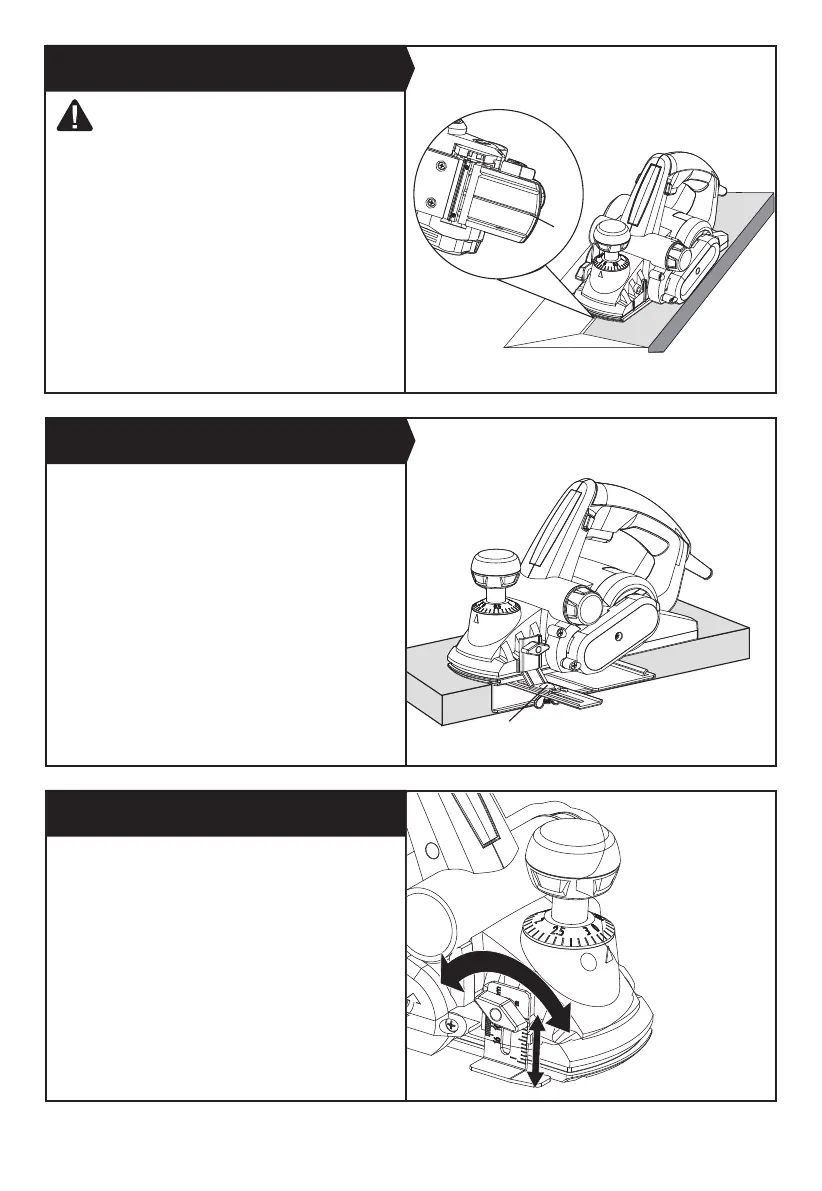
Using the V-groove (A) in the base plate (7) you can make
a chamfer on the work piece edge. Guide the planer
along the edge and maintain a constant angle and force
to produce a good nish. You can control the angle of
the chamfer with your hands. Make a test chamfer on
a scrap piece of wood. Maintain downward pressure to
keep your planer at at the beginning and the end of the
work surface.
Insert the screw provided through the hole on the
support of parallel guide (B). Turn the screw into the nut
on the housing. Fix the parallel guide (6) on the support
of parallel guide with the screw and nut. Ensure the
screws are tightened securely.
NOTE: The parallel guide should be tted on the left
of housing.
To adjust the required width of cut, loosen the nut and
slide the parallel guide (6) to the required position.
Retighten the nut fully.
Use the parallel guide (6) while cutting. The guide should
be held rmly against the edge of the workpiece.
Insert the screw provided through the slot on the rebate
(11). Turn the screw into the nut on the housing. The cut
depth adjustment can be set from 0 to16mm. To adjust
the depth of cut, place the planer on a at board, then
loosen the screw and slide the cut depth adjustment
guide up and down for required depth. Tighten the thumb
screw fully.
4. EDGE CHAMFERING (See Fig. C)
5. USING THE PARALLEL GUIDE (See Fig. D)
6. USING THE REBATE (See Fig. E)
Fig. C
Fig. D
Fig. E
A
B