EasyManua.ls Logo

Wickes Vanity Unit Series User Manual

Wickes Vanity Unit Series
8 pages
To Next Page IconTo Next Page
Page #1 background imageLoading...
Page #1 background image
Vanity Unit Installation Guide
Check all product contents and read instructions before starting installation.
Cleaning
Handle product with care.
When drilling walls check first for hidden pipes and cables.
Use safety eyewear when drilling.
Keep small parts away from children.
If product is above 20kg (see packaging), it requires 2 people to carry and install it.
Use only warm soapy water and damp cloth / sponge on a regular basis.
Do not use abrasive scouring powders. chemicals or aerosol cleaners - these may result in damage to
the surfaces.
Tools Required (Not Included)
Ф8crosshead
Question and Answer IconNeed help?

Do you have a question about the Wickes Vanity Unit Series and is the answer not in the manual?
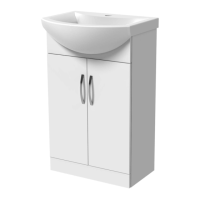
Wickes Vanity Unit Series Specifications

General IconGeneral
TypeVanity Unit
MaterialMDF
ColorWhite
Width600mm
AssemblyRequired
Tap IncludedNo
Mirror IncludedNo
StyleModern/Traditional (depending on the specific unit)

Summary

General Information and Care

Cleaning Instructions

Use warm soapy water and damp cloth/sponge. Avoid abrasive cleaners.

Tools Required

Lists necessary tools not provided with the unit, including screwdriver and drill bits.

Parts Identification

Assembly Steps - Part 1

Step 1: Prepare Base Panel

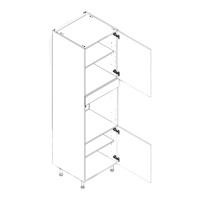
Attach fittings to the first main panel.

Step 2: Prepare Second Panel

Attach fittings to the second main panel.

Assembly Steps - Part 2

Step 3: Assemble Drawer/Cabinet Sides

Connect side panels using dowels and cam locks.

Step 4: Attach Drawer/Cabinet Front

Fix the front panel to the assembled sides.

Assembly Steps - Part 3

Step 5: Attach Base Support

Connect the bottom support pieces.

Step 6: Attach Side Supports

Secure side support elements.

Assembly Steps - Part 4

Step 7: Prepare Shelves

Prepare shelves for installation, remove protective film.

Step 8: Install Hinges

Attach hinges to shelves, differentiating soft/non-soft close.

Assembly Steps - Part 5

Step 9: Mount Doors

Attach doors to the unit using hinges and adjust.

Step 10: Install Shelf/Drawer

Insert the main internal shelf or drawer unit.

Wall Mounting and Finalization

Step 11: Wall Mounting Preparation

Prepare for wall mounting, checking for utilities.

Step 12: Final Installation

Mount the vanity unit to the wall.

Related product manuals