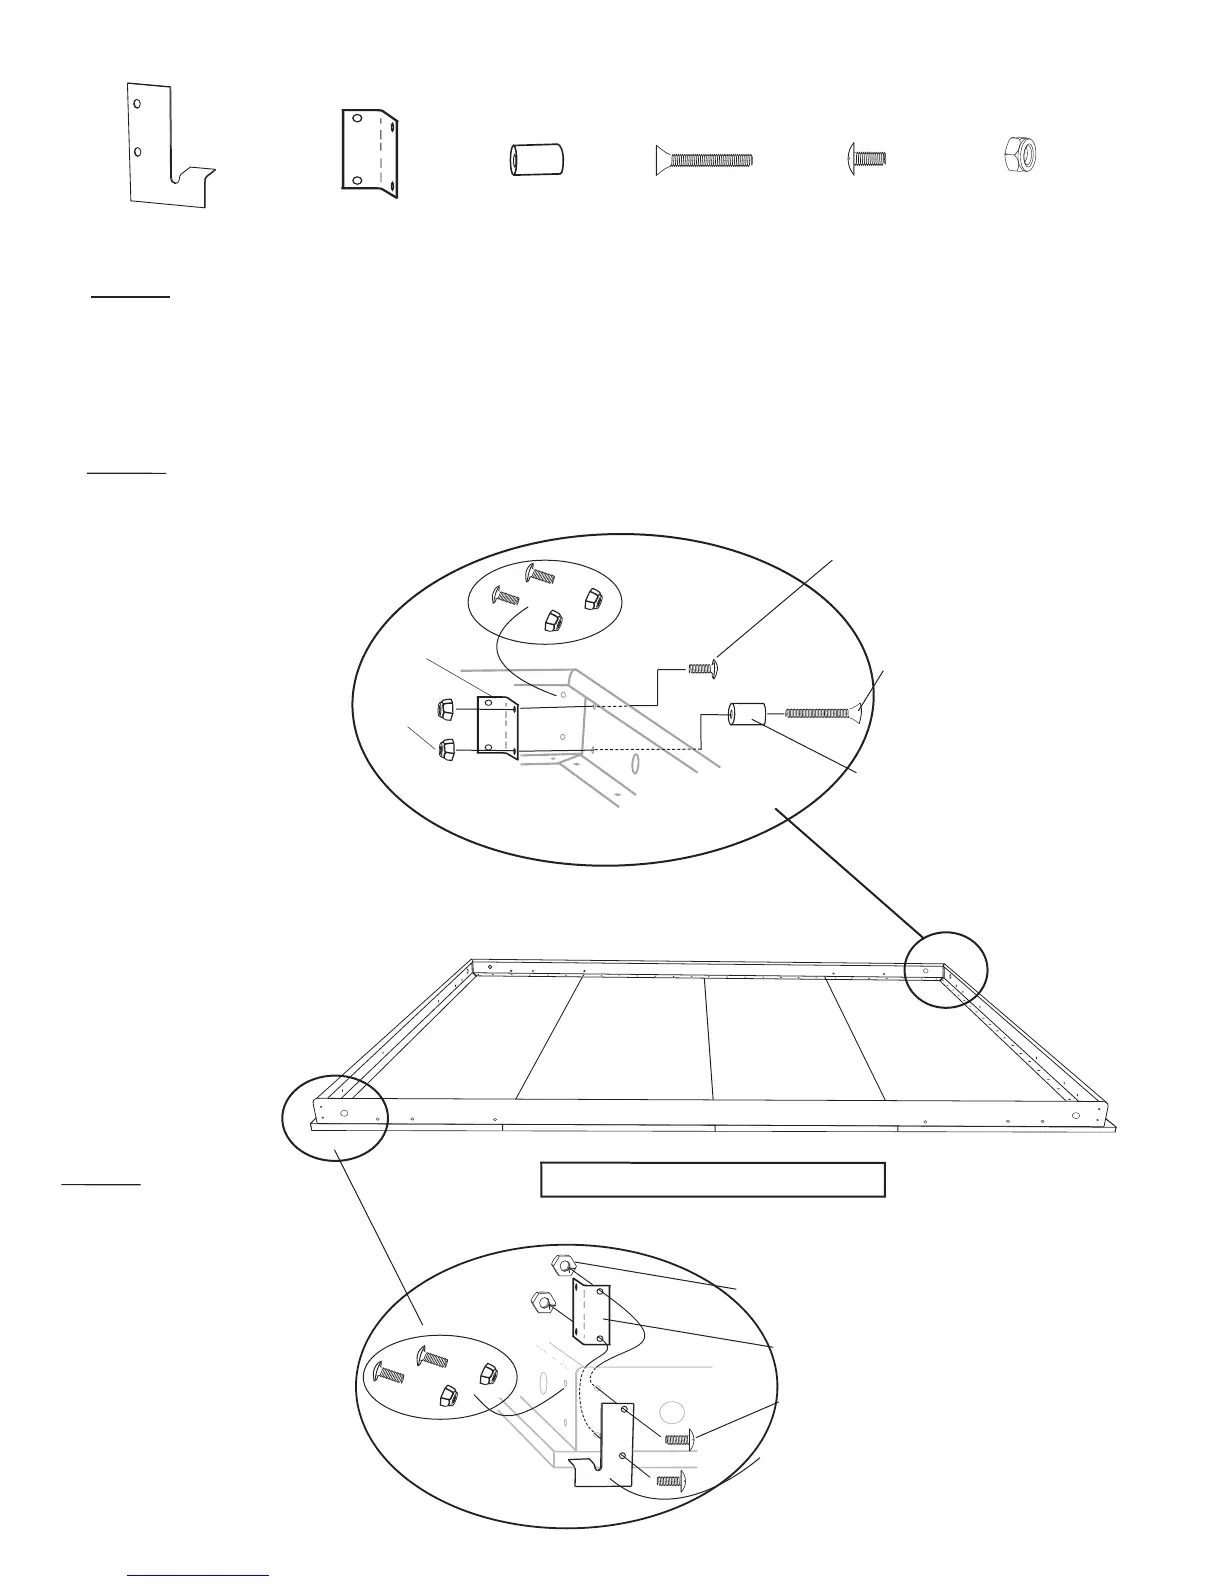
Step 16: From hardware bag 8 locate the hardware shown above. Finger
tighten the hardware as shown in illustration 7 attaching two of the 4 hole
corner brackets on the Head/Foot rail end of the mattress frame. Note the
lower hole on each side rail uses the Leg Stop with the longer screw (3/16” x
1 1/4”). Repeat on the opposite foot rail corner.
3/16” x 1 1/4”
3/16” x 1/2”Leg Stop
3/16” Nylock hex nut
4 hole corner bracket
Spacer Plate
Hardware needed for next 2 steps from Bag #8
x 2
1 Left
1 Right
x 4 x 2 x 2 x 14 x 16
4 hole corner bracket
3/16” Nylock hex nut
Leg stop (black barrel spacer)
3/16” x 1/2” truss head screw (black)
3/16” x 1 1/4” flat head screw (black)
3/16” x 1/2” truss head screw
3/16” Nylock hex nut
4 hole corner bracket
Spacer Plate
(Black)
(Black)
(Black)
Illustration 7
Illustration 8
Page 11
Step 18: Finger tighten
the hardware as shown
in illustration 8 attaching
the 4 hole corner brackets
on the inside of the rails
and the Spacer Plate is
attached on the outside.
Repeat opposite Lower
Rail corner.
Step 17: Once all sides
are finger tight go back to
each corner and align the
corners as they are tight-
ened using either a 3/8”
socket or wrench and a
Phillips screw driver.
Your bed Cabinet installed on this side
Lower Rail
 Loading...