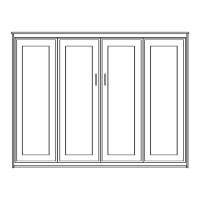
Lower Rail
Bolt hole 1
Bolt hole 3
Bolt hole 2
Step 23: As illustrated below, insert the Allen Key Bolt through bolt hole # 1 and tighten it down securely using a Nylock Nut.
Now insert a 5/16” x 3/4” Hex head bolt through hole # 3 and thread the Nylock nut ONLY UNTIL IT IS FLUSH WITH THE
BOLT END. Bolt hole #2 will be used in a later step.
Hardware needed for next step from hardware bag #7
5/16” Nylock Nut
X 4
X 2
X 2
5/16” x 3/4”
Allen Key Bolt
Page 13
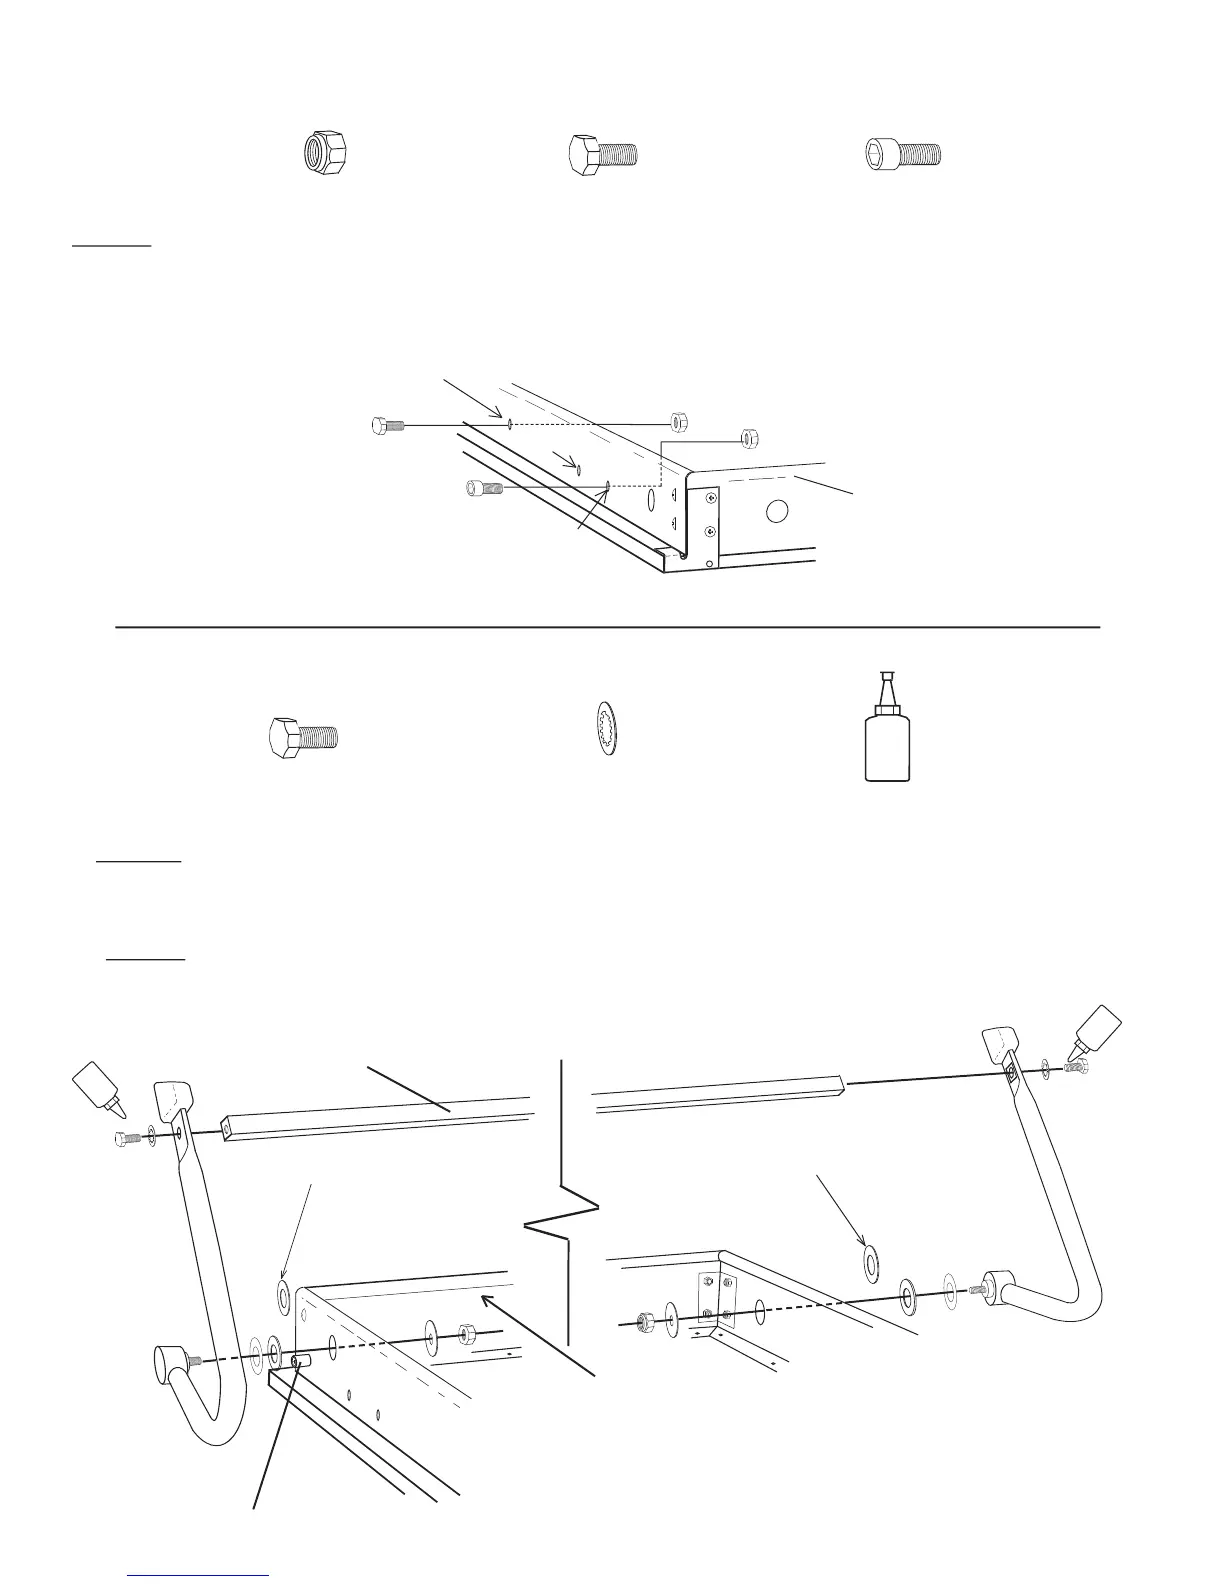
Step 24: Assemble Legs by first removing the nut and the first TWO washers that come pre-installed on the Leg. Leave the
washer with a black edge and the thin plastic washer in place on the leg. Insert the Leg Bolt with the first two washers through the
Head/Foot Rails. DISCARD the thick silver washer then place the black washer and the nut back on the Leg Bolt and tighten.
Step 25: Position the Cross Bar between the Legs. Place 1/2” Star washer on one of the 5/16 X 3/4” Hex Head bolts apply 2
drops of Loc-tite and thread the bolt through the Leg and into the Cross Bar and tighten. Repeat on other side.
Hardware needed for next step from hardware bag #8
X 2
5/16” x 3/4”
X 2
1/2” Star Washer
LOCTITE
Loc-tite
X 1
Discard silver washer
Discard silver washer
Cross Bar
Foot Rail
Leg Stop
LOCTITE
LOCTITE
 Loading...