x 2
7/8” Washer
Hexagon Cam Washer
x 2
5/16” x 1 1/4” Flathead
Slot Machine Screw
x 8
5/16” Plain Hex Nut
x 8
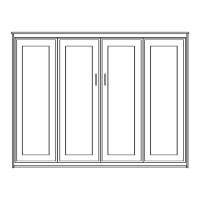
Hardware needed for next 2 steps from Bag #7
Step 3: Install the Lift Mechanism by inserting a 5/16”
x 1 1/4” Flathead Machine Screw through holes “C”
and “D” from the outside (countersunk holes) of the
Right Side Board. Position the corresponding Right Lift
Mechanism holes. Loosely thread on a 5/16” Plain Hex
Nut on each. Insert the same type screw through holes
“A” and “B”. At hole “A” use one of the Hexagon
Cam Washers in the slot of the mounting plate so that
the LARGER PART OF THE CAM IS UP. At hole
“B” use a 5/16” x 7/8” washer. Thread a nut on each.
Tighten the four nuts evenly, making sure the hexagon
cam washer does not rotate while tightening.
See illustration 2.
Repeat step 3 with the Left Side Board and Lifting
Mechanism.
IMPORTANT! Over tightening the nuts will pull
the head of the screw too deeply into the Side Board.
Tighten only until the head of the screw is flush with
the Side Board.
Page 2
Hole A
Hole B
Hole C
Hole D
Finished Edge
Base Board
Notch
Right
Side Board
Illustration 2
All holes are countersunk
in this side of sideboard
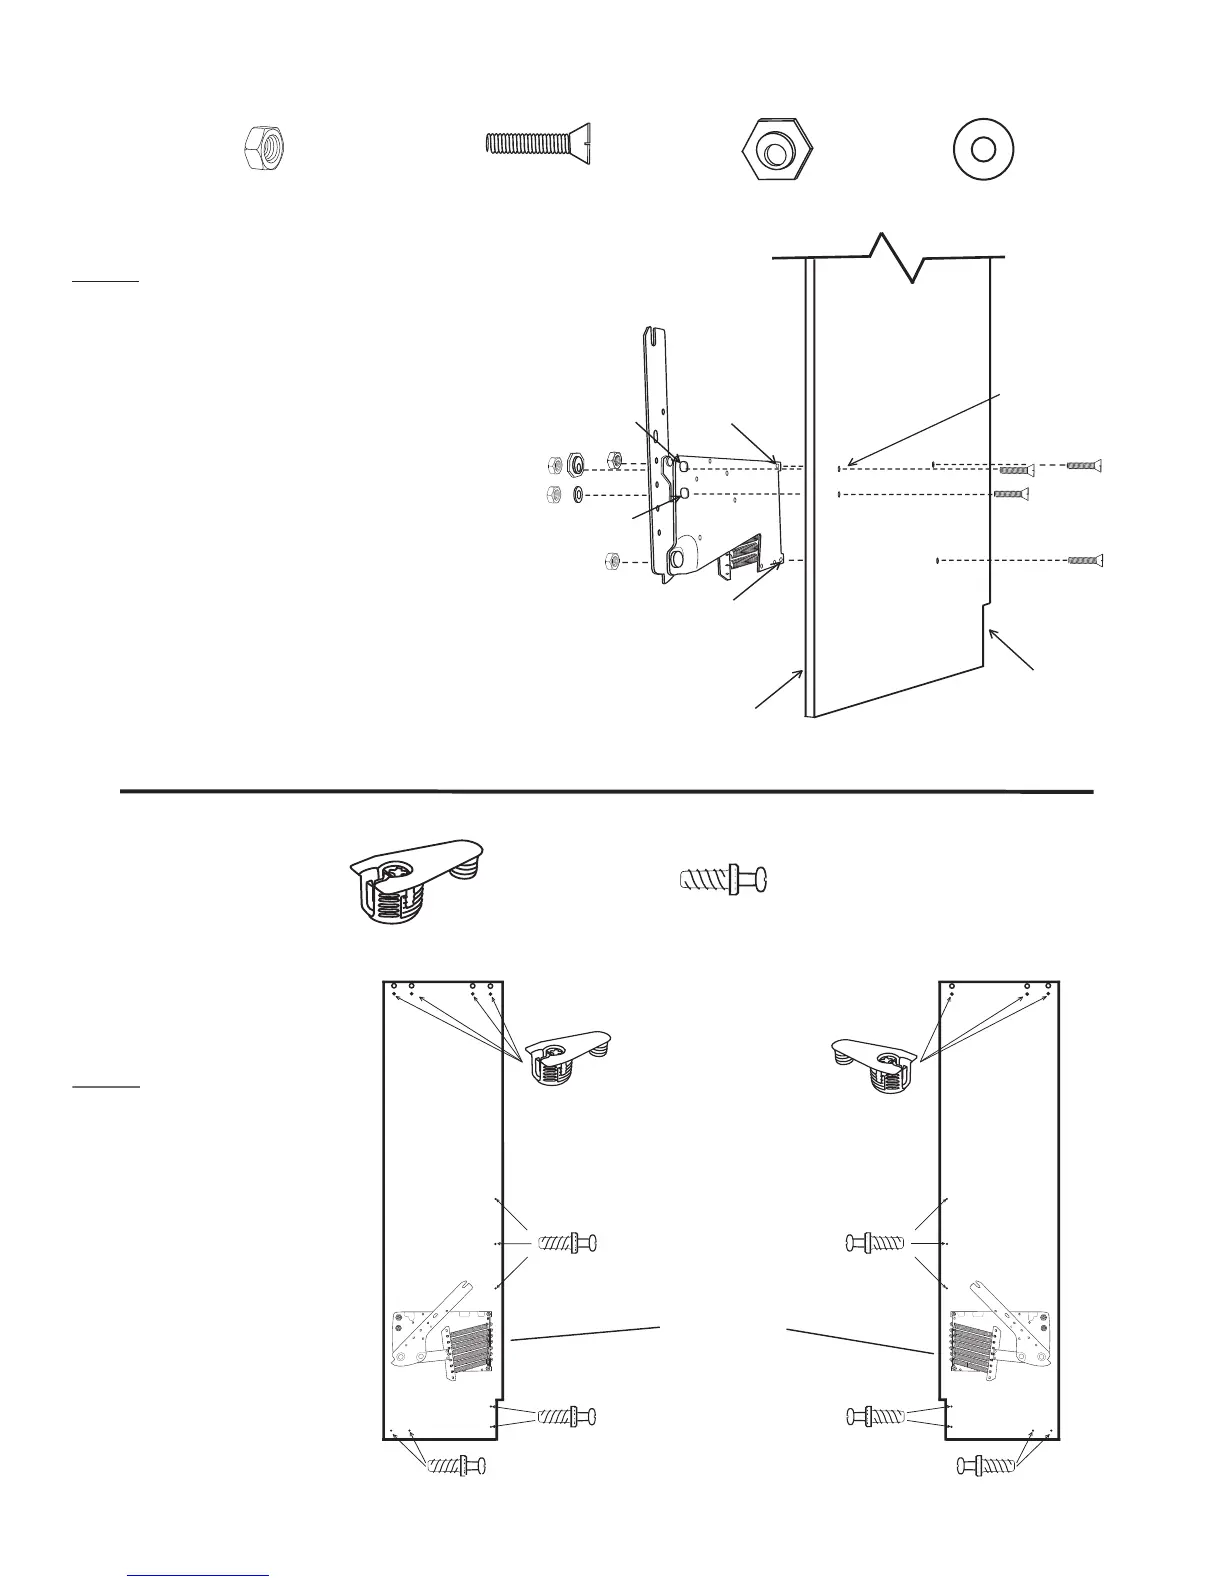
Step 4:
Lay the right and left
Side Boards down as illustrated
and screw Connecting Bolts
into the holes provided and
place Cam Fittings into sockets
provided as shown.
Right Side
Board
Left Side
Board
Un-finished
Edges
Hardware needed for next step
White Cam Fitting
Connecting Bolt
x 7
x 14
 Loading...