EasyManua.ls Logo

Wiley x WX VAPOR User Manual

Wiley x WX VAPOR
2 pages
To Next Page IconTo Next Page
Page #1 background imageLoading...
Page #1 background image
ERX-ICVPR (3)
MAINTENANCE:
Wiley X lenses are specially coated to offer superior abrasion
resistance. Please follow below instructions to prolong the life of your lenses
and keep them performing at their best:
WARNING:
Wiley X brand eyewear is tested tough. However, impact resistant
eyewear is not unbreakable and does not provide unlimited eye protection under all
circumstances and conditions. Misused, abused, scratched and/or damaged
eyewear can reduce impact protection (and void your limited warranty). Dirty
and/or wet eyewear can impair vision and reduce safety (resulting in personal injury
and/or property damage). Keep your Wiley X eyewear clean with water only. Do not
use solvents or abrasives as it could scratch or damage the product reducing its
effectiveness. Store your Wiley X eyewear in the protective case provided to
prolong the life of the lenses. Most of all, take all appropriate precautions when
wearing your Wiley X eyewear during hazardous and/or dangerous activities and
conditions. Wiley X, Inc. is not responsible for personal injury, property damage or
losses incurred while using Wiley X brand products.
LENS REMOVAL - STEP 2
Detach the outer lens hooks from the frame.
5)
LENS REMOVAL
- STEP 1
A
A
The nose piece
and primary lens
are interlocking.
1)
To detach pull a leg
of the nose piece.
Once the leg is
disengaged the
nose piece will
simply rotate out.
2)
NOSE PIECE REMOVAL*
*Should you require corrective lenses, remove the Rx insert
prior to removing the nosepiece. See Rx insert instruction.
Work the leash cord sleeves over the temple tip until secure.
OPTIONAL LEASH CORD
Clean lenses with water only.
Do not use solvents or special cleaners.
Use micro-fiber cleaning cloth provided to gently wipe clean.
Never use paper products to clean and avoid wiping lens surface when dry
and/or dirty as this may potentially scratch the lens.
Remove nose piece (see nose piece removal).
With one hand firmly grasp the frame directly above
the nose piece. Do not pull from the edges (Ref A).
With the opposite hand grasp the lens.
Firmly pull on the lens to detach the lens from the center of the frame.
Note: Pulling lenses from the corners of the frames (See “A”) may damage
the frame or the lenses.
2)
1)
3)
4)
WX VAPOR
INSTRUCTIONS
COPYRIGHT © 2017 WILEY X, INC. ALL RIGHTS RESERVED.
WILEY X, WX, BLACK OPS, logos, tag lines and product names are trademarks or registered trademarks (marcas
registradas) of Wiley X, Inc. in the U.S. and other countries. Logos © 2007-2017 Wiley X, Inc. All rights reserved.
7800 PATTERSON PASS ROAD, LIVERMORE CA 94550 USA
SØNDERGADE 8-10 7570 VEMB DENMARK
WX EMEA LLC: +45 96 93 00 45 WILEYX.EU
WILEY X INC:
1.800.776.7842 925.243.9810 WILEYX.COM
Question and Answer IconNeed help?

Do you have a question about the Wiley x WX VAPOR and is the answer not in the manual?

Wiley x WX VAPOR Specifications

General IconGeneral
BrandWiley x
ModelWX VAPOR
Category3D Glasses
LanguageEnglish

Summary

Lens Removal Guide

Step 1: Initial Lens Detachment

Instructions for removing the nose piece and grasping the frame to begin lens removal.

Step 2: Final Lens Separation

Details on pulling the lens and detaching outer lens hooks from the frame.

Optional Leash Cord Installation

Securing the Leash Cord

Guidance on working leash cord sleeves over the temple tip until secure.

Nose Piece Removal Procedure

Detaching the Nose Piece

Steps to detach the nose piece and primary lens when they are interlocking.

Eyewear Maintenance

Lens Cleaning and Care

Instructions for cleaning lenses with water only and using a microfiber cloth.

Important Safety Warning

Eyewear Limitations and Misuse

Information on impact resistance, warranty voiding, and proper eyewear usage.

Lens Installation Guide

Step 1: Attaching Lens Corners

Instructions for attaching the outer corners of the lens into the frame.

Step 2: Aligning and Securing Lens

How to align the center lens slot and squeeze lens and frame together.

Nose Piece Installation Procedure

Step 1: Aligning Nose Piece Grooves

Guidance on aligning the grooves of the nose piece into the lens.

Step 2: Securing the Nose Piece

How to position and squeeze the nose piece until it seats completely.

Corrective Lens Insert Instructions

Installing the Corrective Lens Insert

Steps for installing the corrective lens insert into the eyewear.

Removing the Corrective Lens Insert

Steps for safely removing the corrective lens insert from the eyewear.
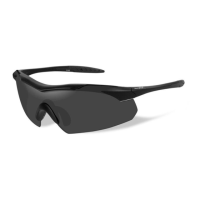
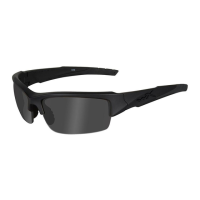
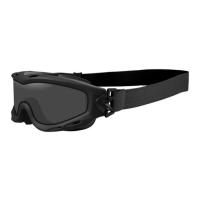
Related product manuals