English
Installation and operating instructions Wilo domestic water systems HiMulti3..H.. /HMHI/HWJ 19
Installation and operating instructions
Captions:
Fig. 1
and 2
Set-up
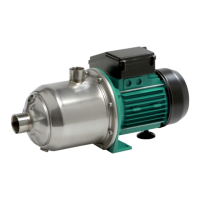
1 Pump
2 Filling/venting screw plug
3 Drain screw plug
4 Diaphragm pressure vessel
5 Pressure gauge
6 Mains cable with plug (EM only)
7 Pressure switch
8 Flexible pressure hose
9 Gas filling valve
L2/P1 Spacings between fastening holes
Fig. 3a Inlet mode (tank)
6 Mains cable with plug (EM only)
10 Spring-mounted foot valve
11 Shut-off device on inlet/suction side
12 Shut-off device on the pressure side
14 Pipe attachment
16 Float switch (low water)
HC Positive suction head
HR Consumer height
Fig. 3b Inlet mode (supply network)
6 Mains cable with plug (EM only)
11 Shut-off device on inlet/suction side
12 Shut-off device on the pressure side
13 Non-return valve
14 Pipe attachment
15 Volume meter
HR Consumer height
Fig. 3c Suction mode
6 Mains cable with plug (EM only)
10 Foot valve
11 Shut-off device on inlet/suction side
12 Shut-off device on the pressure side
14 Pipe attachment
16 Float switch (low water)
HA Suction head
HR Consumer height
Fig. 4 Set-up/installation
Fig. 5a
and 5b
Lifting/Transport
Fig. 6a
and 6b
Pressure switch EM (PM)
a Adjusting screw for switch-off pressure
b Adjusting screw for pressure difference
(switch-on pressure)
c Motor cables/connections
d Network supply line/connections
e Earthing connections (PE)
h Motor connection diagram WJ (EM)
i Motor connection diagram MHI (EM)
Cable
colours
BN Brown
BU Blue
BK Black
GNYE Green-Yellow
Fig. 6c Pressure switch EM (PM) – HiMulti3 pump
a Adjusting screw for switch-off pressure
b Adjusting screw for pressure difference
(switch-on pressure)
c Motor cables/connections
d Network supply line/connections
e Earthing connections (PE)
h Motor terminal box (HiMulti3)
i Quick-Connector connection (HiMulti3)
Cable
colours
BN Brown
BU Blue
BK Black
GNYE Green-Yellow
Fig. 6d Connect cable for Quick-Connector HiMulti3
Fig. 7a
and 7b
Pressure switch DM (type PT)
a Adjusting screw for switch-off pressure
b Adjusting screw for pressure difference
(switch-on pressure)
c Motor supply lines/connections
d Network supply line/connections “LINE”
(to be provided by the customer)
e Earthing connections (PE)
j Motor connection diagram DM (3~400 V)
k Motor connection diagram DM (3~230 V)
Cable
colours
BN Brown
BU Blue
BK Black
GNYE Green-Yellow
Fig. 8a
and 8b
Pressure switch diagrams
Fig. 8a Pressure switch PM5/PT5
Fig. 8b Pressure switch PM12/PT12
po
[bar]
Switch-off pressure
pi [bar] Start-up pressure
Fig. 9a
to 9c
Checking gas supply pressure for diaphragm
pressure vessel
Fig. 9a Depressurise system
Fig. 9b Remove valve flap
Fig. 9c Measure gas supply pressure
 Loading...