9
Operation
This section defines the controls and other features
with which the operator should be familiar. Refer to
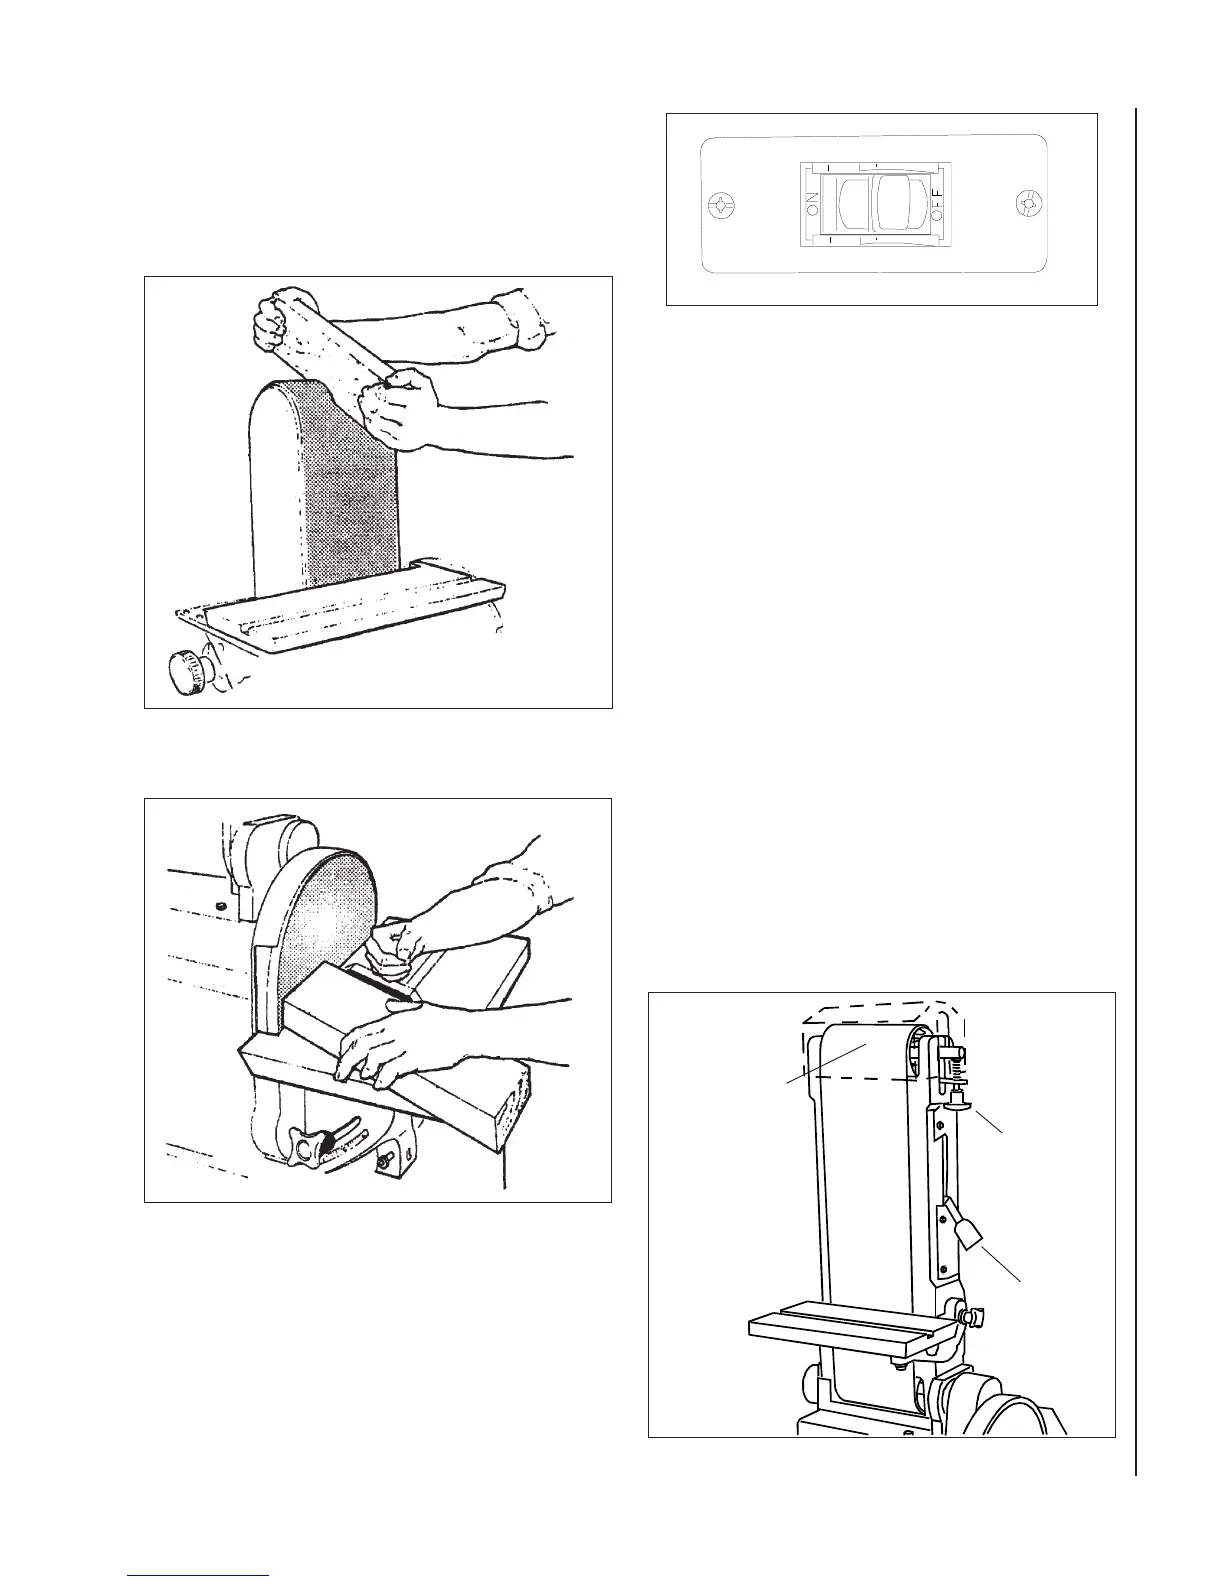
Figures 3 and 4 for some typical sander operations.
Figure 3. Contouring with Belt Sander
Figure 4. Sanding using Disc Sander
Controls
The ON/OFF switch is located on the side of the
machine base (refer to Figure 5).
Miter Gauge
A miter gauge is provided with the machine and can
be used on either the belt sander of disc sander work
tables. The angle of the miter gauge can be adjusted
up to 45 degrees to accommodate angular work
piece surfaces.
Figure 5. ON/OFF Switch
Adjustments
Adjusting Belt Tracking
The tracking of the sanding belt may require adjust-
ment after changing the belt. The belt housing has a
tracking adjustment mechanism (Figure 6) that is
used to adjust tracking.
1. Start the machine.
2. Check tracking of the sanding belt. The belt
should track at the center of the drums.
3. Adjust belt tracking by turning the adjustment
knob. Turn the knob as needed to correct the
tracking of the belt.
Figure 6. Adjusting Belt Tracking
Belt Tracking
Adjustment Knob
Belt should track
at center of drums;
no side-to-side
movement.
Belt Tensioning
Lever
 Loading...